To get started, pick the right drill bits for your material—HSS or cobalt for metals, spade or brad-point for wood—and match your bit to screw heads. Use slow speeds for delicate surfaces and higher RPMs for tough materials, adjusting as needed. Apply steady, gentle pressure to avoid stripping screws, and drill pilot holes in wood to prevent splitting. Mastering these tips will help you work confidently—continue exploring to unbolt even more expert advice.
Key Takeaways
- Select the correct drill bits for your material (HSS, cobalt, carbide) to ensure durability and prevent damage.
- Adjust drill speed according to material; use lower RPMs for softer materials and higher speeds for harder surfaces.
- Match the screw head type with the appropriate bit size to avoid stripping or damaging the screw.
- Apply steady, gentle pressure and keep the drill perpendicular to the surface for clean, accurate holes.
- Use pilot holes in wood and keep bits sharp to prevent stripping and ensure secure, professional results.

DEWALT Drill Bit Set, 21 Pc. Titanium Nitride Coated Pilot Point DEWALT Bit Set with Case for Wood, Metal and Plastic (DW1361)
Titanium Nitride Coating Pilot Point for Longer Life
As an affiliate, we earn on qualifying purchases.
As an affiliate, we earn on qualifying purchases.
What Are the Different Types of Drill Bits and When to Use Them?
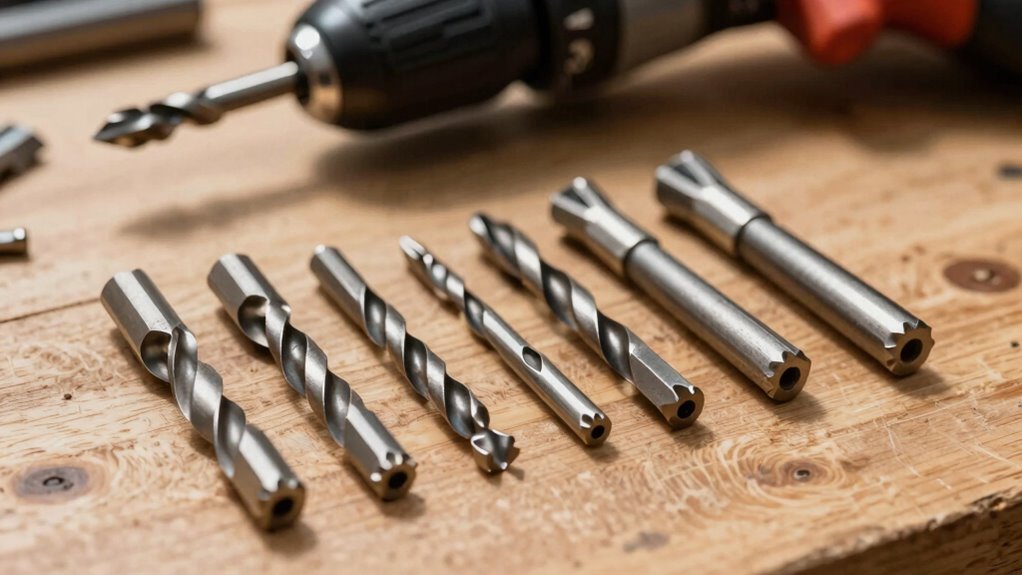
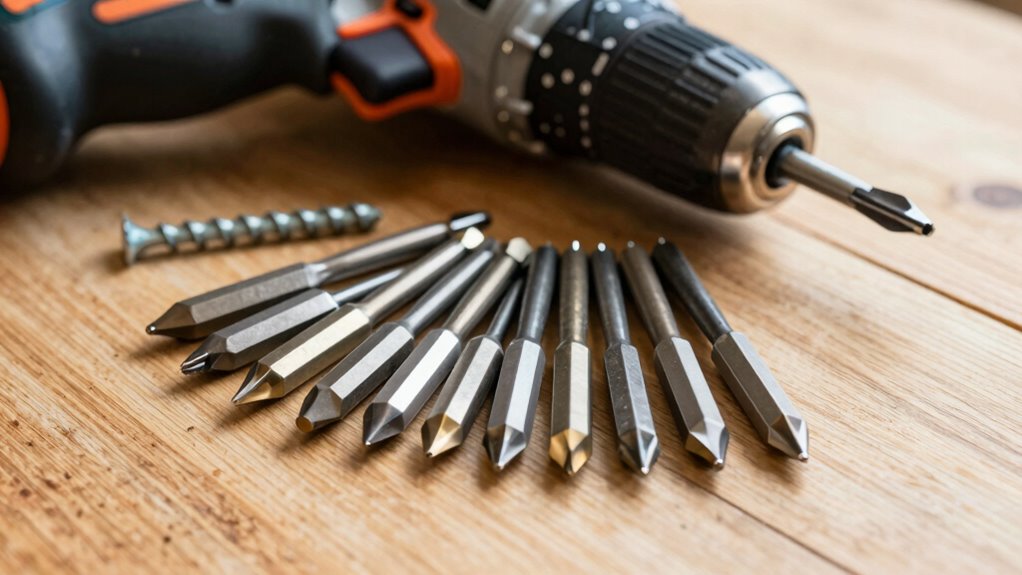
There are several types of drill bits designed for specific materials and tasks. The choice depends on drill bit materials, like high-speed steel (HSS), cobalt, carbide, or masonry bits, which determine durability and suitability for different surfaces. Drill bit shapes also vary, such as twist bits for general drilling, spade bits for wood, and masonry bits for concrete. For metal, you’ll want HSS or cobalt bits, which withstand heat and wear. For wood, spade or brad-point bits give clean holes. Masonry bits with a carbide tip are best for brick or stone. Understanding drill bit materials and shapes helps you select the right bit for each job, ensuring efficiency and preventing damage to your tools or material. Additionally, knowing the types of drill bits can help you adapt to various projects and materials more effectively.

Hammerhead 7.5-Amp 1/2 Inch Variable Speed Hammer Drill with 6pcs Bit – HAHD075
Powerful 7. 5-Amp Motor – Corded hammer drill tackle the most demanding projects
As an affiliate, we earn on qualifying purchases.
As an affiliate, we earn on qualifying purchases.
How Do You Choose the Right Drill Speed for Different Materials?
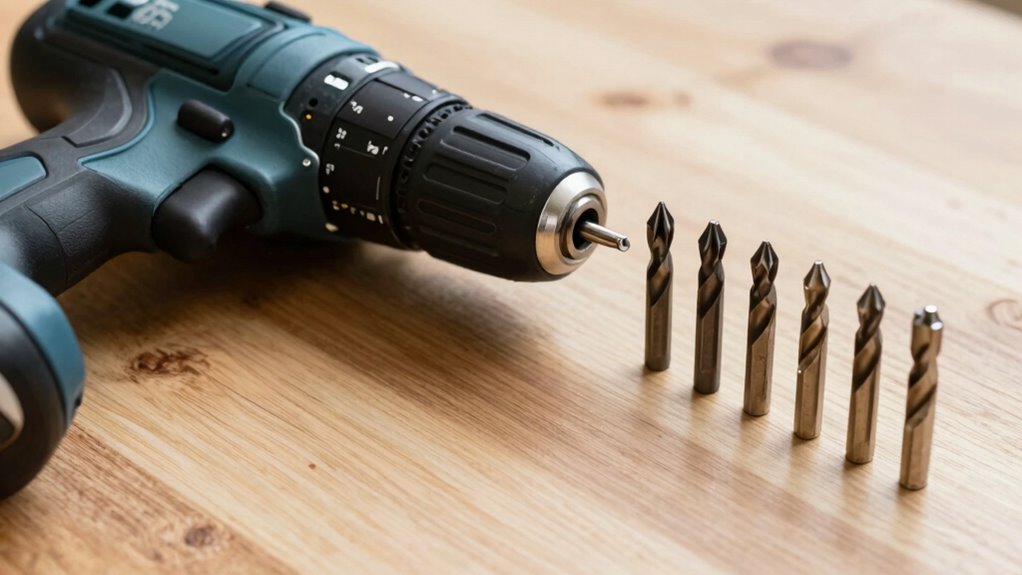
Choosing the right drill speed is essential for achieving clean, precise results and avoiding damage to your material. Different materials require specific speeds; for example, softer woods need a slower speed, while harder metals benefit from higher RPMs. Proper drill ergonomics help you control the tool and reduce fatigue, making it easier to adjust speeds accurately. Always wear safety equipment, like goggles and gloves, to protect yourself from debris or accidents. Many drills have adjustable speed settings—use the lower speeds for delicate tasks and increase when drilling through tougher surfaces. Adjusting your drill speed based on the material ensures cleaner holes, reduces the risk of stripping screws, and extends your tool’s lifespan. Being aware of piercing healing times can help you plan your projects to avoid complications during the process. Additionally, understanding home theatre projector features can guide you in selecting the right equipment for your space and needs. Proper speed selection is key to safe, efficient drilling, and taking the time to learn about the essential oils for various health concerns can enhance your overall well-being and recovery. For optimal results, considering the dog breeds overview can help you select the best tools and techniques suitable for different materials and tasks. Incorporating landscaping techniques can also improve your workspace and make your project more enjoyable.

DEWALT Drill Bit Set, 3-Flats Shank,14-Piece, 135 Degree Split Point, for Plastic, Wood and Metal (DWA1184)
135 Degree Split point tip design to help reduce walking
As an affiliate, we earn on qualifying purchases.
As an affiliate, we earn on qualifying purchases.
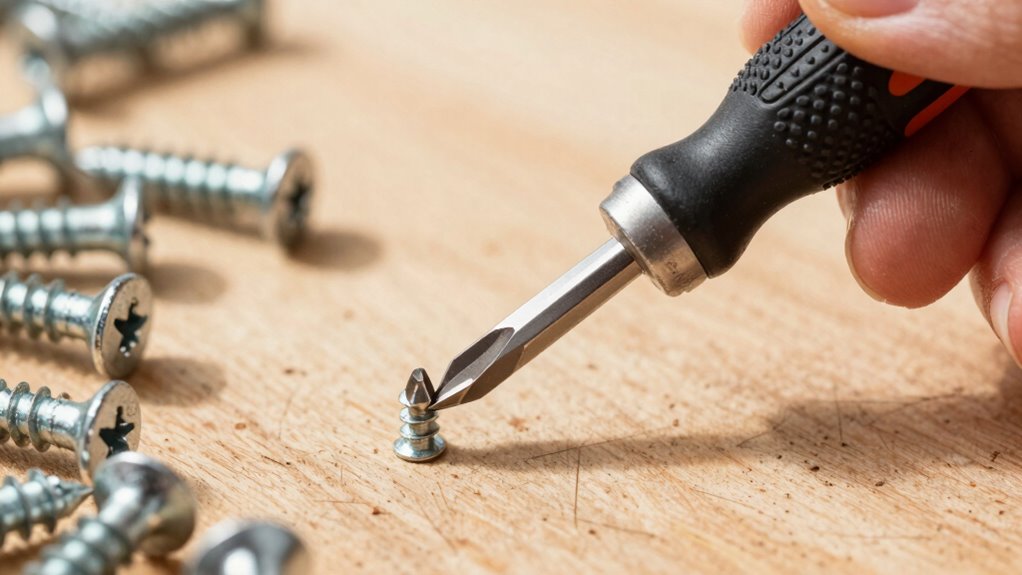
How to Start Drilling Correctly to Avoid Stripped Screws?
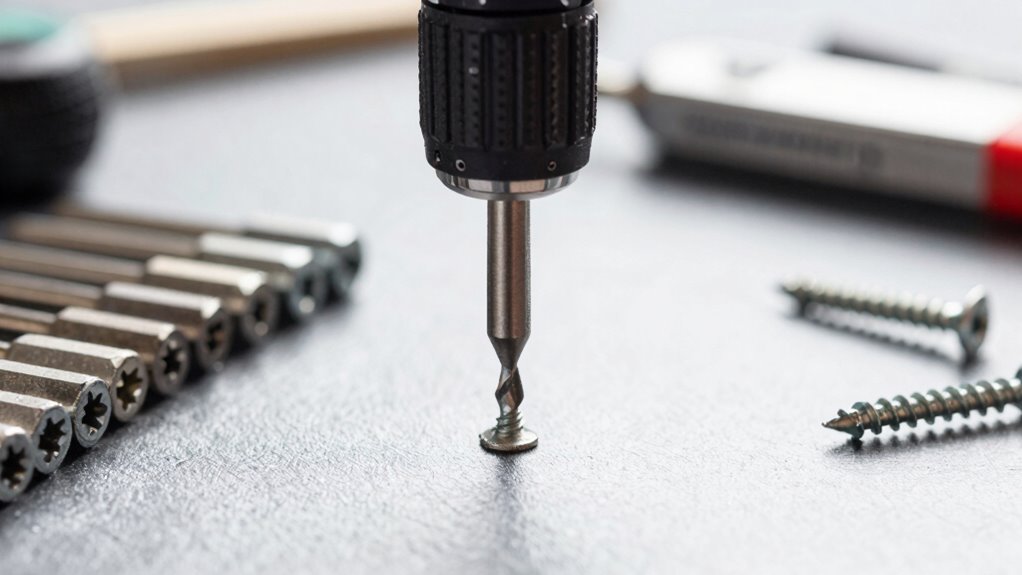
Starting your drilling process correctly sets the stage for avoiding stripped screws and guaranteeing a smooth operation. Before you begin, prioritize drill safety by wearing safety glasses and securing your workpiece. Choose the right bit size to match the screw head, and ensure your drill is set to the appropriate speed—slower for harder materials. Keep the drill perpendicular to the surface to prevent slipping. Apply steady, even pressure without forcing the drill, which can strip the screw head. Regular maintenance tips include keeping bits sharp and clean to maintain maximum grip. Always check your drill’s settings before starting, and double-check that your work area is clear. Proper preparation and technique help you avoid damage and extend your tool’s lifespan, making your projects safer and more successful. Understanding indoor plant care and proper hanging basket setup can also contribute to a more comfortable workspace and better project outcomes. Additionally, mastering drill bit selection ensures you use the correct tools for each task, reducing the risk of damage.

The Original Patented Screwdriver Set 24 in 1 Magnetic Ratchet with Precision Bits–Ideal for Home Repairs, DIY Projects,and Electronics–Ergonomic Rotatable Ratchet Handle and Storage Case–Holiday Gift
24 Versatile Bits for Every Need: This 24-in-1 ratchet screwdriver set comes with a comprehensive range of precision…
As an affiliate, we earn on qualifying purchases.
As an affiliate, we earn on qualifying purchases.
Techniques for Driving Screws Without Damaging the Heads
To drive screws without damaging the heads, make sure you’re using the correct bit size for the screw. Keep steady pressure as you turn to prevent slipping or stripping. Also, adjust your drill’s speed to match the task, avoiding too fast or slow rotations. Additionally, proper bit alignment helps ensure the screw head remains undamaged during driving.
Use Correct Bit Size
Using the correct bit size is essential for driving screws without damaging their heads. A proper fit ensures the bit fully engages with the screw head, reducing the risk of slipping or stripping. If your bit is too small, it won’t grip securely, causing potential damage and making driving the screw difficult. Conversely, a bit that’s too large can strip the screw head or cause it to become cam-out. Always match the bit size to the screw fit—check the screw head to select the right size. This careful pairing allows for maximum grip and control. Using the correct bit size also minimizes wear on both the bit and screw, prolonging their lifespan. Additionally, understanding the importance of proper tool selection can improve overall results and efficiency. Taking a moment to choose the right fit saves time and effort, ensuring cleaner, more professional results.
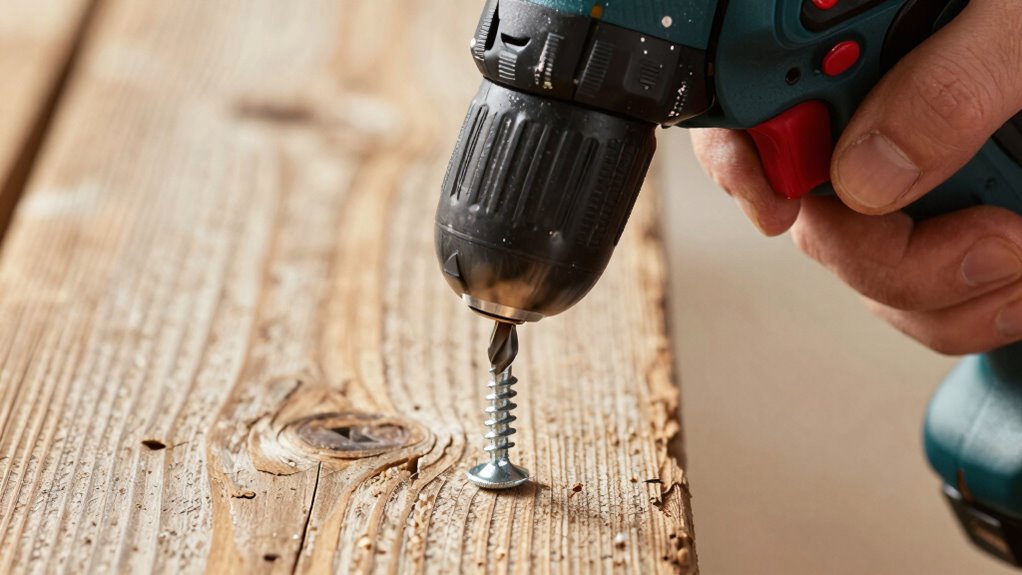
Apply Steady Pressure
Applying steady pressure as you drive a screw helps guarantee you prevent damage to the screw head and assure it seats properly. Focus on consistent pressure application, avoiding sudden pushes that can strip the screw or mar the material. Maintaining grip stability is essential; keep a firm, controlled hold on your drill to prevent slipping. As you turn the drill, apply gentle, even pressure, letting the tool do the work without forcing it. This steady pressure helps the screw bite into the material smoothly, reducing the risk of cam-out or head damage. Keep your hand steady and your grip firm but relaxed, and monitor the screw’s progress. Proper pressure application combined with grip stability ensures a clean, professional finish every time. Paying attention to correct technique can make a significant difference in your results and help prevent common issues like stripped screws. Utilizing attention to detail during the process further enhances precision and reduces errors. Additionally, understanding the importance of proper drill speed can optimize the driving process and minimize damage. Being aware of correct torque settings can also prevent over-tightening that might damage the screw or material. Incorporating these best practices will improve your overall screw-driving skills and outcomes.
Adjust Speed Appropriately
Adjusting your drill’s speed is essential for preventing screw head damage. When you increase speed too much, the screw can strip or the head can become rounded. To avoid this, start with a low to medium speed and increase only if needed. Proper drill bit maintenance ensures the bit stays sharp, reducing slippage and making driving easier. Additionally, understanding cordless drill ergonomics helps you maintain control, so you apply steady pressure without forcing the tool. Faster speeds are useful for quick work but can be risky if not managed carefully. Always adjust the speed based on the screw size and material. Being aware of airless paint spraying tips can help you develop better control and technique when working with different tools and materials. Recognizing the importance of cultural heritage preservation can also inspire more cautious and respectful use of tools around historic or culturally significant sites. Mastering cybersecurity strategies highlights the value of controlled and precise actions in sensitive environments, which can be applied to tool use. Additionally, understanding air quality considerations can help you create safer and cleaner workspaces when operating power tools. By controlling your drill’s speed, you minimize the risk of damaging screw heads and achieve cleaner, professional results. Developing an understanding of golf course history can also promote more careful use of equipment in sensitive environments.
Common Mistakes That Lead to Stripped Screws and How to Avoid Them
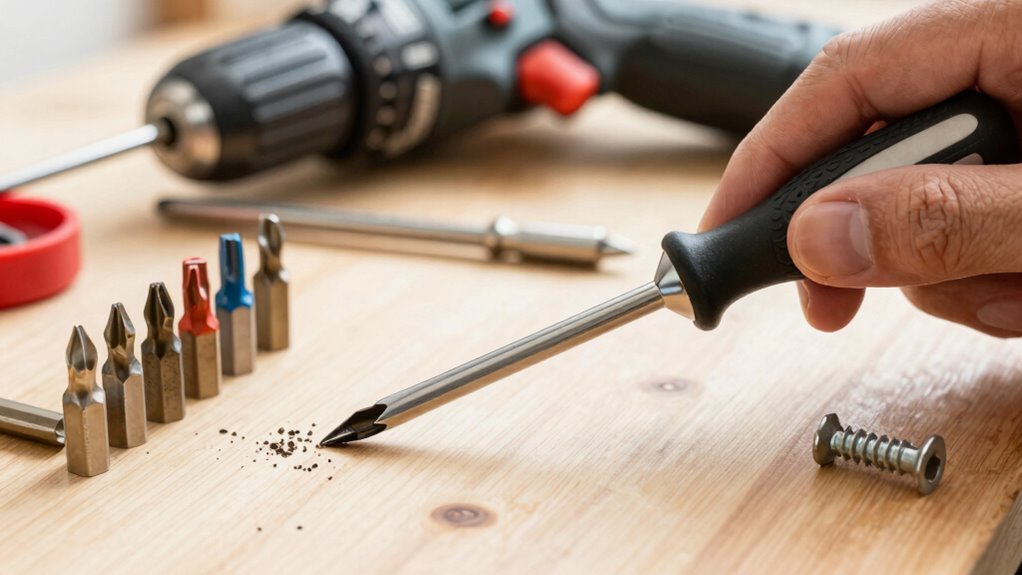
Stripped screws often happen when you don’t pay attention to the fit between the screwdriver and the screw head. Using the wrong screw head types or incompatible bits can cause slippage and damage. For example, using a Phillips bit on a Torx screw is a common mistake that leads to stripped screw heads. Always verify your bit compatibility matches the screw head type for a secure fit. Poor fit means you’ll need more force, increasing the risk of stripping. Additionally, using a worn or damaged bit reduces grip. To avoid this, double-check the screw head type before starting and choose the right bit. Proper bit compatibility and matching screw head types are key to preventing stripped screws and making your work smoother. Being aware of screw head types and their specific bits can significantly improve your results and prevent damage. Also, selecting the appropriate bit size ensures a snug fit, reducing the chance of slipping.
Best Bits for Softwood, Hardwood, and Metal
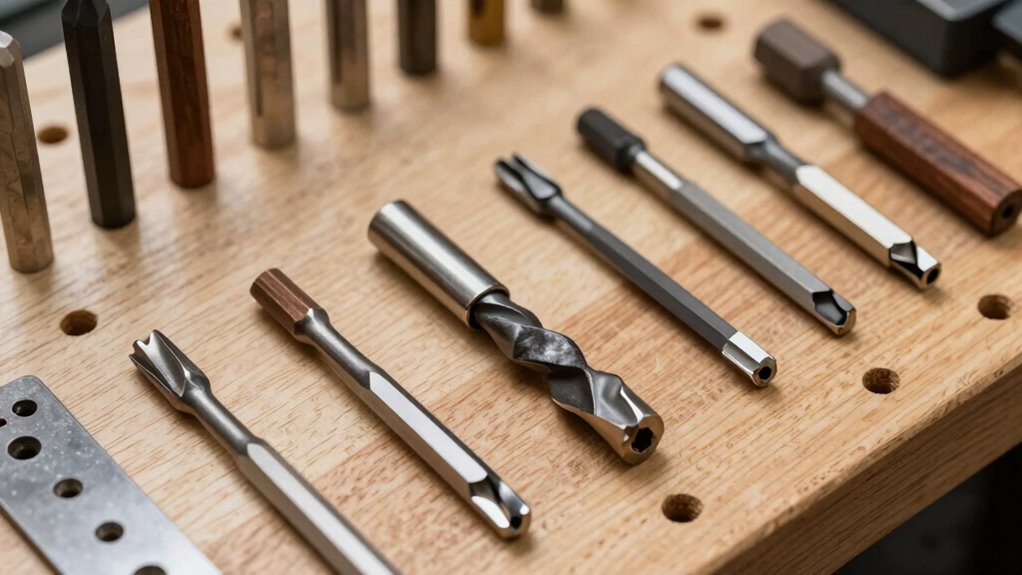
Have you ever struggled to find the right drill bit for different materials? Your choice depends on drill bit compatibility with softwood, hardwood, or metal. For softwood, high-speed steel or brad point bits work best because they cut cleanly without splintering. When working with hardwood, use sharp, sturdy bits like cobalt or carbide-tipped ones to handle the density. Metal requires bits designed for durability, such as cobalt or titanium-coated bits, which resist heat and wear. Also, consider screw head types—Phillips, Torx, or flat—to ensure the bit matches the screw for ideal grip and minimizing stripping. Using the correct drill bit for each material and screw type guarantees better control, cleaner holes, and reduces the risk of damaging your project or stripping screws. Proper drill bit selection according to the material can significantly improve your woodworking and DIY results.
When and Why to Drill Pilot Holes Before Driving Screws?
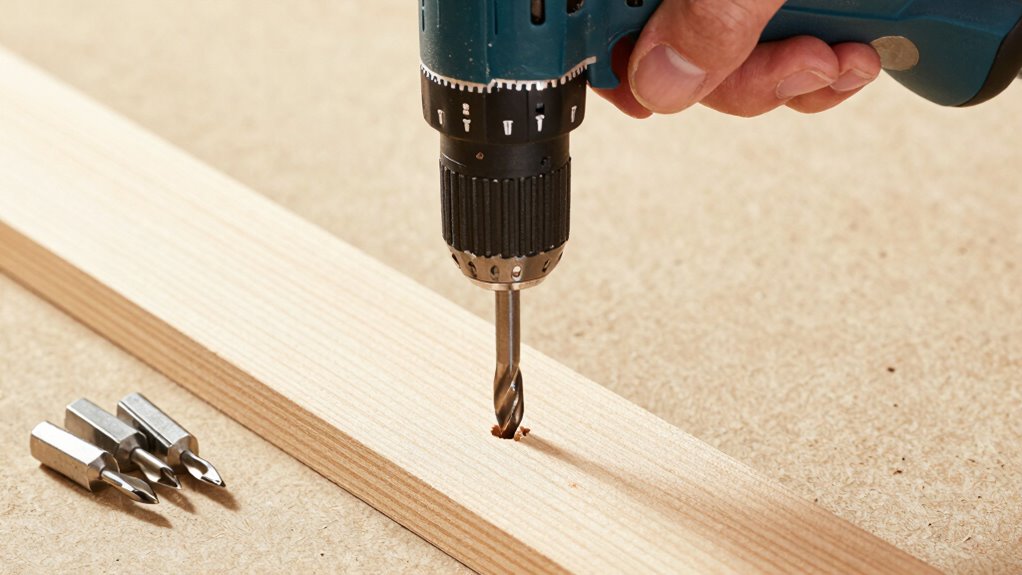
Drilling pilot holes before driving screws can save you time and prevent damage, especially when working with hardwoods or dense materials. Pilot hole importance lies in reducing the risk of splitting wood, cracking delicate materials, and making screw insertion easier. Material specific drilling guarantees you choose the right drill bit size and depth for each project, improving accuracy and holding strength. If you’re working with hardwood or dense composites, drilling a pilot hole first minimizes force needed and helps keep your screw straight. For softer woods or materials, pilot holes may still be beneficial to prevent splitting and ensure precise placement. Knowing when and why to drill pilot holes helps you work efficiently, protects your workpiece, and results in a cleaner, more professional finish.
Troubleshooting Tips for When You Keep Stripping Screws
If you find yourself repeatedly stripping screws, it’s often due to applying too much force, using the wrong screwdriver size, or working with damaged or stubborn fasteners. To prevent this, pay attention to screwdriver ergonomics—choose handles that fit comfortably and give you better control. Verify your drill bits are stored properly; organized drill bit storage helps you quickly find the right size, reducing the risk of slipping. When using a screwdriver or drill, start with light pressure and steady, controlled movements rather than forcing it. If a screw keeps stripping, switch to a slightly larger or high-quality bit. Regularly inspect your tools and replace worn or damaged bits to maintain grip and efficiency. Proper technique and organized tools make a big difference in avoiding stripped screws.
Frequently Asked Questions
How Do I Maintain and Store My Drill Bits Properly?
To keep your drill bits in top shape, use proper bit storage to prevent damage and loss. Store bits in a dedicated case or organizer, keeping them dry and clean. Regular maintenance tips include wiping off debris after use and applying a light coat of oil for rust prevention. Always inspect your bits before use, and sharpen or replace worn ones to ensure ideal performance and longevity.
What Safety Precautions Should I Follow When Using a Drill?
Using a drill is like handling a powerful tool, so always prioritize safety. You should wear personal protective equipment like safety goggles and gloves to protect your eyes and hands. Make certain your workspace is clean, well-lit, and free of clutter to prevent accidents. Keep a firm grip on the drill, stay focused, and avoid loose clothing or jewelry. These precautions make your work safer and more efficient, reducing the risk of injury.
Can I Use a Drill for Tasks Other Than Screwing and Drilling?
Absolutely, you can use a drill for tasks beyond screwing and drilling. Its power tool versatility allows you to sand, grind, polish, or even mix paint, making it useful for various projects. Just plan your project carefully, selecting the right bits and attachments. Always follow safety guidelines, and adjust the speed settings to match the task. This way, your drill becomes a multi-purpose tool that streamlines your work.
How Do I Identify the Correct Size of Screwdriver Bits?
To identify the correct size of screwdriver bits, start with bit size compatibility—match the bit to your screw head to guarantee a snug fit. Use bit identification tips like checking the label on the bit or comparing it to the screw head. Always select a bit that fits securely without slipping. Properly matching your bits prevents stripping screws and makes your work more efficient.
How Often Should I Replace Worn or Damaged Drill Bits?
You should replace worn or damaged drill bits as soon as you notice a decrease in performance or visible wear, which affects bit longevity. Typically, this means every few projects or after about 10-15 uses, but it varies depending on material and usage. Regularly inspecting your bits guarantees peak performance, prevents damage to your work, and maintains safe operation, so don’t wait too long to do replacements.
Conclusion
Mastering your drill skills means balancing precision with patience. While choosing the right bit and speed can prevent stripped screws, rushing or ignoring proper technique can turn a simple task into a frustrating ordeal. Think of it like a dance—your steady hands and careful steps lead to smooth results, unlike hurried movements that cause missteps. With practice, you’ll turn potential mishaps into confident, efficient projects, transforming frustration into satisfaction.