
Sealing a bathroom edge is simple and essential for preventing water damage, mold, and costly repairs. Start by inspecting and cleaning the surface thoroughly, removing any old sealant or debris. Choose a suitable sealant like silicone or acrylic based on your needs, then apply it smoothly along the edge using a caulking gun. Smooth the sealant for a clean finish and allow it to cure fully before exposing it to water. Continue to explore how proper sealing guarantees long-lasting protection.
Key Takeaways
- Clean and dry the surface thoroughly, removing old sealant and debris for optimal adhesion.
- Choose the appropriate sealant (silicone, acrylic, or polyurethane) suited for bathroom wet areas.
- Use a caulking gun to apply an even bead along the bathroom edge, smoothing it for a neat finish.
- Allow the sealant to cure fully (usually 24 hours) before exposing the area to water.
- Regularly inspect and reapply sealant promptly to maintain seal integrity and prevent mold or damage.

GE Advanced Silicone Caulk for Kitchen & Bathroom, Clear, 2.8 fl oz Tube, 1 Pack – 100% Waterproof Silicone Sealant, 5X Stronger Adhesion, Shrink & Crack Proof
100% Silicone Caulk Protection: This silicone caulk clear provides ultimate waterproof protection, ensuring a reliable seal against water…
As an affiliate, we earn on qualifying purchases.
As an affiliate, we earn on qualifying purchases.
When and Why You Need to Seal Bathroom Edges
Sealing bathroom edges is essential to prevent water from seeping into gaps and causing damage. When you don’t seal properly, moisture can penetrate behind tiles and into the walls, leading to mold growth and structural issues. Sealing creates an effective moisture barrier that keeps water out and protects your bathroom’s integrity. Additionally, using appropriate sealant materials ensures a durable and lasting seal. You need to seal bathroom edges especially after tile installation, during repairs, or if you notice cracks or gaps forming. Regular sealing also helps prevent mold buildup by reducing the damp environment that mold spores thrive in. Proper sealing techniques are important for maintaining household safety and preventing costly repairs. Choosing the right sealant application methods can further enhance the longevity of your seal. Using the correct sealing tools can make the process easier and more effective. Employing proper surface preparation can significantly improve adhesion and sealing effectiveness. By maintaining a good seal, you’re actively preventing water damage, safeguarding your walls and floors, and promoting a healthier bathroom environment. Don’t overlook this step—it’s key to long-term durability and mold prevention.
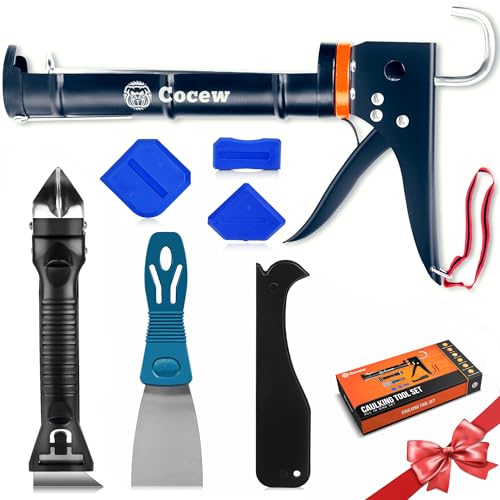
Caulk Gun Kit, Smooth Silicone Caulking Gun and Caulk Remover Tool, Sealant Finishing Tool Grout Scraper for Kitchen Bathroom Window Sink Joint, All in One with Gift Box
【Easy to operate】Cocew Caulking Gun is lightweight, the Smooth Pressure Rod is available with a high thrust ratio….
As an affiliate, we earn on qualifying purchases.
As an affiliate, we earn on qualifying purchases.
Tools and Materials Needed for Sealing Bathroom Edges
To get started, you’ll need the right tools to guarantee a clean and effective seal. Having the proper materials is just as important to prevent water damage and mold growth. Let’s go over the essential items you should gather before beginning your sealing project. Proper sealant application techniques can enhance the longevity and effectiveness of your seal, ensuring your bathroom remains dry and mold-free for years to come. Utilizing digital content formats can also help you record and maintain your project details, making future repairs or inspections easier. Additionally, using essential DIY tools such as caulking guns and putty knives will make the process smoother and more precise. Incorporating moisture-resistant materials can further safeguard your bathroom against water infiltration and damage. Being aware of waterproofing methods may also improve the durability of your sealant and protect your bathroom surfaces effectively.
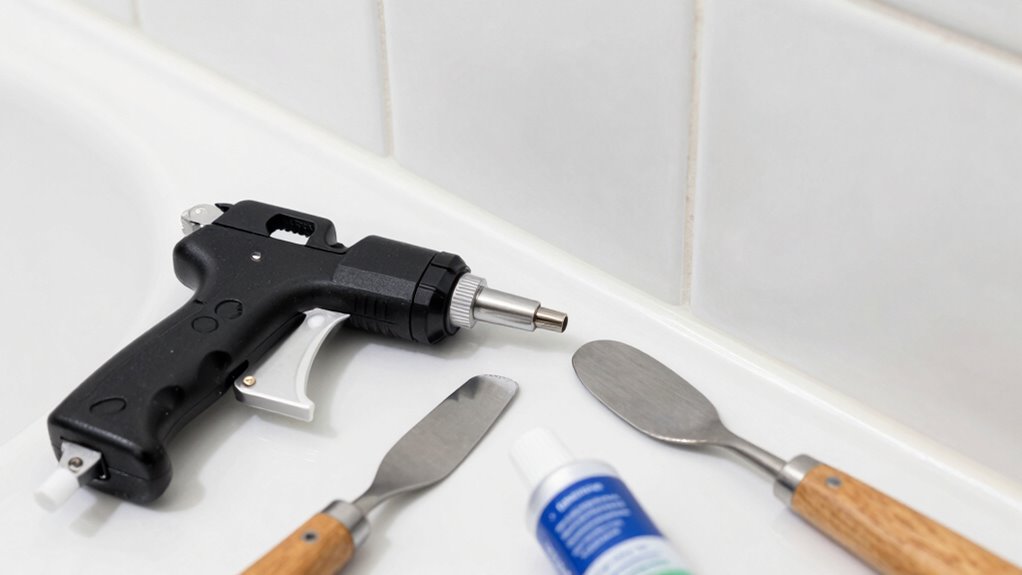
Tools You Must Have
Before you start sealing your bathroom edges, it’s important to gather the right tools and materials. Having the proper equipment guarantees a clean, effective seal that helps prevent mold and supports ventilation tips. First, you’ll need a caulking gun to apply the sealant smoothly. Second, a utility knife or razor blade helps remove old caulk and clean edges for better adhesion. Third, keep a damp cloth or sponge nearby to wipe away excess sealant quickly. These tools help you achieve a neat finish, reducing gaps where moisture can settle. Proper sealing not only enhances your bathroom’s look but also plays a crucial role in mold prevention. With the right tools, sealing becomes easier, and your bathroom stays fresh and well-ventilated longer.
Materials for Proper Sealing
What materials do you need to guarantee a proper seal around your bathroom edges? First, choose the right sealant type, such as silicone, acrylic, or polyurethane, suited for wet environments. Silicone is popular for its flexibility and water resistance, while acrylic is easier to apply and paintable. You’ll also need application tools like a caulk gun to dispense the sealant smoothly, along with a caulk finishing tool or your finger to shape the sealant evenly. A utility knife or razor blade helps trim excess sealant, and painter’s tape ensures clean edges during application. Make sure all surfaces are clean and dry before applying your chosen sealant. Using the correct sealant type and proper application tools guarantees a durable, professional finish around your bathroom edges. Additionally, understanding airless paint spraying techniques can help in other areas of home renovation, ensuring smooth and even coatings. Proper surface preparation, including cleaning and drying, is essential for sealant adhesion and longevity.

Miracle Sealants 511 Impregnator Advanced Penetrating Sealer for Countertops, Stone, Tile & Grout, Pint
For use inside or out on a variety of surfaces including sanded grout, ceramic tile, porcelain tile, glazed…
As an affiliate, we earn on qualifying purchases.
As an affiliate, we earn on qualifying purchases.
Preparing Surfaces for Bathroom Sealant Application
Before applying sealant, make sure the surface is clean and completely dry. Remove any old sealant to guarantee a smooth, secure bond. Taking these steps helps your new sealant last longer and work more effectively. Additionally, ensuring a well-prepared surface can help prevent future issues like mold or deterioration. Proper surface preparation is essential for achieving a durable seal and avoiding costly repairs later on. Regular inspection of the sealant and surrounding areas can help catch early signs of wear or damage, further extending the lifespan of your bathroom sealant. Using proper tools and techniques can also improve the overall quality of your sealant application, ensuring a better seal and a longer-lasting result. For optimal results, consider using professional-grade sealants that are designed for bathroom environments.
Clean and Dry Surface
Ensuring the surface is clean and dry is essential for a successful sealant application. A tidy surface prevents mold prevention issues and ensures the sealant adheres properly. To achieve this: 1. Wipe the area with a damp cloth to remove soap scum, dirt, and residue. 2. Use a mild cleaner to eliminate mold spores and prevent future mold growth. 3. Dry thoroughly with a clean towel or cloth, especially in grout lines, to avoid moisture that can compromise the seal. Proper cleaning also helps identify areas needing grout repair before sealing. Skipping this step can lead to poor adhesion and water leaks later on. Take your time to prepare the surface thoroughly for a longer-lasting, effective seal. Understanding proper surface preparation is crucial for successful sealing and preventing future issues. Additionally, using a test tool to check surface moisture levels can confirm that the area is adequately dry before applying the sealant. Being aware of moisture levels helps ensure optimal adhesion and durability of the sealant. Incorporating a moisture meter can help detect hidden moisture in porous surfaces and prevent future sealing problems.
Remove Old Sealant
Removing old sealant is a crucial step to guarantee the new sealant adheres properly and functions effectively. Sealant removal involves carefully scraping away the old sealant using a utility knife or a sealant remover tool. Make sure to remove all traces of the old sealant, as leftover residue can prevent the new sealant from bonding correctly. Take your time to clean the area thoroughly, reaching into corners and seams where old sealant might hide. If any stubborn bits remain, use a mixture of rubbing alcohol or a specialized cleaner to loosen them. Properly removing the old sealant ensures a clean, smooth surface, which is essential for a long-lasting, effective bathroom seal. Additionally, understanding the best sealant removal techniques can help you work more efficiently and achieve a professional finish. Being aware of the proper cleaning methods after removal can further enhance adhesion and prevent mold or mildew buildup. For optimal results, consider using appropriate removal tools designed specifically for sealant removal to minimize surface damage.
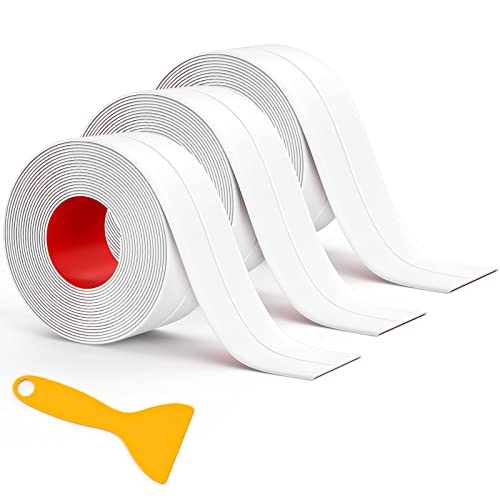
Fixmend Caulk Tape, 3 Roll Self Adhesive Caulk Strip Waterproof, Caulking Sealant Tape for Kitchen, Countertop, Bathroom, Sink, Shower, Bathtub, Toilet Edge Protector with Sealing Tool (1.5" x 10.5Ft)
Material – The caulk strip is made of high-quality PVC material, waterproof, with better adhesion.
As an affiliate, we earn on qualifying purchases.
As an affiliate, we earn on qualifying purchases.
How to Choose the Best Sealant for Bathroom Edges

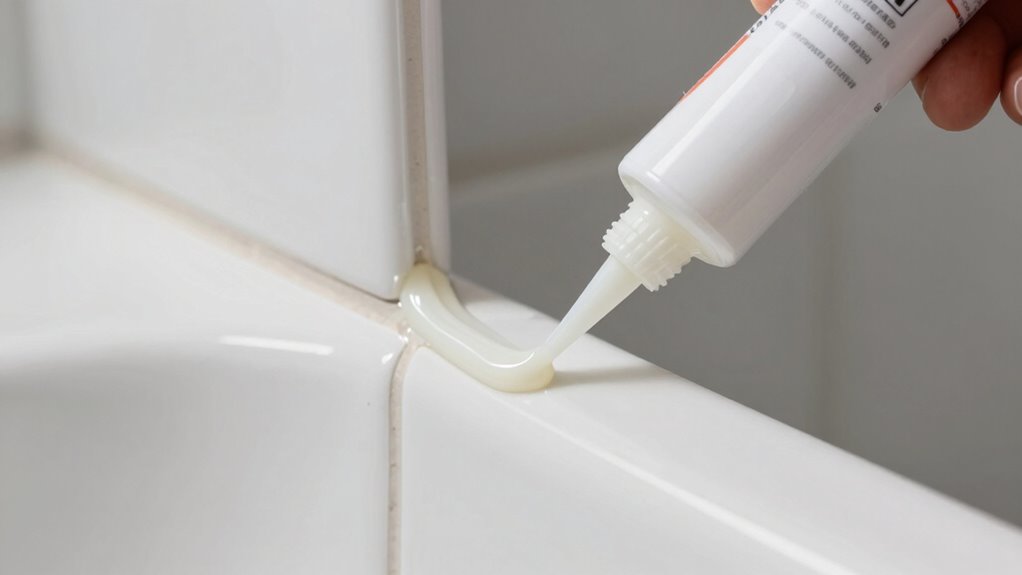
Choosing the right sealant for bathroom edges can make a significant difference in preventing water damage and mold growth. First, consider the sealant types—silicone, acrylic, or polyurethane—each suited for different needs. Silicone is mold-resistant and flexible, making it ideal for wet areas. Acrylic is easier to apply and paintable but less durable. Polyurethane offers strong adhesion for heavy-duty sealing. Second, pay attention to application tips: ensure surfaces are clean and dry, apply in a smooth, continuous bead, and avoid overfilling. Third, match the sealant to your specific bathroom environment, considering moisture levels and surface materials. Selecting the correct sealant type and mastering proper application tips guarantees a long-lasting, effective seal that keeps water out and mold at bay.
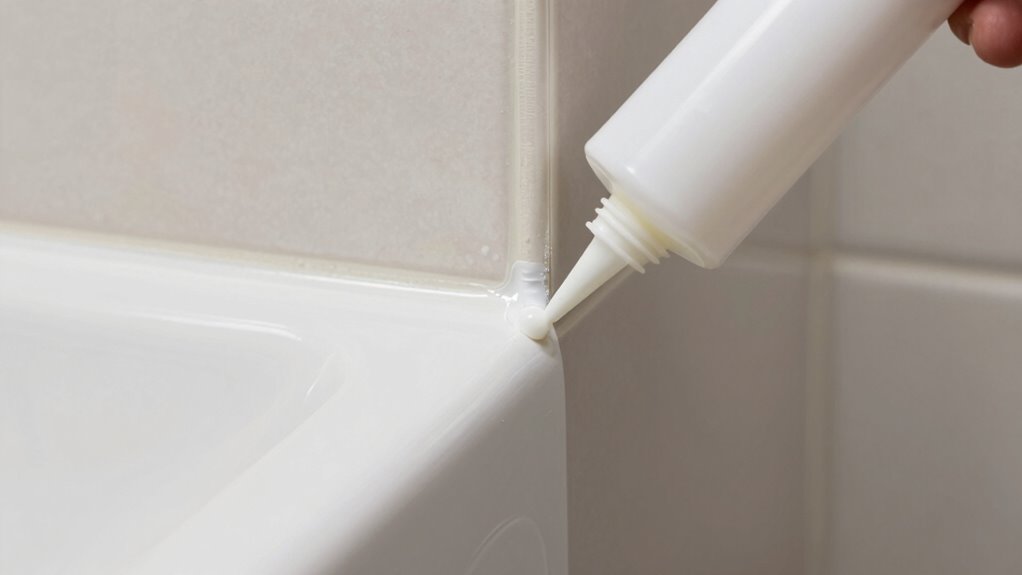
Step-by-Step Guide to Applying Sealant Along Bathroom Edges
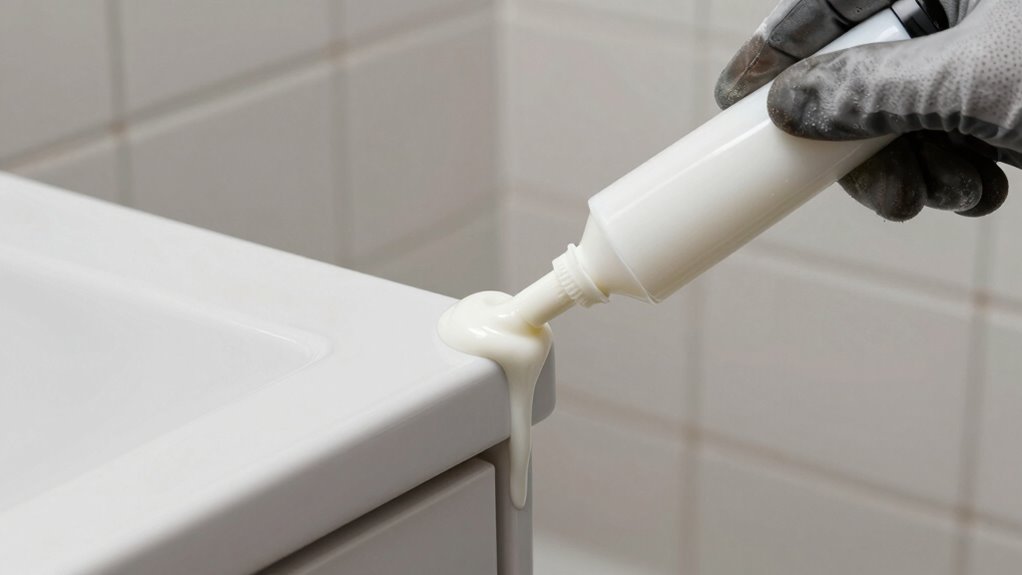
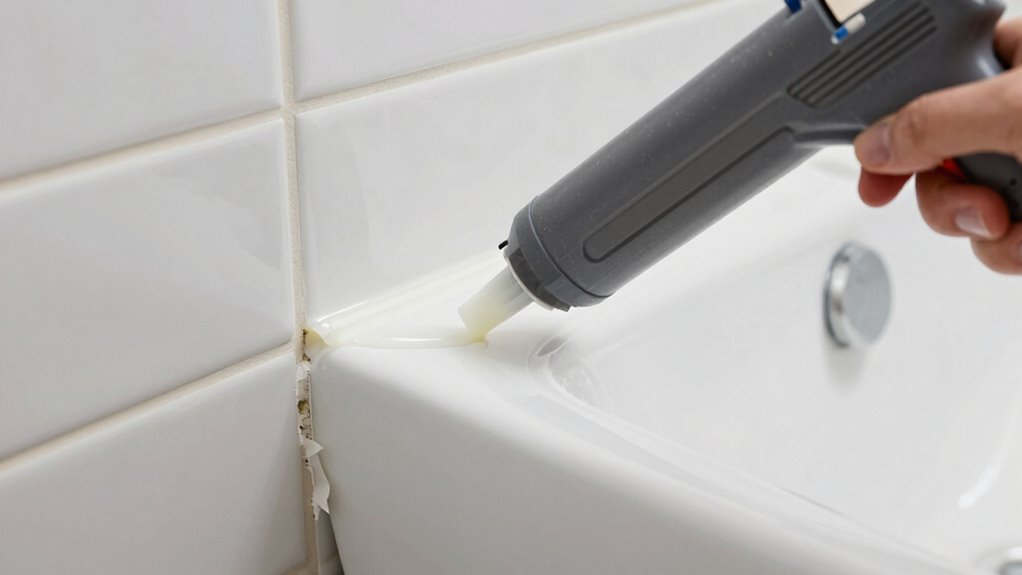
Applying sealant along bathroom edges is a straightforward process if you follow the right steps. First, verify the area is clean and dry to prevent mold prevention issues. Cut the tip of the sealant tube at a 45-degree angle and load it into a caulking gun. Slowly apply a steady bead of sealant along the edge, maintaining even pressure. Use a damp finger or a caulk smoothing tool to smooth out the sealant, ensuring good adhesion. Wipe away excess with a damp cloth. Proper application helps with grout maintenance by sealing gaps and preventing water infiltration. Additionally, using high-quality electric dirt bikes can make maintenance and repairs easier. Take your time to ensure the sealant is even and well-adhered, which extends the life of your bathroom edges and reduces mold growth. Regular inspection and cleaning of the sealed areas also contribute to maintaining a properly sealed and mold-free bathroom environment.
How Long Does Sealing Take, and When Should You Reapply?

Sealing your bathroom edge typically takes about 24 hours to fully cure, but this can vary based on sealant type and conditions. You should consider reapplying when you notice cracks, mold, or gaps forming. Following a regular schedule, usually every 1 to 2 years, helps maintain a watertight seal and prevents damage.
Typical Sealing Duration
The typical sealing duration for bathroom edges usually ranges from 24 to 48 hours before the silicone or caulk fully cures and becomes waterproof. During this time, it’s essential to avoid splashes or moisture exposure, which can compromise mold prevention and affect durability. To guarantee ideal results, keep these points in mind:
- Allow full curing before using the bathroom extensively to prevent mold growth.
- Check the color matching after curing, as some sealants may change shade slightly during drying.
- Reapply if needed after 12 months, especially if the sealant shows cracks or discoloration, to maintain a clean, mold-free surface.
Patience during this period guarantees a long-lasting, waterproof seal that matches your bathroom’s aesthetic.
Signs for Reapplication
How can you tell when it’s time to reapply sealant around your bathroom edges? Look for visible cracks, gaps, or peeling, which can allow moisture to seep in. These signs compromise mold prevention, increasing the risk of mold growth. Also, if you notice any discoloration or a persistent musty smell, it’s a good indicator that the sealant has degraded. Proper ventilation tips can help slow down deterioration, but they don’t prevent it entirely. When the sealant shows signs of wear, reapplication is necessary to maintain a watertight barrier. Regularly inspecting your bathroom edges ensures you catch issues early, protecting your bathroom from water damage and mold. Reapplying sealant at the right time keeps your bathroom safe and well-maintained.
Proper Reapplying Schedule
Knowing when to reapply sealant depends on how long the current application lasts before showing signs of wear. Typically, you should consider reapplying sealant every 1 to 2 years to maintain mold prevention and aesthetic improvements. Keep an eye out for these indicators:
- Visible cracks or gaps in the sealant
- Mold or mildew starting to grow along the edges
- Discoloration or peeling that affects appearance
Regular reapplication guarantees your bathroom stays clean and visually appealing while preventing mold buildup. If you notice any of these signs earlier, reapply sooner. Proper scheduling not only keeps your bathroom looking fresh but also extends the life of your sealant, saving you time and effort in the long run.
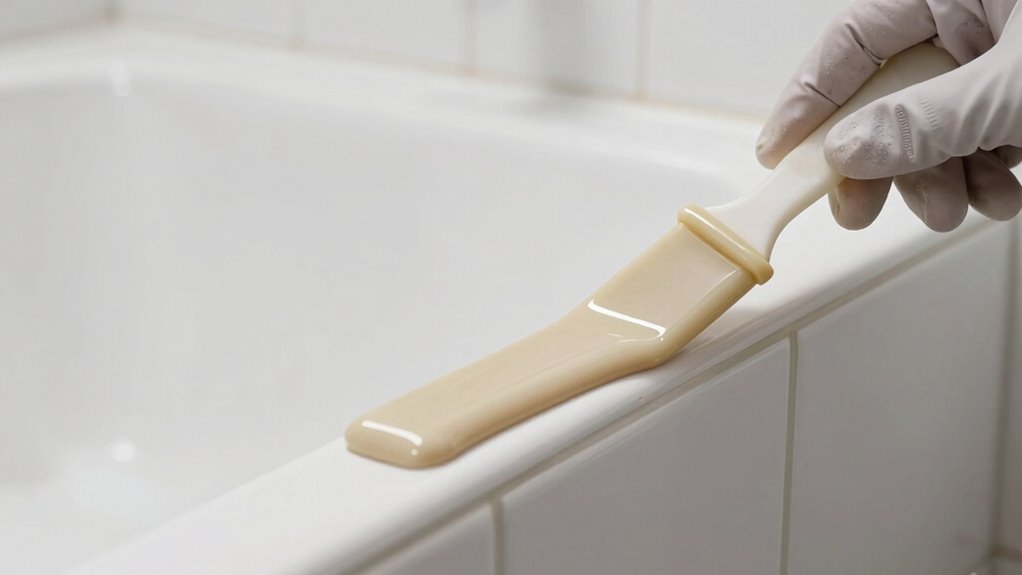
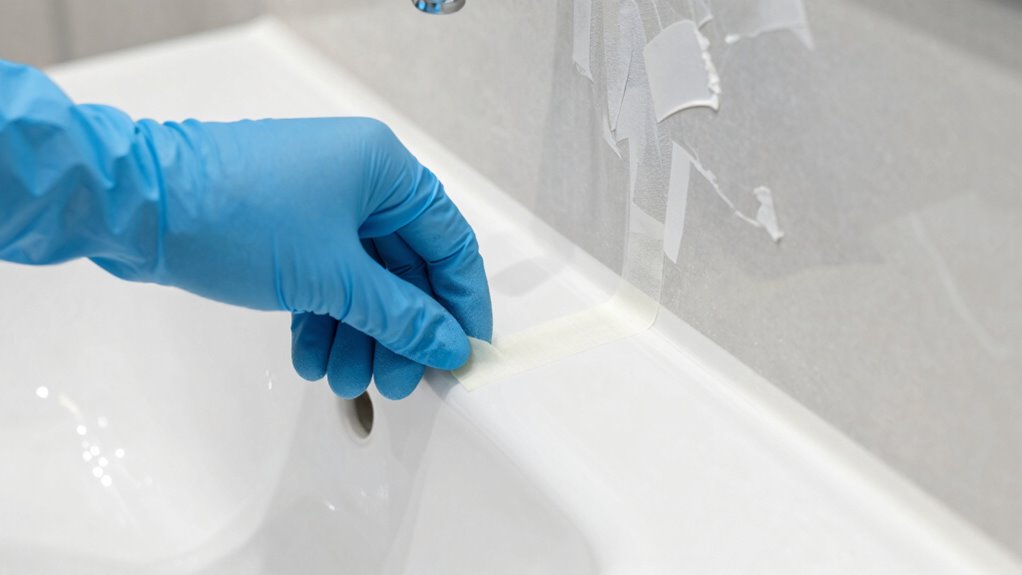
Tips for Achieving a Clean, Professional Seal

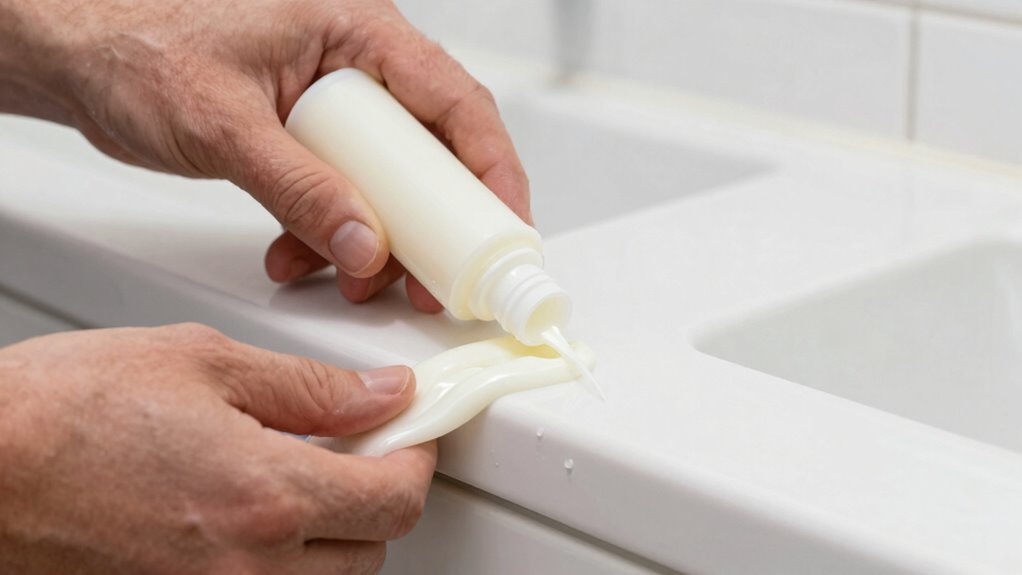
Achieving a clean, professional seal around your bathroom edge starts with proper preparation. Make sure the surface, including decorative tiles, is thoroughly cleaned and dried to remove dirt and soap scum. Use painter’s tape along the edges to create a straight, neat line and prevent excess sealant from spreading. Apply the sealant in a steady, continuous motion, pressing it into the joint to ensure good adhesion. Smooth the sealant with a caulk finishing tool or your finger dipped in water to achieve a sleek finish. For mold prevention, choose a high-quality, mold-resistant sealant, especially in humid areas. Wiping away excess sealant immediately prevents messes and guarantees a polished look. Proper technique and attention to detail help guarantee a professional, long-lasting seal.
Troubleshooting Sealant Problems and Fixing Common Issues
Even with careful application, sealant issues can arise over time. Common problems include cracks, loss of flexibility, and mold buildup. To address these issues:
Sealant issues like cracks and mold can develop over time; prompt repairs help maintain a proper seal.
- Cracks or gaps: Remove old sealant, clean the area thoroughly, and reapply a fresh, flexible sealant that maintains its integrity and sealant flexibility.
- Mold growth: Ensure the area stays dry and well-ventilated. Use mold-resistant sealant and clean any mold promptly to prevent it from spreading.
- Loss of adhesion or peeling: Scrape away loose sealant, clean the surface, and reseal with a compatible, high-quality product that offers good mold prevention.
Maintaining Your Sealed Bathroom Edges for Long-Lasting Protection
To guarantee your bathroom edges stay protected for the long term, regular maintenance is essential. Keep the tiles around your sealed edges clean by wiping them down with a damp cloth to prevent dirt buildup. Regular tile maintenance helps spot early signs of damage or sealant wear, allowing you to address issues promptly. It’s also important to check for mold and mildew, especially in damp areas. To prevent mold, ensure proper ventilation and dry the edges thoroughly after showers. Resealing areas when you notice cracks or deterioration can prolong the lifespan of your sealant. Consistent upkeep not only maintains the appearance but also ensures your bathroom edges remain waterproof and mold-free, providing long-lasting protection and peace of mind.
Common Mistakes to Avoid When Sealing Bathroom Edges
Sealing bathroom edges can be straightforward, but many people make common mistakes that compromise the effectiveness of their sealant. These sealing mistakes often lead to leaks or mold growth. To avoid these common pitfalls:
- Skipping surface preparation, which causes poor adhesion and weak seals.
- Applying too much or too little sealant, resulting in gaps or messes.
- Rushing the curing process, which prevents the sealant from setting properly.
Pay attention to these details to ensure a durable seal. Properly cleaning and drying surfaces, applying an even bead, and allowing adequate curing time help prevent sealing mistakes. Being mindful of these common pitfalls guarantees your bathroom edges stay protected, dry, and mold-free in the long run.
Frequently Asked Questions
Can I Seal Bathroom Edges Myself Without Professional Help?
Yes, you can do DIY sealing of bathroom edges yourself if you’re comfortable with basic tools and follow clear instructions. Use proper sealing materials like silicone caulk and guarantee the area is clean beforehand. However, if you’re unsure about your skills or dealing with complex areas, seeking professional assistance might be best to ensure a watertight seal. Proper sealing prevents water damage and mold growth, so take your time.
What Types of Bathroom Edges Are Unsuitable for Sealing?
Like a knight from a medieval tale, you might stumble upon edges unsuitable for sealing, especially if the material isn’t compatible or if the edge isn’t properly prepared. Avoid sealing porous materials like unglazed ceramic or natural stone without proper sealing primers, as they can absorb moisture. Make certain of thorough edge cleaning and dry it well first. If the surface isn’t compatible or properly prepared, sealing won’t last and may cause more damage.
How Do I Remove Old or Damaged Sealant Effectively?
To remove old or damaged sealant effectively, start with a sealant removal tool or a utility knife to gently cut and lift the sealant. Use a sealant remover or a mixture of vinegar and water for stubborn residues. Once removed, clean the surface thoroughly with a mild detergent to guarantee proper surface preparation. This helps create a clean, smooth surface, ensuring your new sealant adheres properly.
Is It Safe to Use Silicone Sealant Around Bathroom Fixtures?
Think of silicone sealant as the armor of your bathroom fixtures. It’s generally safe if you choose a high-quality, mold-resistant product, guaranteeing silicone safety. Proper application guarantees sealant durability, preventing leaks and mold growth. Always follow manufacturer instructions and ensure good ventilation during and after sealing. With the right silicone, your bathroom remains protected, just like a fortress, without risking exposure to harmful chemicals or compromised seals.
How Does Humidity Affect the Sealing Process and Longevity?
Humidity can considerably impact your sealing process and its longevity. When there’s high moisture in the air, it slows down silicone curing, increasing the risk of incomplete sealing. This allows moisture infiltration, which can lead to mold growth behind the sealant. To prevent this, make sure the area is dry and well-ventilated before sealing, and consider using a humidity-resistant sealant for better long-term protection against moisture and mold.
Conclusion
Now that you’ve sealed your bathroom edges, you’re practically invincible against water damage, mold, and leaks—your bathroom will stay pristine forever! With your newfound skills, you’ll conquer any sealing challenge that comes your way, transforming your space into an impenetrable fortress of cleanliness. Remember, a perfect seal isn’t just a job—it’s your secret weapon for a flawless, long-lasting bathroom. So go ahead, seal away and enjoy a leak-free, sparkling sanctuary that could withstand the test of time itself!