Labeling your home tech cables makes managing your setup much easier. By choosing durable labels, using color coding, and attaching them at both ends, you can identify devices quickly and troubleshoot efficiently. Using simple tools like label makers or permanent markers helps create clear, lasting labels. Organizing and maintaining these labels guarantees your cables stay neat and functional over time. Keep exploring to discover more tips for a clutter-free and organized home tech environment.
Key Takeaways
- Use color coding and clear labels at both ends for quick cable identification.
- Choose durable, waterproof labels and tools like label makers for longevity.
- Organize cables with ties, clips, and labeled compartments to reduce clutter.
- Regularly inspect and update labels to maintain readability and system accuracy.
- Implement a consistent labeling system to streamline setup, troubleshooting, and upgrades.

VolenGo Label Maker Machine with 4 Tapes, Wire Label Maker Waterproof-Labels, Laminated Handheld Label Printer, Backlit & Portable & 3 Cable Modes, H1100 Labeler for Industrial Office Organization
𝗕𝗮𝗰𝗸𝗹𝗶𝗴𝗵𝘁 𝗦𝗰𝗿𝗲𝗲𝗻: VolenGo H1100 label maker has a Backlit-LCD, even in low-light situations; No more struggling to see…
As an affiliate, we earn on qualifying purchases.
As an affiliate, we earn on qualifying purchases.
Why Labeling Your Cables Makes Home Tech Easier to Manage
Labeling your cables can considerably simplify managing your home tech setup. Proper cable identification helps you quickly find and troubleshoot devices without guesswork. When you follow labeling best practices, you avoid the frustration of unplugging the wrong cable or losing track of connections. Clear labels save time during setup, maintenance, and upgrades, ensuring you know exactly which cable connects to what device. Plus, organized cables reduce clutter and help prevent accidental disconnections. By labeling your cables, you create a system that’s easy to update as your tech evolves. Additionally, incorporating cable organization techniques can further enhance your setup’s neatness and efficiency. Using standardized labeling methods can make it even easier to recognize and manage cables over time. Incorporating visual cues into your labels can help improve quick identification. Implementing consistent labeling practices ensures that your system remains clear even as your home tech expands. Integrating classic arcade game themes into your labeling system can add a fun touch to your organization process. Overall, effective cable identification through smart labeling makes managing your home tech more straightforward and less stressful.

Wmiwulien 8 Sheet 240 Pcs Cable Labels for Management, Colorful Waterproof Cord Tags for Electronics, Self Adhesive Tear Resistant Wire Labels for Laser Printer and Handwriting
Cable Labels Tag Size – A4 size 210 mm x 297 mm (sheet size); 3.31 x 1.02 inch…
As an affiliate, we earn on qualifying purchases.
As an affiliate, we earn on qualifying purchases.
How to Choose the Best Labeling Method for Your Cables
Choosing the right labeling method depends on your specific needs and the type of cables you’re working with. To guarantee effective cable identification, consider how durable, visible, and easy to apply your labels need to be. Different labeling techniques suit different environments and cable types, from flexible labels for tight spaces to permanent markers for quick fixes. Think about whether you need labels that withstand heat or moisture, or if removable options are better. Your goal is reliable cable identification that lasts. Here are some tips to help you decide:
- Use adhesive labels for quick, temporary identification
- Choose engraved or heat-shrink labels for durability
- Opt for color-coded labels for easy visual grouping
- Select waterproof or weatherproof labels for outdoor or humid areas
- Consider Free Floating techniques for flexible and adaptable labeling solutions, which can be especially useful when working with electric dirt bikes or other portable equipment. Incorporating environmental resistance into your labeling choice ensures longevity in challenging conditions. Understanding how capacity and watt-hours influence your labeling needs can also help you select labels that suit different power environments.
Additionally, assessing the topical authority of your labeling system can help ensure your cables are easily identifiable and maintain their clarity over time.

270 PCS Tear Resistant Cable Labels, 9 Colors Waterproof Cable Tags Wire Labels for Management, Cord Label Can Write On, Self Adhesive Wire Label Printable for Laser Printer and Handwriting
Size and Quantity: Contains 9 colors, including red, orange, yellow, blue, light blue, purple, light green, green, and…
As an affiliate, we earn on qualifying purchases.
As an affiliate, we earn on qualifying purchases.
What Tools and Supplies Do You Need to Label Your Cables?

To get started with cable labeling, you’ll need a selection of tools and supplies tailored to your specific needs. Basic items include label makers or pre-printed labels for clear cable identification, along with durable markers for handwritten labels. You might also want cable ties or clips to keep cables organized and easily accessible. A pair of scissors or wire cutters can help trim labels or secure cables neatly. For advanced labeling techniques, consider color-coded labels or heat shrink tubing for extra durability. Adhesive labels work well for temporary identification, while heat shrink offers long-lasting results. Ensuring you have the right supplies makes cable identification straightforward, helping you stay organized and simplifying troubleshooting or upgrades later on. Additionally, understanding cable labeling best practices can enhance your overall organization and clarity. Using consistent labeling methods ensures that your system remains easy to navigate over time.
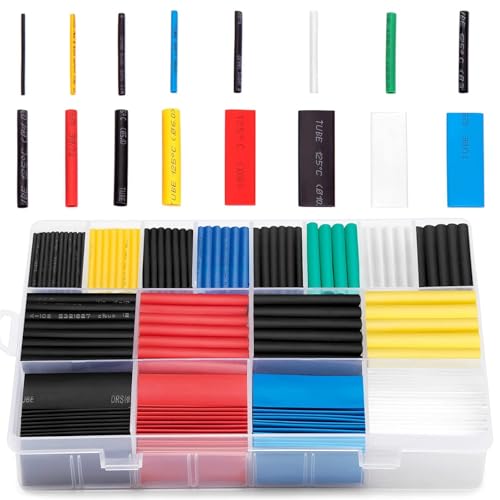
Ginsco 580 pcs 2:1 Heat Shrink Tubing Kit 6 Colors 11 Sizes Assorted Sleeving Tube Wrap Cable Wire Kit for DIY
BIG COLLECTION – Totally 580pcs,11 specifications: 1/24"(80pcs),1/16"(80pcs),1/12"(100pcs),3/64"(30pcs),1/8"(60pcs),9/64"(30pcs),5/32"(70pcs),1/5"(30pcs),15/64"(20pcs),5/16"(20pcs),25/64"(60pcs).
As an affiliate, we earn on qualifying purchases.
As an affiliate, we earn on qualifying purchases.
How to Label Your Cables Step-by-Step
Start by gathering all the tools and supplies you plan to use, such as label makers, markers, cable ties, and scissors. To begin labeling, decide on a clear system, like cable color coding, to easily identify each cable. Use your label maker or a permanent marker to write concise, legible labels that indicate each cable’s purpose. Wrap labels securely around the cable or attach them with cable ties, ensuring they’re visible and not too tight. For added label durability, consider using weatherproof or laminated labels, especially in areas prone to dust or moisture. Keep your labeling consistent by sticking to a color code or numbering system. This organized approach makes future troubleshooting and upgrades faster and smoother. Additionally, understanding the importance of cable management can help prevent tangling and damage over time, ensuring your setup remains organized and efficient. Proper labeling also aids in minimizing interference, maintaining optimal signal quality, and prolonging the lifespan of your equipment. Regularly reviewing and updating your labels can further enhance your overall cable organization strategy. Incorporating proper storage techniques can further protect your cables from environmental damage and extend their lifespan.
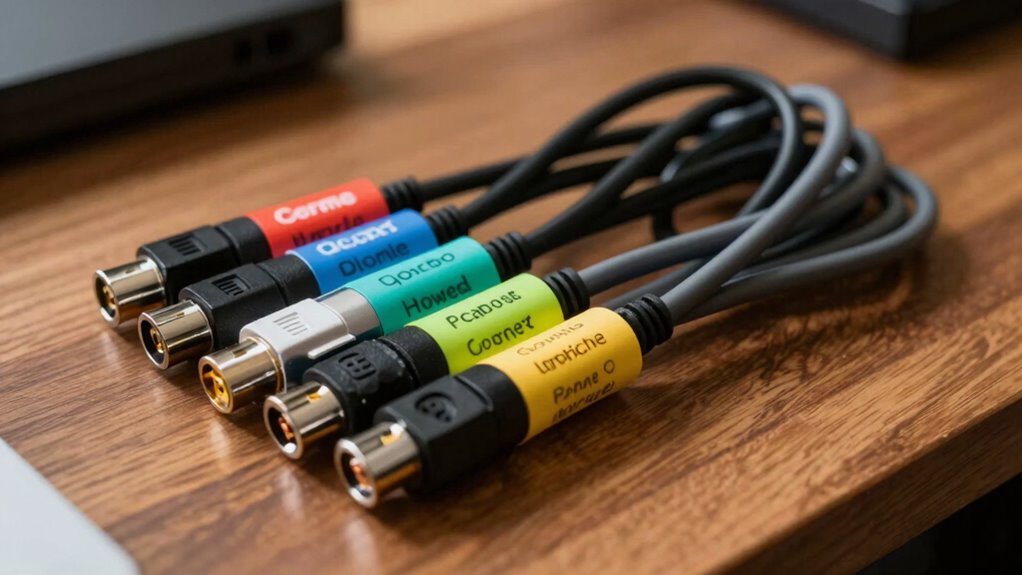
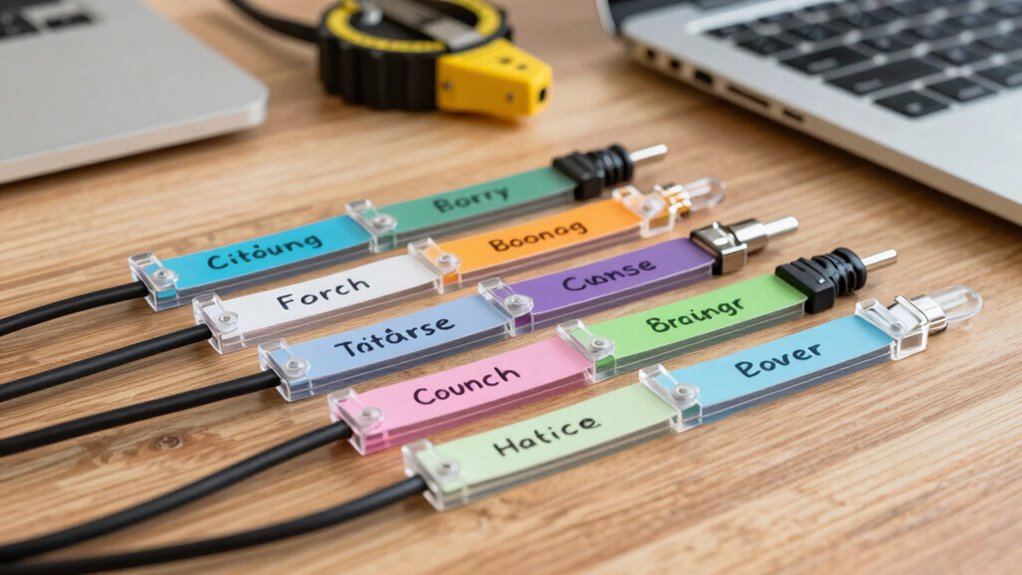
How to Create Neat and Durable Cable Labels
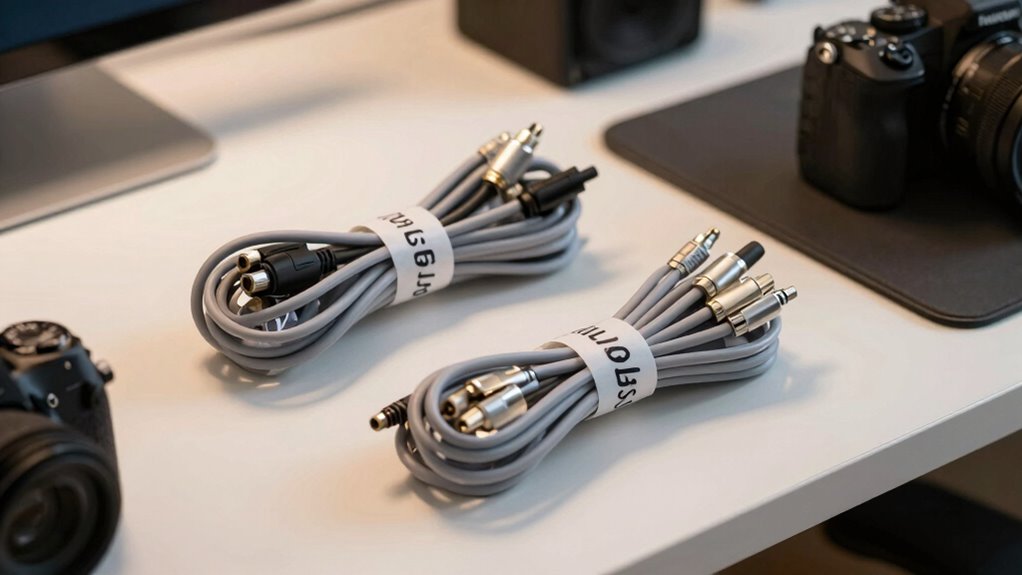
Creating neat and durable cable labels begins with selecting the right materials. Use high-quality adhesive labels that stick securely without peeling over time. These labels should be resistant to dust, moisture, and temperature changes to ensure longevity. Incorporate color coding to easily identify different cables at a glance—choose distinct colors for power, data, and audio cables. Write clearly with a permanent marker or print labels with a laser printer for sharp, legible text. Keep labels concise, aligning text neatly for a professional look. Avoid overcrowding labels to maintain clarity. Properly applying labels involves cleaning the cable surface first to guarantee adhesion. Additionally, choosing appropriate label materials designed specifically for cable environments can significantly enhance durability. Using labels that are resistant to environmental factors helps maintain clarity over time. To further improve visibility and organization, consider using label placement strategies that prevent labels from peeling or fading over time. Ensuring proper adhesion techniques can also help the labels stay securely in place through regular use. Employing environmentally resistant labels can further extend the lifespan of your cable labels, especially in challenging conditions. With the right materials and techniques, your labels will stay neat, legible, and durable through regular use.
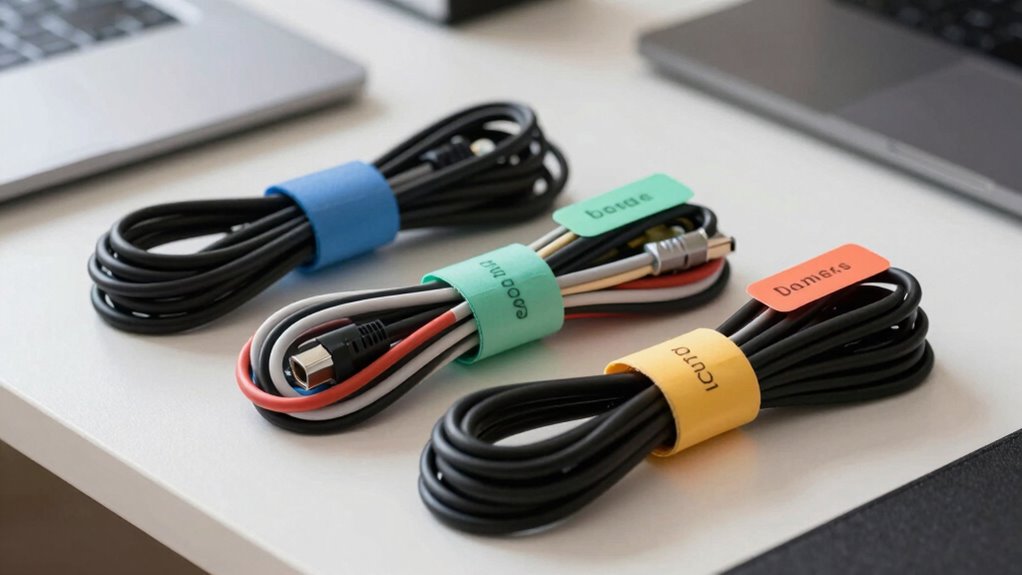
How to Organize and Store Your Labeled Cables for Easy Access
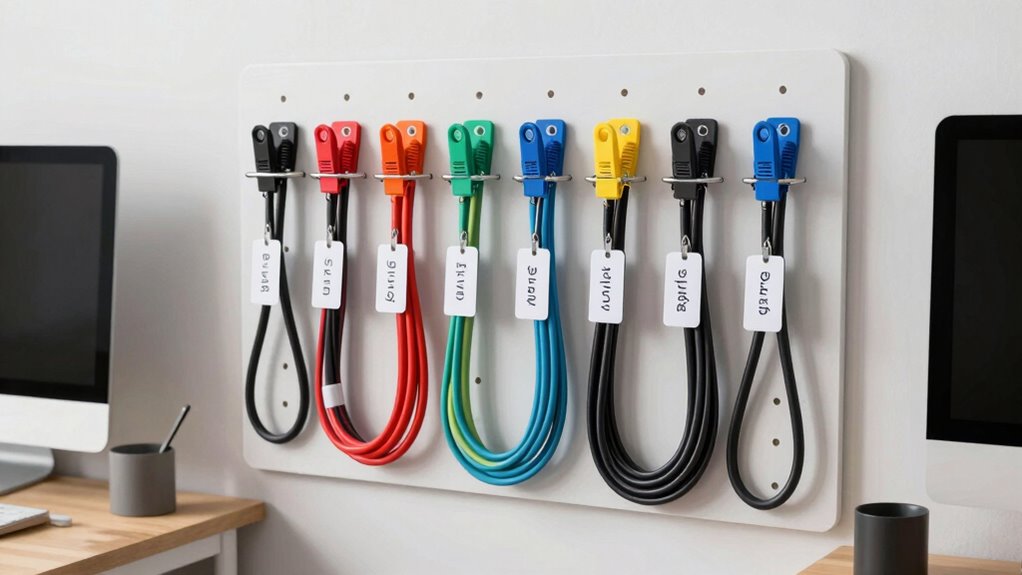
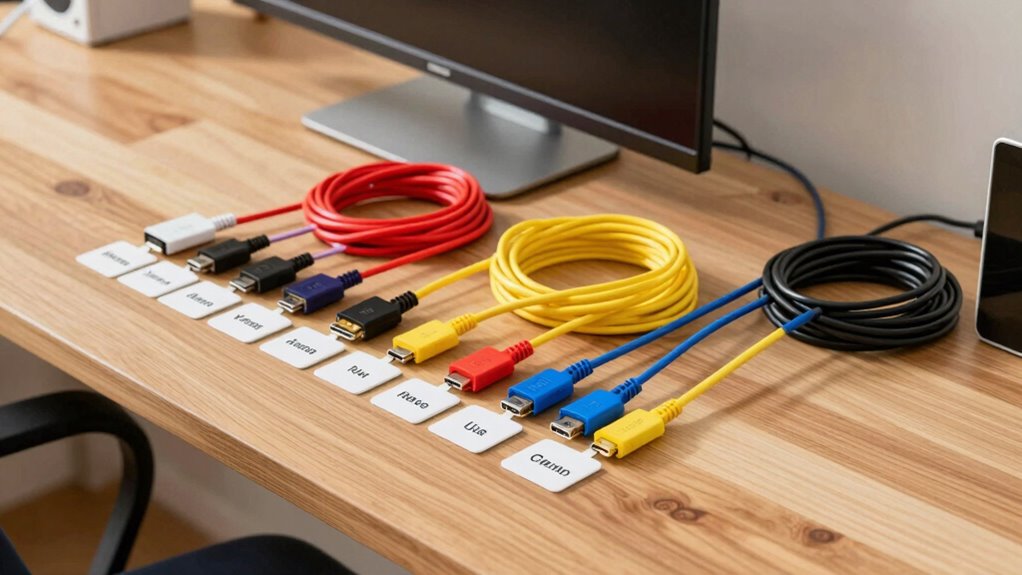
Once your cables are labeled neatly and securely, organizing them for quick access becomes the next step. Use cable color coding to quickly identify types, such as red for audio and blue for data. Implement label placement strategies by attaching labels at both ends of each cable to prevent confusion during retrieval. Store cables in clearly labeled compartments or bins, grouping similar types together for efficiency. Wrap cables neatly using velcro straps or cable ties, avoiding tangles. Consider using cable organizers with dedicated slots or hooks to keep your collection tidy. This approach reduces clutter and saves time when you need a specific cable. Proper organization guarantees you can locate and connect your cables swiftly, enhancing your overall home tech setup.
What Are Common Challenges When Labeling Cables and How Can You Fix Them?
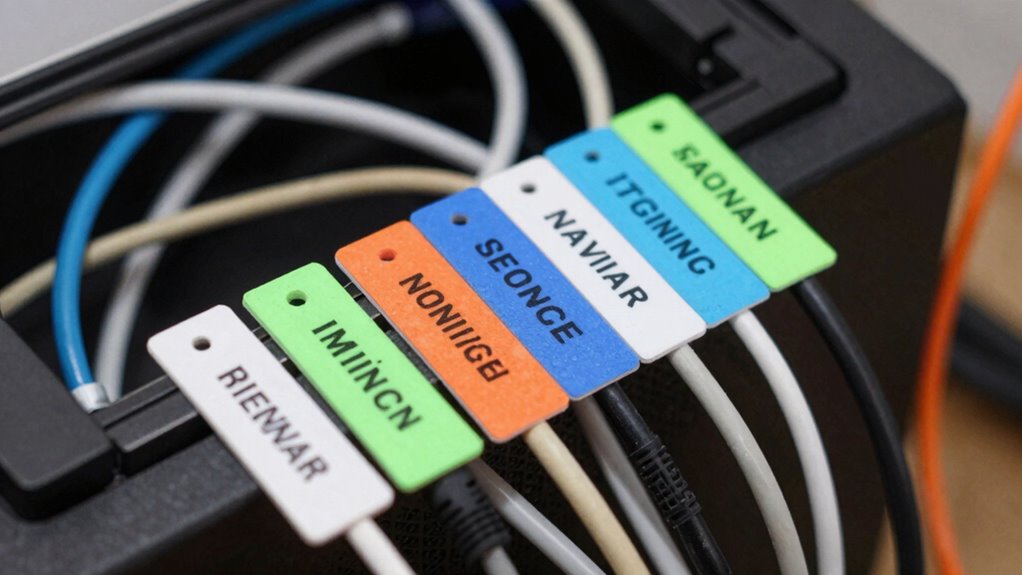
Labeling cables can be tricky because labels often peel off, fade over time, or become unreadable in tight spaces. This can lead to cable confusion, making it hard to identify which cable is which. Common label mistakes include using fragile labels that don’t stick well or choosing small print that’s hard to read later. To fix this, use durable, waterproof labels designed for cables. Apply them firmly in clean, dry areas, and choose larger fonts for clarity. For tight spots, consider wrap-around labels or color coding to enhance visibility. Regularly check and replace worn labels to prevent confusion. Additionally, considering water damage when selecting labels ensures longevity in humid or damp areas. Using proper labeling techniques can significantly improve your organization and reduce frustration. Incorporating waterproof labels can further enhance durability in various environments. To ensure that labels stay intact over time, selecting labels with strong adhesive properties is essential. By avoiding these mistakes and implementing better labeling practices, you’ll keep your home tech setup organized and easy to manage.
Additional Tips to Keep Your Home Tech Setup Clutter-Free
Keeping your home tech setup tidy is easier when you focus on streamlining cable management and regularly reorganizing your cords. By staying on top of maintenance, you can prevent clutter from building up and make certain everything stays functional. A consistent routine helps maintain a clean, efficient tech environment.
Streamline Cable Management
Effective cable management starts with simple organization strategies that prevent your home tech setup from becoming a tangled mess. To streamline cable management, focus on reducing clutter and making your setup more efficient. Use cable clips or sleeves to bundle wires neatly, especially for wireless devices and smart home integration tools. Label cables clearly so you can quickly identify and troubleshoot issues. Consider installing wall-mounted cable organizers or channels to keep cords off surfaces. Additionally, group related cables together to minimize tangling and make future upgrades easier. By implementing these tips, you’ll enjoy a cleaner, more accessible setup that enhances your home’s functionality and aesthetics. Proper management not only looks better but also prolongs the life of your devices and simplifies daily use.
Regular Maintenance and Reorganization
Regular maintenance and reorganization are essential to keep your home tech setup clutter-free and functioning smoothly. Periodically reviewing and updating your cable color coding helps you quickly identify connections and prevents confusion over time. Check the labels’ readability to ensure they haven’t faded, maintaining label longevity. If labels become worn or difficult to read, replace or reapply them promptly. Unplug unused cables and organize loose wires to prevent tangling and accidental disconnections. Reassessing your setup also provides an opportunity to streamline cables, reducing clutter and improving airflow. Keeping your cables labeled, clean, and organized through regular upkeep minimizes troubleshooting time and prolongs the lifespan of your equipment. Consistent reorganization ensures your home tech remains efficient and easy to manage.
Frequently Asked Questions
How Often Should I Update My Cable Labels?
You should update your cable labels whenever you notice label damage or if your setup changes. Label durability can diminish over time due to wear and tear, so regular inspection is key. Typically, replacing labels every 1-2 years helps ensure clarity and organization. If labels become illegible or peel, it’s time for a replacement. Staying proactive with label replacement frequency keeps your home tech system neat and easy to troubleshoot.
Can Cable Labels Be Removed Without Damage?
Yes, cable labels can be removed without harm if you’re careful. Use a gentle approach, such as peeling slowly or applying a bit of heat with a hairdryer to loosen adhesive. This helps prevent damage to the cable or its insulation. Avoid ripping labels off quickly, as that can cause damage. Taking your time during label removal ensures damage prevention and keeps your cables in good condition.
What Are the Best Waterproof Labeling Options?
For waterproof labeling, you should use waterproof tape and waterproof markers. Waterproof tape adheres securely to cables and resists water, ensuring your labels stay intact. Waterproof markers are designed to write clearly on the tape and won’t smudge or wash away when exposed to moisture. Combining these two options provides durable, water-resistant labels that are perfect for outdoor or humid environments, helping you keep your cables organized and protected.
How Do I Prevent Labels From Peeling Over Time?
To prevent labels from peeling over time, you should choose labels with durable adhesive specifically designed for long-term use. Conduct durability testing on a small section before full application to verify the adhesive holds up. Also, make sure the surface is clean and dry before applying the label. Using high-quality labels with strong adhesive ensures they stay securely attached, even in challenging conditions, reducing the risk of peeling.
Are There Eco-Friendly Labeling Alternatives?
Yes, you can choose eco-friendly labeling options like biodegradable labels and reusable labels. Biodegradable labels break down naturally, reducing environmental impact, while reusable labels can be written on with dry erase markers and easily cleaned, making them perfect for multiple uses. These alternatives help you organize your cables sustainably without sacrificing functionality, ensuring your home tech labeling stays eco-friendly and effective over time.
Conclusion
Just like a skilled librarian organizes a vast collection, labeling your cables keeps your home tech neat and accessible. With the right tools and a little patience, you’ll turn chaos into clarity. Remember, every cable labeled is a step toward a more efficient and stress-free setup—making your tech feel less like a mystery and more like a masterpiece. Embrace the process, and soon, you’ll be the hero of your own organized home.