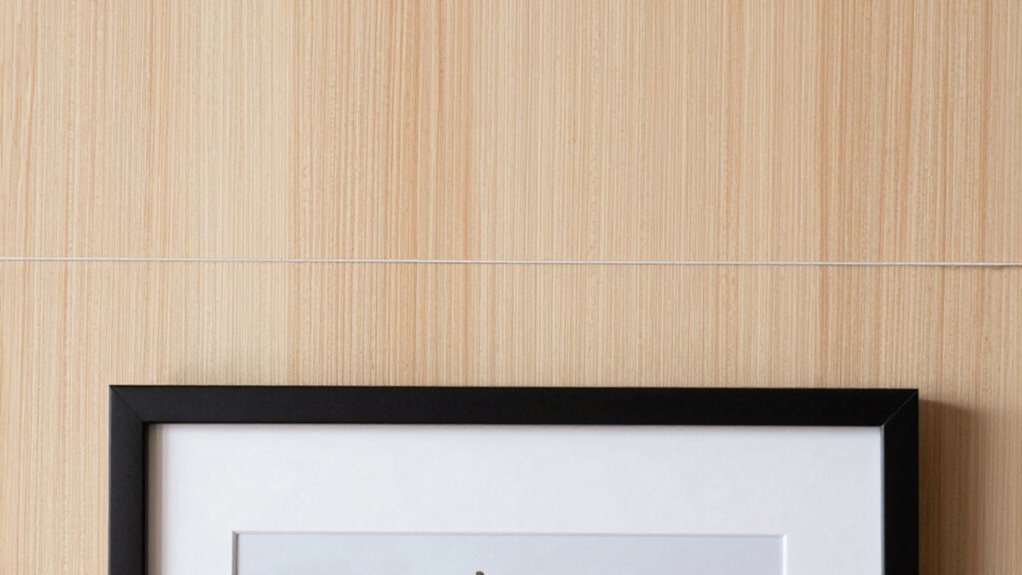

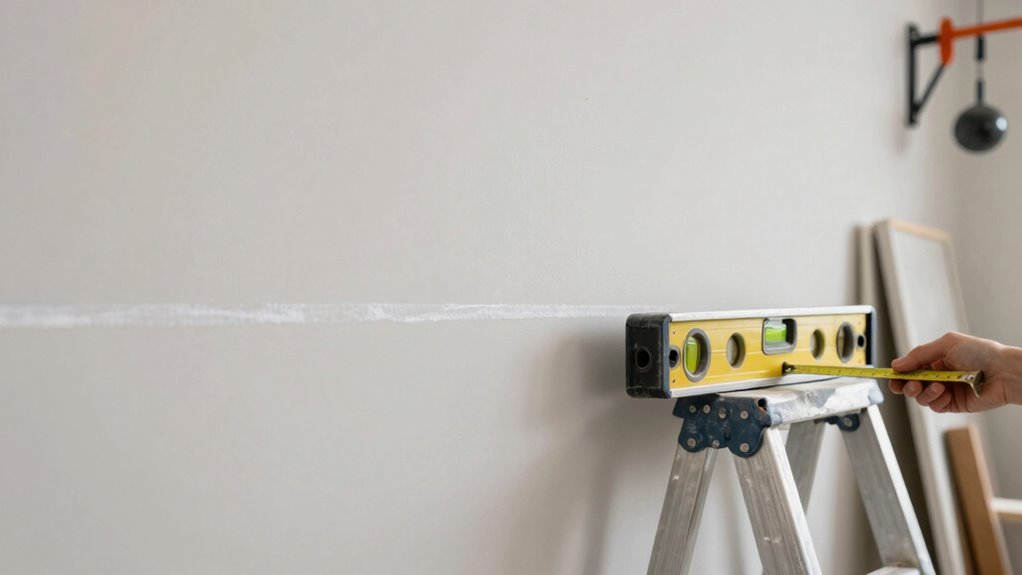
To hang anything straight with one simple reference line, start by choosing a spot on the wall that’s smooth, clean, and easy to see. Use a level to draw a straight, level line at your desired height, verifying its accuracy with multiple checks. Mark the points for your artwork along this line. With the right tools and careful measurement, you’ll guarantee everything hangs perfectly aligned. Keep going to learn how to make this process even easier.
Key Takeaways
- Establish a level, straight reference line at the desired height using a laser level or bubble level for accuracy.
- Mark the line with fine-point pencils or painter’s tape, ensuring it’s straight and clearly visible.
- Use the reference line to measure and mark the hanging points for each item, maintaining consistent spacing.
- Select appropriate hardware based on wall type and weight, and install along the reference line for secure, straight hanging.
- Verify alignment with a level after hanging, making small adjustments to ensure everything is perfectly straight.
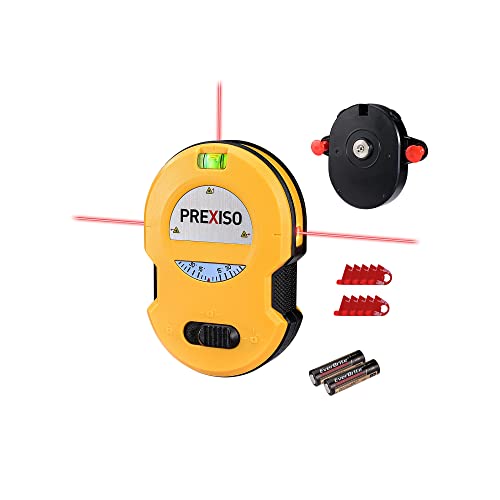
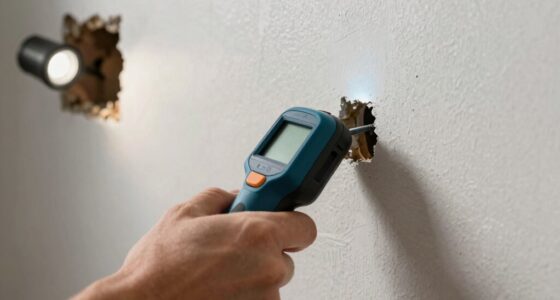
PREXISO Multi Surface Laser Level LED Light Vial, 30Ft Horizontal & Vertical Line Laser with Wall Mount Base, 2 Pins, 10 Sticker, 2 AA Batteries for Hanging Frames & Picture, Construction Wall Writing
One-switch Operation: Simple one-switch operation powers 3 laser lines on and off, projecting 3 level line onto surface;…
As an affiliate, we earn on qualifying purchases.
As an affiliate, we earn on qualifying purchases.
Why Using a Single Reference Line Makes Hanging Artwork Easy
Using a single reference line simplifies the process of hanging artwork because it provides a consistent baseline to align everything. When you use one line, it becomes easier to focus on art placement, ensuring each piece is positioned at the right height and spacing. This method helps maintain visual balance across your wall, preventing artwork from looking uneven or cluttered. Additionally, a clear reference point can help you measure accurately for multiple pieces, reducing the need for repeated adjustments. With a clear reference point, you avoid guesswork and uneven adjustments, saving time and frustration. The line acts as a guide, making it straightforward to measure and hang multiple pieces uniformly. Incorporating art placement principles can further enhance your wall arrangements. Additionally, understanding visual balance concepts ensures your display is harmonious and pleasing to the eye. When you establish a consistent baseline, your overall layout becomes more cohesive and professional-looking. Using a level tool can help ensure your reference line is perfectly straight, further improving your results. Overall, a single reference line streamlines the process, giving you confidence that your artwork will be perfectly aligned and aesthetically pleasing.

Torpedo Level Magnetic, Firecore 9 Inch Shockproof Small Leveler Tool with 3 Bubble Spirit Level 45 90 180 Degree, Construction Levelers for Hanging Pictures Install Shelf Home Renovation
Torpedo Level Magnetic: Featuring a magnetic base, Firecore spirit level attaches securely to metal surfaces for a variety…
As an affiliate, we earn on qualifying purchases.
As an affiliate, we earn on qualifying purchases.
How to Choose the Best Spot for Your Reference Line

Choosing the right spot for your reference line is essential because it sets the foundation for evenly hanging your artwork. First, examine your wall surface to verify it’s smooth, clean, and free of imperfections that could affect the line’s accuracy. A textured or uneven wall might require extra care or different methods. Next, consider lighting conditions; avoid placing your reference line where shadows or glare could obscure your measurements. Natural light from windows or harsh overhead lighting can create shadows that make it difficult to see your markings clearly. Ideally, choose a spot with consistent, even lighting. This ensures your reference line remains visible and accurate, helping you hang your artwork straight and at the perfect height. Additionally, understanding the wall surface type can help you select the most effective hanging method and tools for a secure, straight result. Being aware of wall material characteristics can also influence your choice of hardware and hanging techniques, ensuring a long-lasting, professional-looking display. Moreover, considering wall texture can assist in choosing the appropriate hanging hardware for a smooth and secure installation. Recognizing the importance of proper lighting can further improve the accuracy of your measurements and final placement. To achieve the best results, it’s also helpful to know about the different types of wall surfaces and their unique requirements.

4 Rolls Premium Painters Tape, Blue Tape, Masking Tape, Paint Tape for Multi-Purpose, Painting, Painter's, DIY Crafts Arts (88yd =0.94IN*22yd*4) Decoration Labeling No Residue, Easy Removal
Professional Mask Tape – Multi-Surface adhesive tape made of high quality blue crepe paper not easy to lift…
As an affiliate, we earn on qualifying purchases.
As an affiliate, we earn on qualifying purchases.
Tools Needed for Hanging Artwork With a Reference Line
To hang your artwork accurately, you’ll need the right measuring tools and hanging hardware. Choosing the appropriate tools guarantees your reference line stays straight and your pieces hang perfectly. Let’s explore which tools and hardware options will give you the best results. Using proper safety tips when handling tools like nail guns and saws ensures your project remains safe and successful. Additionally, selecting quality hardware can prevent damage and ensure your artwork stays securely in place over time. Proper measurement techniques also help minimize infection risks, especially when installing items around sensitive areas, ensuring a safe and clean process for your space. Employing accurate leveling techniques can further enhance the precision of your hanging project and maintain the aesthetic balance of your wall display. Incorporating home security considerations can also help protect your artwork from theft or damage.
Measuring Tools Selection
A reliable measuring tool is essential for accurately hanging artwork with a reference line. A measuring tape helps you determine the exact height and position of your piece, ensuring consistency across multiple items. A level tool is vital for confirming that your reference line and artwork are perfectly straight. Choose a sturdy, easy-to-read measuring tape that can extend to the needed lengths without slipping. For hanging accuracy, pick a high-quality level tool with a clear bubble or digital readout. Together, these tools let you mark precise measurements and verify the alignment of your reference line, making the process smoother and more accurate. proper measuring techniques can significantly improve your hanging results. Using precision tools ensures your artwork stays perfectly aligned and straight every time.
Hanging Hardware Options
When it comes to hanging artwork with a reference line, selecting the right hardware is essential for guaranteeing stability and a clean look. You have several options to contemplate:
- Heavy-duty nails or hooks for quick, basic hanging.
- Alternative hardware like adhesive strips or Command hooks for damage-free solutions.
- Decorative hooks that add style while securely holding your artwork.
Choose hardware based on weight, wall type, and aesthetic. For lightweight pieces, decorative hooks or adhesive options work well and keep the wall pristine. For heavier artwork, opt for sturdy hooks or anchors that provide extra support. Always match the hardware to your wall material and the weight of your piece to ensure it stays straight and secure. Understanding wall material compatibility is crucial for selecting the most effective hardware. Additionally, considering the weight capacity of your chosen hardware helps prevent accidental falls or damage. Using the correct anchoring methods tailored to your wall type can further enhance security and prevent damage over time. Being aware of installation techniques can also influence the stability and longevity of your hanging setup. Properly assessing these factors ensures a secure and level display that maintains its appearance over time.
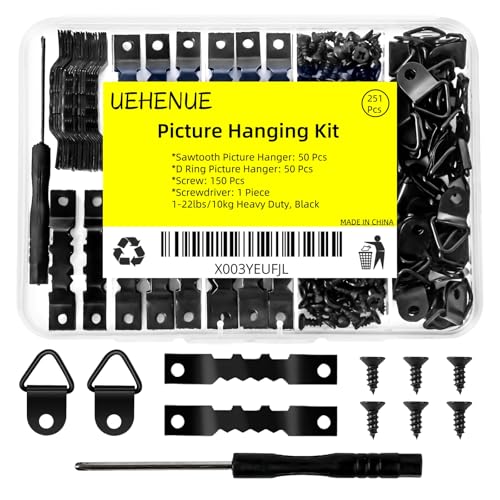
UEHENUE 251Pcs Picture Hanging Kit, Include 50 Sawtooth Picture Hangers, 50 D Rings, 150 Screws and Screwdriver, Heavy Duty Picture Frame Hanging Hardware for Wall Artworks Frame Canvas Mounting
Versatile Picture Hanging Kit: Upgraded five-grid vertical solid plastic box. Includes 50 sawtooth picture frame hangers, 50 D…
As an affiliate, we earn on qualifying purchases.
As an affiliate, we earn on qualifying purchases.
How to Mark Your Reference Line Precisely
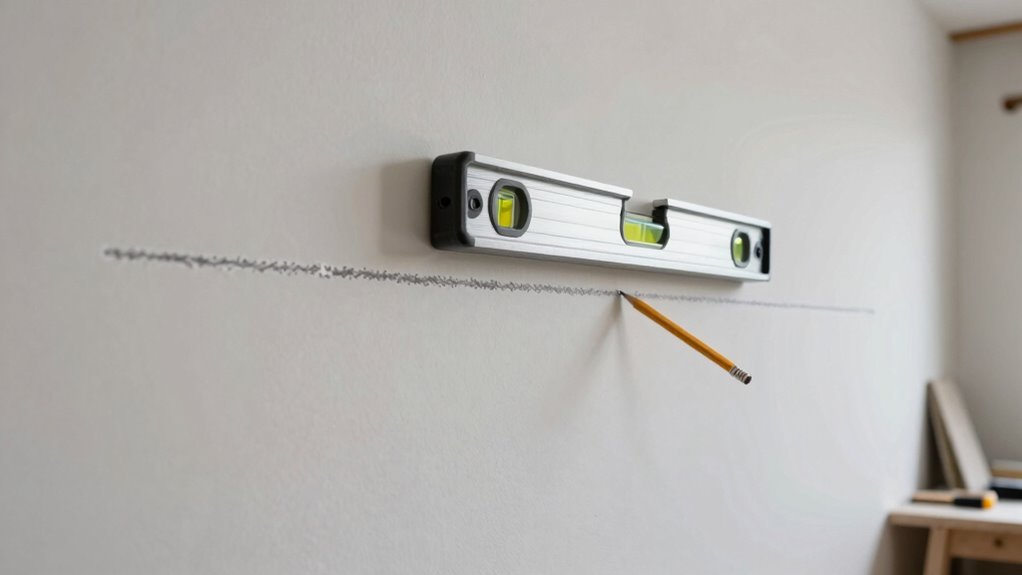
Have you ever struggled to hang something level because your reference line wasn’t accurate? To avoid this, focus on measuring accuracy and marking precision. Use a reliable measuring tape or a laser level to establish your line, ensuring it’s straight and at the correct height. Double-check measurements before marking, so your line remains true. When marking, use a fine-point pencil or painter’s tape for clear, precise lines. Keep your hand steady and avoid rushing, as small errors can lead to crooked hangings. Take your time to verify the line from multiple angles. Remember, a precise reference line is the foundation for hanging anything straight, so accuracy in measuring and marking is essential to achieving professional-looking results. Incorporating proper tools can further improve your accuracy and confidence. Paying attention to measurement accuracy ensures your project turns out just right.
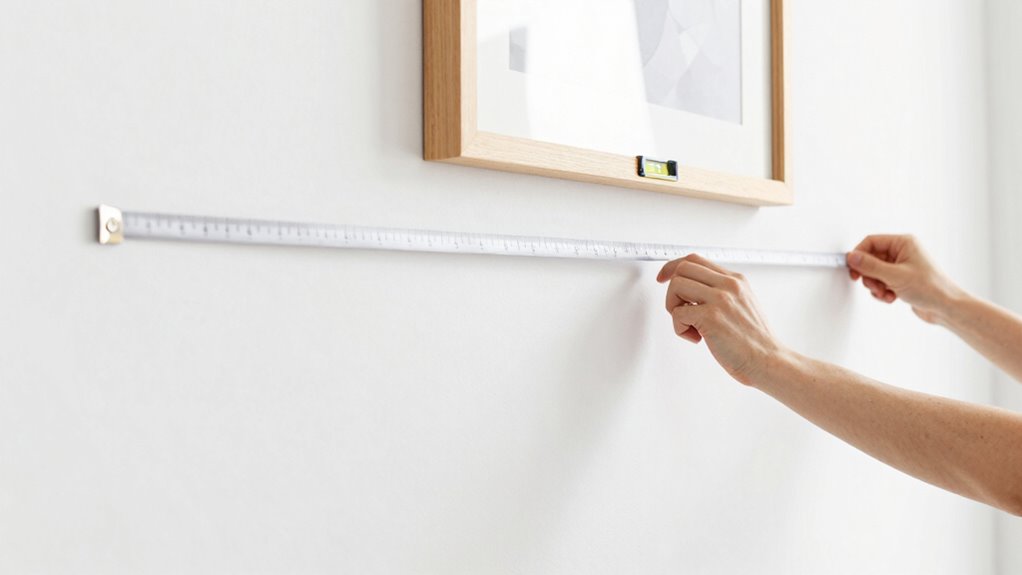
How to Hang Multiple Pieces in a Perfect Line

Once you’ve established a precise reference line, hanging multiple pieces in a straight line becomes straightforward. To achieve perfect art placement, follow these hanging techniques:
- Measure the space between each frame, ensuring consistent gaps for visual harmony.
- Mark the top centers of each piece along the reference line to keep everything aligned.
- Use a level to verify that all marks are perfectly straight before hanging.
This method ensures your artwork or photos stay in a clean, organized line. Keep in mind, spacing and height are key to a polished look. With these steps, hanging multiple pieces in a perfect line will look professional and cohesive, transforming your wall into a well-curated display.
Hanging on Different Wall Types: Tips and Tricks
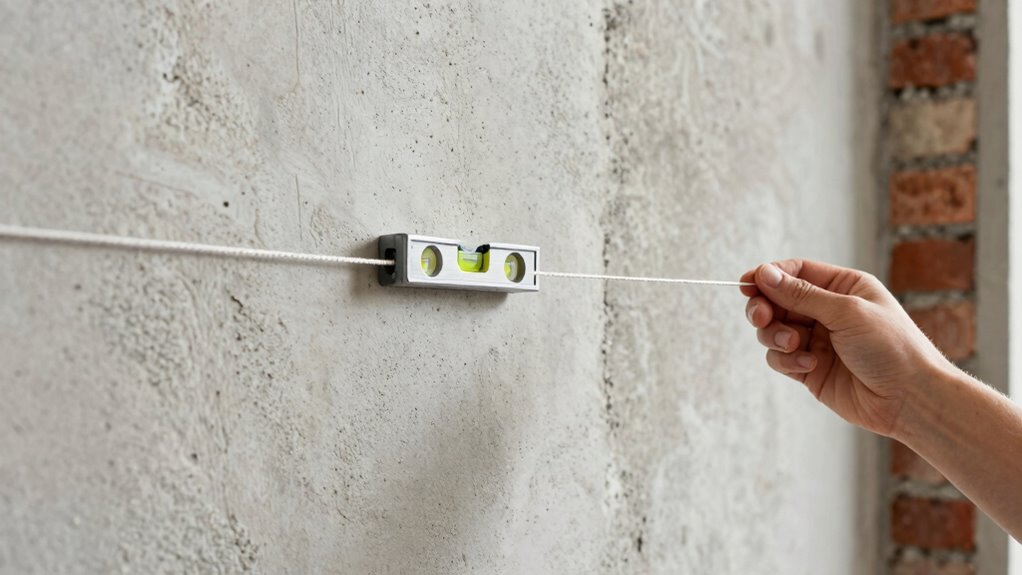
Different wall surfaces require different hanging techniques to guarantee your items stay secure and look their best. For smooth walls like drywall or plaster, use standard anchors and nails, ensuring your reference line stays level. If you’re working with textured walls, such as brick or stucco, consider using masonry screws or specialized anchors to get a secure hold. When hanging artwork with gallery lighting, ensure the fixtures are compatible with your wall type to avoid damage. Wall texture can also impact how your pieces align; adjust your reference line accordingly to compensate for uneven surfaces. Always test your anchors and hooks before hanging valuable items, and remember that different surfaces may require additional tools or techniques to keep everything perfectly straight and secure.
Troubleshooting Common Issues When Using a Reference Line

Using a reference line is a reliable way to guarantee your items hang straight, but it can sometimes lead to issues like crooked placement or misalignment. When dealing with cluttered walls or uneven surfaces, these problems become more common. To troubleshoot:
- Check for obstructions or clutter that might interfere with your line, causing inaccurate measurements.
- Confirm your surface is even; uneven walls can shift your reference line, resulting in crooked hanging.
- Ensure your tape or chalk line is taut and straight, especially on irregular surfaces, to prevent sagging or deviations.
Final Checks to Make Your Artwork Look Professional

Before you hang your artwork for the final time, make certain to perform some quick checks to guarantee everything looks polished and professional. Start by evaluating the color coordination; confirm your artwork complements the wall color and existing decor. Check that the frame’s finish matches or enhances nearby elements. Examine the wall textures—rough or textured surfaces might require additional adjustments, like using appropriate hangers or spacers, to ensure the piece sits flush. Confirm that the placement feels balanced and aligned with other elements in the room. Use your level to verify the artwork is perfectly straight. Finally, step back and view it from different angles to spot any inconsistencies or distractions. These final checks will make your display look intentional and stylish.
FAQS: Common Questions About Hanging Artwork With a Reference Line
Have questions about using a reference line to hang your artwork straight? Many people face common challenges like uneven spacing or misaligned pieces, but these can be corrected with proper setup. Let’s explore how to troubleshoot these issues and ensure your artwork hangs perfectly every time.
Common Hanging Challenges
Hanging artwork with a reference line can sometimes lead to challenges, especially if you’re aiming for perfect alignment. One common issue is inconsistent artwork spacing, which can make your display look uneven. Another challenge involves dealing with different wall surfaces, like textured or uneven walls, that make it hard to get a clean, straight line. Additionally, you might struggle with positioning multiple pieces at the right height and distance from each other. To overcome these issues, measure carefully and mark your reference line precisely. Test on small sections first, especially on tricky wall surfaces. Keep in mind that adjusting spacing and using appropriate tools can help you achieve a balanced, professional look, even with imperfect wall surfaces or complex artwork arrangements.
Proper Reference Line Setup
Setting up a proper reference line is essential for hanging artwork accurately. It helps guarantee visual alignment and improves measuring accuracy. Start by choosing a straight, level line at the desired height. Use a level to certify it’s perfectly horizontal. This reference acts as your guide, making it easier to position your artwork consistently. To keep things clear, consider the following setup:
| Step | Action |
|---|---|
| 1 | Mark the wall at eye level or desired height |
| 2 | Use a level to draw a straight line |
| 3 | Confirm the line is level with a second check |
| 4 | Measure from the line to hang points |
| 5 | Adjust artwork to align with the line |
This setup minimizes errors, ensuring your display looks balanced and professional.
Troubleshooting Misaligned Art
Even with a carefully drawn reference line, misalignment can still occur due to uneven wall surfaces, improper measuring, or shifting during hanging. To fix art placement and achieve proper visual balance, consider these steps:
- Check if the wall is uneven by using a level; adjust the artwork’s position accordingly.
- Re-measure the distance from the reference line to the art’s edges, ensuring consistent spacing.
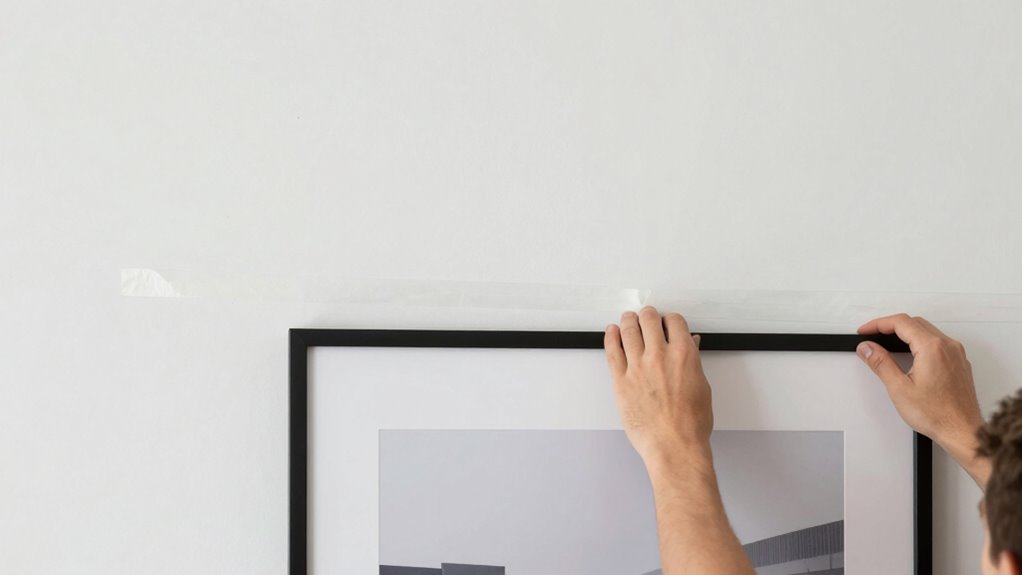
- Use painter’s tape or small nails to temporarily hold the art, then step back to assess its placement before finalizing.
If the art still feels off, tweak its position slightly rather than re-hanging entirely. Small adjustments help you fine-tune art placement and restore visual balance. Patience ensures your artwork hangs perfectly straight.
Frequently Asked Questions
Can I Use a Reference Line for Uneven or Textured Walls?
Yes, you can use a reference line on uneven surfaces or textured walls, but it requires extra care. For textured walls, draw your line lightly or use painter’s tape to prevent smudges. On uneven surfaces, make sure your line is level and adjust for bumps or dips. Use a laser level or a long straightedge for accuracy. This way, your hanging will look straight, even on challenging walls.
How Do I Remove or Adjust the Reference Line After Hanging?
Removing or adjusting your reference line is like peeling away a band-aid—quick and simple. To remove it, gently erase with a damp cloth or peel off tape if you used painter’s tape. If you need to adjust the line, lightly mark the new position and re-apply the line with a pencil or painter’s tape. Keep the process smooth; your wall will thank you for the gentle touch.
Is a Reference Line Suitable for Hanging Heavy or Large Artwork?
A reference line can work for hanging heavy or large artwork if it’s sturdy and the wall is compatible. Check the weight capacity of your hanging tools and verify the wall can support the weight. Use heavy-duty hooks or anchors, and double-check the line’s stability. If the artwork exceeds the line’s capacity or the wall isn’t strong enough, consider alternative methods like wall studs or specialized hardware for added security.
What Are Alternative Methods if I Don’T Have a Level or Ruler?
When you’re flying blind without a level or ruler, think of your space as a blank canvas waiting for your touch. Use alternative tools like a smartphone app, a piece of string, or even a credit card to create a straight line. Creative methods such as taping painter’s tape as a guide or aligning objects with existing features turn chaos into order, helping you hang with confidence and precision.
How Do I Maintain the Reference Line if I Move the Artwork Later?
To maintain accuracy when repositioning artwork, you should mark the reference line lightly with painter’s tape or a removable pencil mark. Keep track of the original measurements and placement points, so you can re-align the artwork precisely. When you move the artwork, carefully match the marks or tape positions, ensuring the reference line stays consistent. This way, you can easily rehang your artwork exactly where it was, maintaining straightness.
Conclusion
Now that you’ve learned how a simple reference line can make hanging artwork effortless, it’s funny how a small trick can turn chaos into perfect symmetry. Whether you’re hanging a single piece or a gallery wall, that one line becomes your secret weapon. So next time you find yourself juggling nails and measurements, remember—you’re just one reference line away from professional-looking decor. Happy hanging, and enjoy the coincidence of how easy it all becomes!