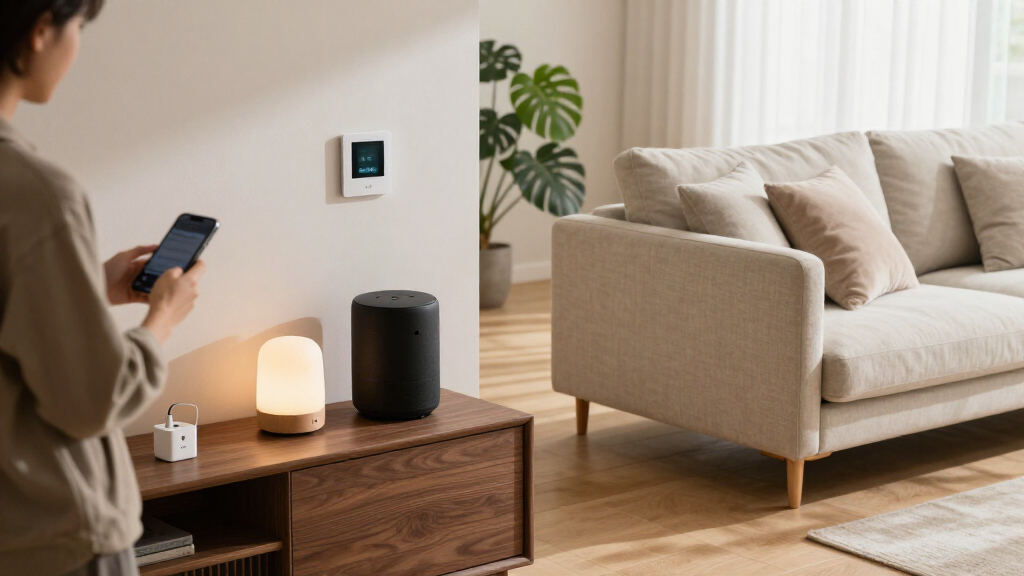
This guide walks you through setting up the latest smart home devices — smart speakers and displays, smart bulbs and plugs, video doorbells, cameras, thermostats, and locks — and connecting them so they work together from one app. By the end, you will have a functioning smart home hub, devices installed and named clearly, voice control working, and at least one automation (such as lights that turn on at sunset) running on its own.

Get the latest gadgets delivered free — and shop member deals
- Fast, free delivery on millions of items
- Access to Prime Big Deal Days deals on October 6–7
- Prime Video, Amazon Music and more included

Amazon Echo Show 11 (Newest Model) – Full-HD 11" Smart Display with Spatial Audio, Graphite
- ✔ Display: 11" Full-HD touchscreen
- ✔ Color: Graphite
- ✔ Processor: AZ3 Pro chip

Amazon Echo Show 5 (Newest Model) Smart Display with Alexa – Cloud Blue
- ✔ Display: 5.5 inches
- ✔ Camera: 2 MP built-in
- ✔ Voice Assistant: Alexa (designed for Alexa+)

Amazon Echo Show 15 (Newest Model) – Full HD 15.6" Smart Display with Built-in Fire TV
- ✔ Display Size: 15.6 inches
- ✔ Resolution: Full HD (1080p)
- ✔ Zoom: 3.3x
This guide is written for beginners. No wiring expertise is required for most modern devices; where any electrical work is involved (smart switches, thermostats), the guide flags it and tells you when to hire an electrician instead. Budget two to four hours total, though you can spread installation across several days.
Difficulty: Beginner | Time: 2-4 hours (spread across device installs)
What You’ll Need
Tools & Materials:
- Smartphone or tablet running a current OS (iOS or Android)
- Reliable Wi-Fi with a strong 2.4 GHz signal where devices will be installed (most smart devices require 2.4 GHz specifically)
- A smart home platform choice: Amazon Alexa, Google Home, or Apple Home
- At least one smart speaker or display to act as your voice-control hub
- Smart devices to install (bulbs, plugs, thermostat, lock, doorbell, or camera)
- Screwdriver set (Phillips head most commonly needed)
- A ladder or step stool for doorbell and camera installation
- Fresh batteries where required (many locks and sensors use AA or CR123A)
- Your Wi-Fi network name (SSID) and password, written down or copied to clipboard
Knowledge:
- Ability to install apps and sign in to accounts on your phone
- Knowing how to turn off power at your circuit breaker (only needed for switches and thermostats)
- Basic familiarity with your home’s layout and Wi-Fi coverage
Before buying anything, decide on one platform — Alexa, Google Home, or Apple Home — and stick with it for every device. Check each product box or listing for the “Works with Alexa,” “Works with Google,” or “Works with Apple Home” badge. Mixing devices across incompatible platforms is the single most common reason smart home setups become frustrating. If you own an iPhone and value privacy, Apple Home is the natural fit; if you already use Amazon or Google services heavily, choose accordingly.
If your Wi-Fi router is more than four or five years old, consider upgrading it first. A mesh Wi-Fi system (such as Eero, Nest Wifi, or Deco) eliminates dead zones that would otherwise disconnect cameras and locks at the far ends of your home.
Amazon Echo Show 11 (Newest Model) – Full-HD 11" Smart Display with Spatial Audio, Graphite
The Echo Show 11 hits the sweet spot that the other two models flank on either side. Its 11-inch Full-HD touchscreen offers 60% more viewing area than the Echo Show 8, which makes recipes, camera feeds, and video calls genuinely comfortable to view — something the Echo Show 5’s 5.5-inch screen simply can’t match. At the same time, it avoids the Show 15’s wall-mounted commitment, sitting happily on a counter or shelf.What earns it the top spot is the built-in smart home hub, which neither the Show 5 nor the Show 15 emphasizes as a core capability. If you’re building out lights, plugs, and sensors, this model can replace separate hub hardware entirely. The AZ3 Pro chip keeps Alexa+ responsive, and the audio is the standout here: room-filling spatial audio with up to 2x the bass of the Echo Show 8 (2023), making it a legitimate music player rather than an afterthought. The auto-framing camera with 3.3x zoom keeps you centered on calls, and Omnisense presence detection enables temperature- and occupancy-based routines.The tradeoffs are real, though. Alexa+’s more advanced features may sit behind a subscription, and the footprint is too large for a nightstand — that’s the Show 5’s territory.
Pros:
- Large Full-HD display with 60% more viewing area than Echo Show 8
- Built-in smart home hub eliminates separate hub hardware
- Room-filling spatial audio with up to 2x the bass of the Echo Show 8 (2023)
- Auto-framing camera with 3.3x zoom and strong privacy controls
Cons:
- Alexa+ features may require a subscription
- Footprint too large for nightstands or very tight spaces
Best for: Buyers who want one device that handles smart home control, video calls, music, and daily assistance without a separate hub
Not ideal for: Anyone shopping for a bedside display or those unwilling to consider a possible Alexa+ subscription
Bottom line: The Echo Show 11 is the most complete smart home device in this lineup, balancing screen size, audio, and hub functionality better than either sibling.
“The Echo Show 11 is the most complete smart home device in this lineup, balancing screen size, audio, and hub functionality better than either sibling.”
Amazon Echo Show 5 (Newest Model) Smart Display with Alexa – Cloud Blue
Where the Show 11 asks for counter space and the Show 15 asks for wall space, the Echo Show 5 asks for almost nothing. Its 5.5-inch screen is the right size for a nightstand, desk, or bathroom shelf, where the bigger models would be absurd. This pick makes the most sense for buyers who already own a larger display elsewhere and want a second or third touchscreen for alarms, weather, and quick smart home controls.The audio story has improved meaningfully in this generation: 2x the bass and clearer vocals mean it outperforms what you’d expect from something this small, though it can’t fill a living room the way the Show 11’s spatial audio can. Video calling works via the 2 MP camera, but compared with the Show 11’s auto-framing 3.3x zoom camera, this is clearly a secondary feature here — fine for a quick check-in, not for long family calls.Privacy is arguably the best in this lineup for its size, with a physical camera shutter alongside the mic/camera-off button — a shutter the Show 11 lacks. We also rate the sustainability story: 100% recycled aluminum and post-consumer recycled fabric. The compromises are straightforward: the small screen limits extended video watching, and some features assume a Prime membership or compatible devices.
Pros:
- Compact 5.5-inch size fits nightstands and desks
- Improved audio with 2x the bass and clearer vocals
- Physical camera shutter plus mic/camera-off button
- Made with recycled materials and recyclable packaging
Cons:
- Small screen limits extended video watching
- Some features require Prime membership or compatible devices
- 2 MP camera is basic compared with the Show 11’s auto-framing camera
Best for: Buyers adding a compact display to a bedroom, desk, or small room where space and privacy matter most
Not ideal for: Anyone wanting a primary entertainment display or a whole-home smart home hub
Bottom line: The Echo Show 5 is the smart choice for small spaces, offering the best privacy hardware in the lineup at the cost of screen and audio headroom.
“The Echo Show 5 is the smart choice for small spaces, offering the best privacy hardware in the lineup at the cost of screen and audio headroom.”
Amazon Echo Show 15 (Newest Model) – Full HD 15.6" Smart Display with Built-in Fire TV
The Echo Show 15 plays a completely different role from the other two: it’s designed to be mounted on a wall and treated as the family command center. Its 15.6-inch Full HD display dwarfs the Show 11’s screen, and the customizable widget system turns that space into shared calendars, to-do lists, weather, and a central smart home dashboard with live camera feeds. If your household runs on schedules, this is the model that makes them visible at a glance.Its unique advantage is built-in Fire TV, complete with an included remote. Neither the Show 11 nor the Show 5 offers access to thousands of streaming apps this directly — the Show 11 is the better audio device, but the Show 15 is the better television. Video calling is handled well too, with auto-framing and 3.3x zoom matching the Show 11’s camera experience, and privacy is covered with a camera shutter and mic/camera-off button.The tradeoffs mirror the Show 11’s: some streaming content requires subscriptions, and the sheer size rules out smaller rooms — this is not a device for a bedroom shelf. Compared with the Show 11, you also give up the built-in smart home hub emphasis and the stronger spatial audio, so buyers should choose based on whether organization or control is the priority.
Pros:
- Large 15.6" Full HD display ideal for kitchen and family organization
- Built-in Fire TV with thousands of streaming apps and an included remote
- Central smart home dashboard with voice control and live camera feeds
- Camera shutter and mic/camera-off button for privacy
Cons:
- Subscriptions may be required for some streaming content
- Large size unsuitable for smaller spaces
- Lacks the Show 11’s built-in hub emphasis and spatial audio performance
Best for: Busy households that want a wall-mounted hub for schedules, smart home monitoring, and streaming in a shared space like the kitchen
Not ideal for: Small rooms, renters who can’t wall-mount, or buyers primarily seeking music performance
Bottom line: The Echo Show 15 is the family-focused pick, trading the Show 11’s audio and hub strengths for unmatched screen space and Fire TV entertainment.
“The Echo Show 15 is the family-focused pick, trading the Show 11’s audio and hub strengths for unmatched screen space and Fire TV entertainment.”
As an Amazon Associate we earn from qualifying purchases.
Before You Start
Do three things before opening a single device box:
1. Confirm your 2.4 GHz network. Most smart home devices connect only to the 2.4 GHz band. If your router broadcasts separate network names for 2.4 GHz and 5 GHz (for example, “MyWiFi” and “MyWiFi-5G”), connect your phone to the 2.4 GHz network during setup. Many setup failures trace back to this alone.
2. Create or update your platform account. Install the Alexa app, Google Home app, or Apple Home setup, and sign in before you begin. Devices fail to pair when you stop mid-setup to create an account.
3. Write down your Wi-Fi password. You will type it several times during setup. Copying and pasting from your phone’s clipboard speeds this up and prevents typos.
Safety warning: Any device that replaces a wall switch, thermostat, or hardwired fixture involves household wiring. Turn off the correct breaker first and verify power is off with a non-contact voltage tester. If you are not fully comfortable with this, hire an electrician — it typically costs less than a service call after a mistake.
Step-by-Step Instructions
Step 1: Install your smart speaker or display in a central location
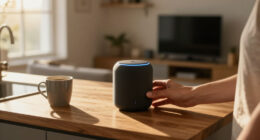
Unbox the smart speaker or display, place it in a central, open spot in your main living area — not inside a cabinet, not directly against a wall, and away from running microwave ovens or metal shelves that block signal. Plug it into power using the included adapter.
Open the platform app on your phone (Alexa, Google Home, or Apple Home), tap the option to add or set up a device, and follow the prompts. The app will detect the speaker, ask you to connect it to Wi-Fi, and have you sign in to your account. When prompted, name the device after the room it is in, such as “Living Room Speaker.”
Tip: Wait for the speaker’s light ring or screen to indicate it is ready (usually pulsing orange or a “ready to set up” message) before searching for it in the app. Pressing and holding the action or mute button for 10-15 seconds usually forces setup mode if the app cannot find it.
Check: Say the wake word (“Alexa,” “Hey Google,” or “Hey Siri”) and ask for the time. The speaker should answer in a clear voice with no error message.
Step 2: Update the speaker’s firmware
Once the speaker is connected, keep it plugged in and connected to Wi-Fi for 15-20 minutes without using it. During this time it downloads and installs firmware updates automatically. You can check the device settings page in the app — most show a software version and “up to date” status.
Tip: Skipping this idle period is a frequent cause of later devices failing to pair. Updated firmware fixes pairing bugs that shipped with the device.
Check: The device settings page in the app shows current software with no update pending.
Step 3: Set up your smart plugs first — they are the easiest win
Plug a smart plug into a wall outlet, then plug a lamp or fan into the smart plug. Open the platform app, tap “Add Device,” choose “Plug,” and follow the pairing prompts. Most plugs broadcast their own setup signal for 1-2 minutes after first power-up, so have your phone and app ready before plugging it in.
When pairing completes, the app asks you to name the plug. Name it for what it controls, such as “Living Room Lamp” — not “Plug 1.” Repeat for each additional plug.
Tip: Add one plug at a time and name it immediately. Adding several plugs at once leaves you with a confusing list of identical devices.
Check: Tap the plug’s icon in the app. The lamp turns on and off within a second of tapping.
Step 4: Install smart bulbs and assign them to rooms
Screw a smart bulb into a light fixture with the power switch left ON, then turn the wall switch off and back on once. Open the app and start the add-device flow for the bulb brand (Philips Hue, Wyze, TP-Link, and others each pair through the main platform app or their own app with platform linking). Follow the prompts to connect the bulb to Wi-Fi or a hub.
After pairing, assign the bulb to a room in the app. This grouping is what lets you later say “turn off the living room lights” and have every bulb in that room respond.
Tip: Smart bulbs must stay powered at the switch at all times. If family members flip the wall switch off, the bulb goes offline and cannot respond. Consider a piece of tape over the switch or smart buttons/switches instead of bulbs in high-traffic rooms.
Check: Use a voice command — “turn on the living room lights” — and the bulb responds. Also confirm the bulb appears inside the correct room group in the app.
Step 5: Install the video doorbell or security camera
Choose a mounting spot at door height with a clear view and strong Wi-Fi (check the signal-strength indicator in the app’s camera setup screen before drilling anything). If your doorbell is hardwired, turn off its breaker first and verify with a voltage tester. If it is battery-powered, charge it fully before mounting.
Attach the mounting bracket with the included screws, connect or insert the battery, and snap the camera onto the bracket. Complete pairing in the app, then adjust the viewing angle and set motion detection zones so passing street traffic does not trigger constant alerts.
Tip: Test the doorbell’s chime before final tightening of the bracket so you can reposition without re-drilling.
Check: Press the doorbell or walk through the camera’s view. A live view appears in the app within a few seconds, and you receive a motion or ring notification on your phone.
Step 6: Install the smart thermostat
Turn off power to your HVAC system at the breaker before touching the old thermostat. Photograph the existing wiring with your phone — this photo is your reference if anything is unclear. Remove the old thermostat’s faceplate, label each wire with the included adhesive labels (or masking tape and a pen) according to the terminal letter each wire was attached to, then disconnect and remove the old base.
Mount the new thermostat’s base, connect each labeled wire to the matching terminal on the new base, attach the faceplate, and restore power. The thermostat will guide you through Wi-Fi setup on its own screen, then appear in your platform app.
Tip: If your photo shows wires that do not match the new thermostat’s manual — such as wires in unusual terminals or more wires than terminals — stop and use the manufacturer’s compatibility checker online or hire an HVAC technician. Some systems need a C-wire adapter (usually included).
Check: The thermostat powers on, connects to the app, and displays the current room temperature. Change the temperature by one degree in the app and hear or see the system respond.
Step 7: Install the smart lock and calibrate it
Remove your existing deadbolt’s interior thumbturn and exterior keypad assembly using the included instructions (usually two screws). Install the smart lock’s components in the same holes, attach the exterior and interior pieces, and insert fresh batteries.
Complete pairing in the app, then run the lock’s calibration routine — the app walks the motor through a full lock and unlock cycle so it learns your door’s mechanics. Create your entry code and test it several times.
Tip: If the bolt is stiff or scrapes, the door alignment is the problem, not the lock. Adjust the strike plate slightly before calibrating; a dragging bolt drains lock batteries quickly.
Check: Lock and unlock the door remotely from the app, then enter your code on the keypad. Both methods should work smoothly, and the app logs each event.
Step 8: Organize devices into rooms and rename anything unclear
Open your platform app’s device list and confirm every device is assigned to a room — Kitchen, Living Room, Front Door, and so on. Rename any device whose name does not match how you would naturally say it aloud. Voice commands match device names, so “Bedroom Lamp” works and “TK-04 Bulb” does not.
Tip: Use names family members will actually say. If your household calls it “the hall light,” name it Hall Light rather than Foyer Fixture.
Check: Scroll the app’s room view: every device appears exactly once, in the right room, with a plain-language name.
Step 9: Create your first automation
Open the app’s routines or automations section and create one routine. A good first choice: “When the doorbell detects motion after sunset, turn on the porch light.” Set the trigger (doorbell motion), add a condition (after sunset), and add the action (turn on Porch Light). Save and name the routine.
Create one or two more routines that fit your routine — lights off at a set bedtime, or a “Good Morning” routine that adjusts the thermostat and reads the weather aloud.
Tip: Start with three or fewer automations. Adding many at once makes it hard to tell which routine is misbehaving when something turns on unexpectedly.
Check: Trigger the routine manually from the app (most apps have a “Run” or “Test” button). The connected devices respond in sequence within a few seconds.
Step 10: Run a full-system test
Walk through your home and test every device three ways: from the app, by voice, and through its automation. Confirm the lock locks and unlocks, the camera sends notifications, the thermostat responds, and lights obey room-level voice commands. Note any device that lags or fails, and address it using the troubleshooting section below before considering the project done.
Tip: Test the lock from outside your front door with the door closed — never leave the first lock test for when you are already locked out.
Check: Every device responds to both app and voice control within a couple of seconds, and no device shows as “offline” in the app.
Common Mistakes to Avoid
- Buying devices from incompatible platforms — Check every product for the “Works with Alexa / Google Home / Apple Home” badge before purchase, and commit to one platform for the whole home. Matter-certified devices work with all three major platforms and are the safest choice for mixed households.
- Connecting the phone to 5 GHz Wi-Fi during setup — Before pairing any device, switch your phone to the 2.4 GHz network. Most smart devices cannot see or use 5 GHz, and the app will hang at the connection step.
- Leaving smart bulbs on a wall switch someone flips off — Keep wall switches ON for smart bulbs at all times, and communicate this to everyone in the house — or install smart switches instead of bulbs in rooms where people habitually use the switch.
- Naming devices with serial-style or vague names — Name every device the way you would say it in a sentence: “Kitchen Light,” not “Bulb A3.” Voice assistants match spoken words to device names literally.
Troubleshooting
Problem: Device will not pair and the app keeps searching
Solution: Move the phone within a few feet of the device, confirm the phone is on 2.4 GHz Wi-Fi, and force the device into pairing mode (usually holding its button or power-cycling it). If it still fails, restart your router and try again — device pairing relies on the router briefly accepting a new client.
Problem: Device shows as offline in the app
Solution: Check whether the device lost power (flipped switch, tripped breaker, dead batteries) and whether Wi-Fi reaches that spot — check the signal-strength reading in the app. For distant devices, add a mesh Wi-Fi node or a smart home hub that repeats signal, such as an Echo device with a built-in smart home hub or a Thread border router.
Problem: Voice commands fail or control the wrong device
Solution: Open the app’s device list and look for duplicate or confusing names (two “Lamps” in different rooms causes ambiguity). Rename devices uniquely, then ask the assistant to “discover devices” or re-sync the smart home skill so it refreshes the name list.
Problem: Smart lock batteries drain within weeks
Solution: A dragging or misaligned deadbolt forces the motor to work harder. Lubricate the bolt with graphite, adjust the strike plate so the bolt moves freely, and re-run the lock’s calibration routine. If drain continues, check for cold temperatures at the door — lithium batteries handle exterior doors better than alkaline in winter.
What Success Looks Like
Your setup is complete when all of the following are true: every device appears once in your platform app and none show “offline”; you can control each device from the app and by voice within a couple of seconds; the smart lock works by code, by app, and physically with a key as backup; the doorbell or camera sends a notification to your phone when triggered; and at least one automation (such as sunset lighting) runs on its own without your input. Ask someone else in the household to run a voice command — if it works for them too, the system is genuinely usable rather than just configured for you.
Next Steps
With the core system running, expand gradually: add door and window sensors to build out security routines, add a second speaker for multi-room audio, or set up a “leaving home” routine that locks the door, adjusts the thermostat, and turns off lights in one command. Check battery levels for locks and cameras monthly — most apps report them on the device page. Review your camera’s motion zones every few months so new plants or furniture do not trigger false alerts. Update device firmware when the app prompts you; security fixes for locks and cameras in particular are worth installing promptly. If a device repeatedly drops offline, replace it under warranty rather than tolerating it — reliability problems rarely improve with age.
Frequently Asked Questions
Do I need a separate smart home hub, or is a smart speaker enough?
For most Wi-Fi devices, a smart speaker is enough. You only need a dedicated hub for devices using Zigbee or Z-Wave protocols (common with Philips Hue bulbs and many sensors) or Thread/Matter devices, which need a border router — some Echo and Nest devices include this. Check the product requirements before buying.
Do smart home devices work if the internet goes down?
Partially. Local controls usually still work — wall switches, keypad codes on locks, and bulbs with physical controls — but app control from outside the house, voice commands through cloud services, and notifications typically stop until the connection returns. Matter devices with a local hub keep more functions working offline.
Are smart locks safe? Can they be hacked?
Modern smart locks from established brands use encryption comparable to banking apps, and the practical risk is low compared to physical attack on the lock itself. Keep firmware updated, use a long unique entry code, enable two-factor authentication on the lock account, and always keep the physical key accessible as a backup.
How many devices can my Wi-Fi handle before problems start?
Most consumer routers handle roughly 20-30 smart devices comfortably; beyond that, older routers slow down. If you plan a large setup, use a mesh Wi-Fi system and offload Zigbee or Thread devices to a hub so they do not each consume a Wi-Fi connection.
Should I choose Alexa, Google Home, or Apple Home?
Choose based on your phone and ecosystem: iPhone users get the smoothest experience with Apple Home; households using Gmail and Android devices generally prefer Google Home; Alexa has the widest device compatibility and best budget speaker lineup. Matter-certified devices work with all three, so buying Matter products keeps your options open.
Fall Picks
fall essentials
As an affiliate, we earn on qualifying purchases.