
TL;DR
Moving your rig out of your workspace is the most effective way to reduce noise. When placing it in a closet, ventilation and treatment are key to avoiding heat buildup and boxy sound. Proper setup transforms a cramped closet into a quiet, high-quality recording space.
Ever notice how your noisy computer rig seems to bounce around in your tiny closet, creating echo and boomy sound? The truth is, noise and bad acoustics aren’t just about what you hear—it’s about where you put your gear and how you treat that space. If you think foam panels alone will fix everything, you’re missing the bigger picture. The best solution? Move your rig out of your workspace entirely, then carefully treat the closet to tame reflections and keep heat in check.
This guide unpacks the most effective ways to set up a quiet, professional-sounding closet studio. You’ll learn why placement beats treatment, how to keep your gear cool, and why a “rig in the closet” can be a game-changer—if done right.
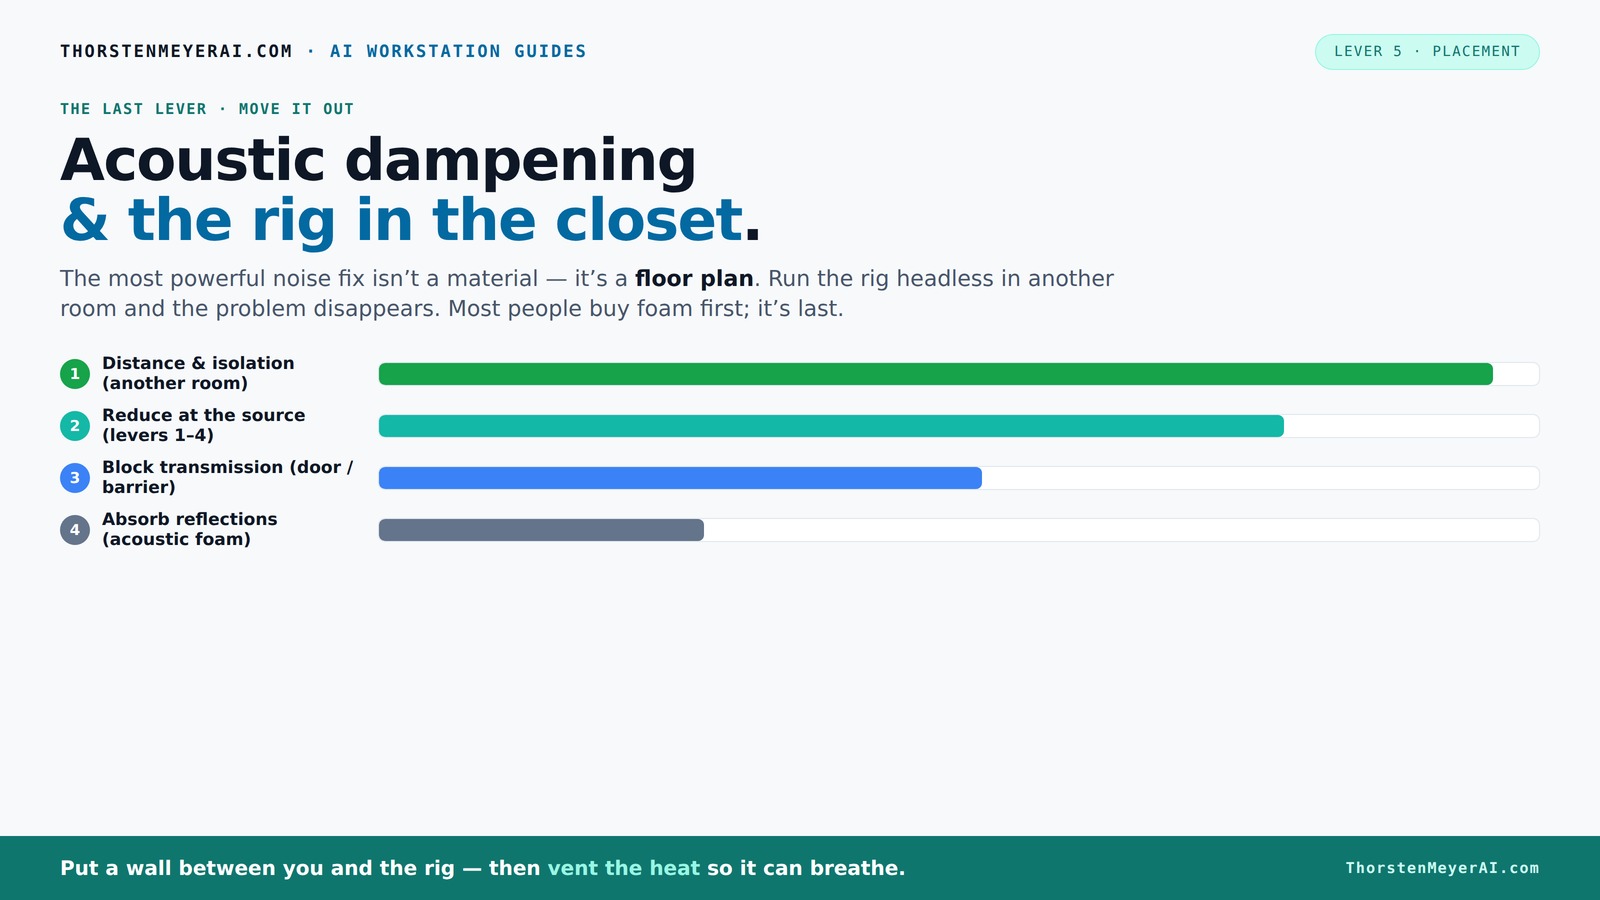
Acoustic dampening
& the rig in the closet.
The most powerful noise fix isn’t a material — it’s a floor plan. A rig you can’t hear because it’s in another room beats any amount of foam. Tap the approaches in Part 1 to see what actually works.
(another room)
(levers 1–4)
(door / barrier)
(acoustic foam)
Contain the noise, not the heat
Key Takeaways
- Moving your rig into a different room or closet dramatically cuts noise and heat issues, often more effectively than treatment alone.
- Ventilation is critical—never seal a closet completely without airflow, or you'll cook your hardware.
- Prioritize treatment on reflection points: behind the mic, ceiling, and side walls. Bass traps are essential for controlling low-frequency boom.
- Use soft surfaces like blankets and rugs for quick fixes, but don’t rely on foam alone to tame boomy sounds.
- Sealing the door and gaps is often overlooked but can make a huge difference in noise control.

22 Pack Self-Adhesive Sound Proof Foam Panels for Walls 12"x12"x0.4" Fabric
Superior Noise Reduction & Echo Cancellation - Tired of background noise and poor acoustics? Our soundproof wall panels...
As an affiliate, we earn on qualifying purchases.
As an affiliate, we earn on qualifying purchases.
Why Moving Your Rig Outperforms Foam and Panels Every Time
Distance from noise sources is the most powerful way to cut sound. When your rig sits in another room or a closet, it’s like turning down the volume at the source—nothing beats that. Imagine a GPU whirring loudly on your desk, versus it humming quietly in a basement. The difference is night and day.
According to soundproofing experts, moving your gear away from your workspace can reduce perceived noise by over 90%. That’s because sound diminishes rapidly with distance, especially airborne noise. Foam and panels are good, but they only soften reflections inside a room—they don’t stop sound from escaping or entering.
For example, I moved my AI workstation to a closet in the basement. Now, I SSH into it, and I barely hear it. My workspace stays silent, and I don’t need to spend hours lining every wall with foam.

Focusound 52 Pack Acoustic Foam Panels 1" x 12" x 12" Sound Proof Foam Panles Soundproofing Noise Cancelling Wedge Panels for Home Office Recoding Studio with 300PCS Double-Side Adhesive
Soundproofing - Acoustic foam panels triangular grooves structure for better noise absorption, helps to reduce and absorb unwanted...
As an affiliate, we earn on qualifying purchases.
As an affiliate, we earn on qualifying purchases.
The "Rig in the Closet" Setup—How to Do It Without Cooking Your Hardware
Placing a powerful, heat-generating machine in a closet sounds risky—and it is, if you ignore airflow. The key is to give your rig enough ventilation. Think of it like a mini data center: hot air needs to escape, and cool air must flow in.
Use passive vents or a quiet exhaust fan to pull hot air out. Never fully seal the space unless you incorporate temperature-controlled airflow—otherwise, heat will trap, and your machine will overheat. Some creators install small ducted systems with soundproofing lining, combining quiet fans and thick insulation. This way, your rig stays cool without leaking noise.
For example, I installed a small duct system with a low-noise fan in my closet. It keeps the temperature steady, and I don’t hear a thing. I recommend checking out [this guide](https://thorstenmeyerai.com/reduce-heat-noise-ai-workstation/) for more on cooling solutions.
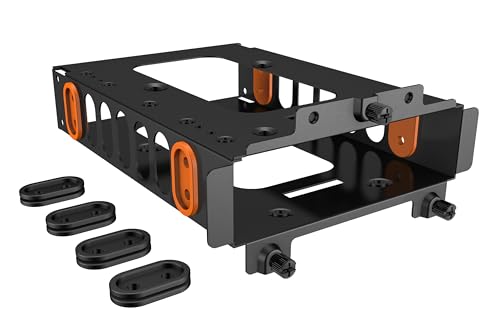
be quiet! HDD Enclosure Cage for PC Cases
Perfect mounting for one HDD or up to 2 SSDs. Decoupled installation of HDDs
As an affiliate, we earn on qualifying purchases.
As an affiliate, we earn on qualifying purchases.
Placement Tips: Where to Put Acoustic Treatment for the Best Results
In a tiny closet, strategic placement of acoustic panels makes all the difference. The first step is to decide where your mic will go. The main reflection point—the wall behind your mic—is the top priority. Treat that surface with thicker panels or bass traps if needed.
Next, focus on the ceiling and side walls. Reflection points are where sound bounces back toward the mic, creating echo and boxiness. Use 2-inch panels for small spaces, and go thicker if you notice boomy low frequencies.
Understanding why these points matter is crucial: reflections at these surfaces cause sound waves to bounce unpredictably, creating a muddy or harsh recording. Proper placement of treatment at these key points minimizes these issues, allowing your recordings to sound clearer and more natural. The tradeoff is that over-treating can make the space sound dead or unnatural, so balance is key. Use your ears and test different placements to find the sweet spot.
| Surface | Recommended Treatment |
|---|---|
| Rear wall behind mic | Thick panels or bass traps |
| Ceiling above mic | Acoustic panels or blankets |
| Side walls (reflection points) | 2-4 inch foam or moving blankets |

Soundproof Room Divider with Wheels, 72 x 66 Inch Freestanding Room Partition Wall, Portable Temporary Wall, 3 Panel Acoustic Screen, Cubicle Privacy Panels for Office, Study, Classroom (Light Grey)
【Privacy & Focus Support】This room divider panel helps reduce visual interruptions and supports focused work by separating desks...
As an affiliate, we earn on qualifying purchases.
As an affiliate, we earn on qualifying purchases.
How to Prevent Your Closet Setup From Becoming a Boxy Echo Chamber
Small rooms tend to build up bass and create a boomy sound—like singing in a cardboard box. To prevent this, add bass traps in the corners or use thicker, denser panels for low frequencies. That way, low-end stays tight and controlled.
For example, I installed bass traps in the corners of my closet, which flattened out the low-frequency buildup. Now, my vocals are clear and punchy, not muddy or boomy.
Remember: soft surfaces like rugs and blankets help soften reflections but won’t solve low-frequency issues. For that, dedicated bass treatment is a must. Skipping bass traps can result in recordings that sound muffled or overly boomy, especially when singing or recording bass-heavy instruments. The tradeoff is that bass traps can be expensive and take up space, so prioritize corners if your budget is limited. Proper low-frequency treatment is essential for achieving a balanced, professional sound.
Common Mistakes That Sabotage Your Closet Studio
Many beginners overdo thin foam without addressing heat or sound leakage. They also forget to seal the door, letting sound escape and noise in. Ignoring low frequencies is another trap—thin panels won’t tame bass buildup.
Don’t treat only one surface—walls, ceiling, and door all matter. And remember, a sealed, ventilated space beats a completely closed box that’s boiling over with heat.
Failing to seal gaps around the door or vent can significantly reduce your soundproofing efforts, allowing noise to leak out and external noise to intrude. This can also lead to heat buildup, which damages equipment over time. Overlooking low-frequency treatment results in recordings that sound hollow or boxy, especially when recording voices or bass instruments. The tradeoff here is that neglecting these aspects can undermine your entire setup, making your efforts ineffective and potentially damaging your gear.
“Thick, dense treatment combined with proper ventilation beats just slapping foam everywhere.”
Budget Options: Quick Fixes, Mid-Range, and Serious Upgrades
On a tight budget? Use blankets, clothing, and rugs to kill reflections. Hang moving blankets or use DIY panels made from thick carpet or foam mattress toppers. These can dramatically improve sound without breaking the bank.
Mid-range: Invest in commercial acoustic panels—2 to 4 inches thick—mounted on walls with command strips or adjustable poles. This gives you more control over sound reflection and low frequencies.
For a permanent, professional setup, consider custom-built soundproof cabinets with active venting and thick insulation. They’re pricier but turn a closet into a near-studio environment.
Check out [this guide](https://thorstenmeyerai.com/low-noise-pc-cases-airflow/) for more on DIY solutions.
Frequently Asked Questions
How do I soundproof a closet cheaply?
Seal gaps around the door with weatherstripping or acoustic sealant, and hang blankets or thick rugs to absorb reflections. These DIY tricks cost little but can significantly improve sound isolation and reduce echo.
Where should I put acoustic panels in a closet booth?
Focus on the wall behind your mic, ceiling, and side reflection points. Thick panels or bass traps in these spots cut down echo and low-end buildup, making your recordings clearer.
Do I need bass traps in a small closet?
Yes. Small rooms tend to amplify bass and produce boomy sound. Installing bass traps in the corners helps control low frequencies, keeping your recordings tight and balanced.
Is acoustic foam enough, or do I need blankets/panels?
Foam helps with high-frequency reflections, but in tiny closets, blankets, rugs, and heavier panels are more effective at reducing echo and controlling low frequencies. Combining both works best.
How thick should my panels be for a closet?
Use 2-inch panels for general reflection control; go thicker—up to 4 inches—for better low-frequency absorption, especially if your closet tends to sound boxy or boomy.
Conclusion
Your closet can become a quiet, professional studio with simple but strategic tweaks. The secret is moving your gear out of your workspace and treating that space smartly—focusing on placement, ventilation, and reflection points.
Remember: a well-ventilated, properly treated closet isn’t just quieter—it’s a smarter, more reliable setup that keeps your gear healthy and your sound clear. Think of your closet as a blank canvas—use these tips to turn it into your perfect high-performance studio.