
To improve door seals and cut down drafts, start by inspecting for gaps and leaks around your door frame using a light or tissue. Choose the right weatherstripping, like foam tape or V-strip, and clean the surface thoroughly before installation. Carefully apply the seal along the edges, making sure it’s snug and free of wrinkles. Regularly check and replace worn seals, and you’ll enjoy a warmer, quieter home. Keep going to discover more tips for lasting results.
Key Takeaways
- Conduct a thorough inspection to identify gaps, cracks, and areas where drafts are entering around the door.
- Clean and prepare the door surface by removing dirt, old adhesive, and smoothing rough spots before installing new seals.
- Select appropriate weatherstripping materials like foam tape or V-strip based on door type and size.
- Properly measure, cut, and firmly apply weatherstripping or sealant to ensure a snug, airtight fit.
- Regularly inspect and maintain door seals, replacing damaged weatherstripping and lubricating hinges to preserve effectiveness.

Ninsula 33Ft Door Weather Stripping, (1/2in x 1/4in), Strong Adhesive, Sound Proof, Door Insulation, Weatherproof Foam Tape for Doors, Weatherstripping for Doors Frames, Windows
Extra Long Size: You'll get a 33FT door weather stripping (1/2in x 1/4in). Easy to install, no tools…
As an affiliate, we earn on qualifying purchases.
As an affiliate, we earn on qualifying purchases.
Why Drafty Doors Make Your Home Less Comfortable
Drafty doors can substantially impact your home’s comfort by allowing outside air to seep in and indoor air to escape. When your door doesn’t seal properly, it disrupts indoor airflow, making your rooms drafty and cold or excessively warm. This uneven temperature can make it hard to stay comfortable, especially during extreme weather. Additionally, gaps around the door let in exterior noise, which can be distracting and diminish your peace at home. You might find yourself constantly adjusting the thermostat or feeling irritated by sounds from outside. Overall, drafty doors compromise your indoor environment, reducing comfort and increasing energy costs. Sealing these gaps helps maintain consistent indoor temperatures and keeps unwanted exterior noise out, creating a more peaceful, comfortable living space. Proper door sealing techniques can also help prevent moisture issues that lead to mold and damage over time. Improving your door seals can also contribute to better energy efficiency, lowering your utility bills and making your home more environmentally friendly. Ensuring proper door seals also supports indoor air quality by reducing the infiltration of dust, allergens, and outdoor pollutants. Additionally, proper installation methods can ensure that your seals stay effective longer and require less maintenance over time. Incorporating weatherstripping materials designed specifically for your door type can further enhance the effectiveness of your seal and extend its lifespan.

Updated Weather Stripping Door Seal, Door Draft Stopper Silicone Seal Strip for House and Glass Shower Doors for Windows Gaps of Collision and Side, Window Insulation for Winter
WEATHER STRIPPING SIZE: The total length of the window sealing strip is 16 feet and can be cut…
As an affiliate, we earn on qualifying purchases.
As an affiliate, we earn on qualifying purchases.
How to Inspect Your Doors for Drafts and Gaps
Wondering if your door allows drafts to sneak in? Start by inspecting the door gap around the edges. Close the door and feel for cold air or check for light coming through the gaps. You can also perform draft detection by holding a lit candle or incense stick near the edges—if the flame flickers or smoke wavers, you’ve found a draft. Pay close attention to areas where the door meets the frame, threshold, and hinges. Look for uneven gaps or spaces that might let air in. Use your hand to detect cold spots or air movement. Additionally, sealant options can help you effectively block drafts once you identify the problem areas. Properly sealing these gaps can also improve energy efficiency, reducing your heating and cooling costs. Conducting a thorough inspection allows you to pinpoint exactly where your door needs better sealing, which is essential for energy conservation and maintaining a comfortable indoor environment. Being aware of draft sources can help you target your sealing efforts more precisely. This thorough inspection helps identify exactly where your door needs better sealing, so you can target your efforts for maximum draft reduction. Regularly maintaining and updating your door seals can further enhance these benefits and ensure long-term comfort and efficiency.

Frost King R734H Sponge Rubber Foam Tape 3/4" W X 7/16" H X 10' L, Black
The product is 3/4×7/16 BLK SpongeTape
As an affiliate, we earn on qualifying purchases.
As an affiliate, we earn on qualifying purchases.
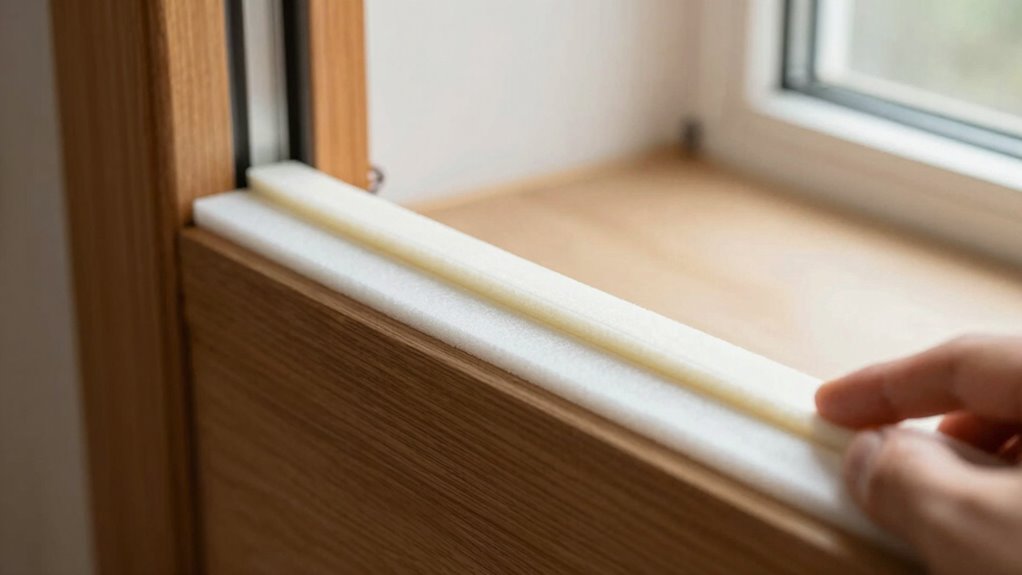
Choosing the Best Weatherstripping for Your Doors

After inspecting your doors for drafts and gaps, the next step is selecting the right weatherstripping to keep your home airtight. Consider your door material, as different types of weatherstripping work better with wood, metal, or fiberglass doors. For example, foam tape is flexible and easy to install, making it suitable for various door materials, while V-strip or tension seal works well for metal doors. Also, think about color options to match your door’s finish or blend seamlessly with your home’s decor. Many weatherstripping products come in neutral shades like white, black, or gray, but some offer more variety. Choosing the right weatherstripping ensures durability, effectiveness, and aesthetic appeal, helping you seal gaps effectively and improve your home’s energy efficiency. Weatherstripping materials are designed to withstand different environmental conditions, ensuring long-lasting performance. Additionally, selecting weatherstripping with aesthetic considerations can enhance your home’s overall appearance while maintaining energy efficiency. Properly installed weatherstripping enhances insulation and reduces heating and cooling costs over time.

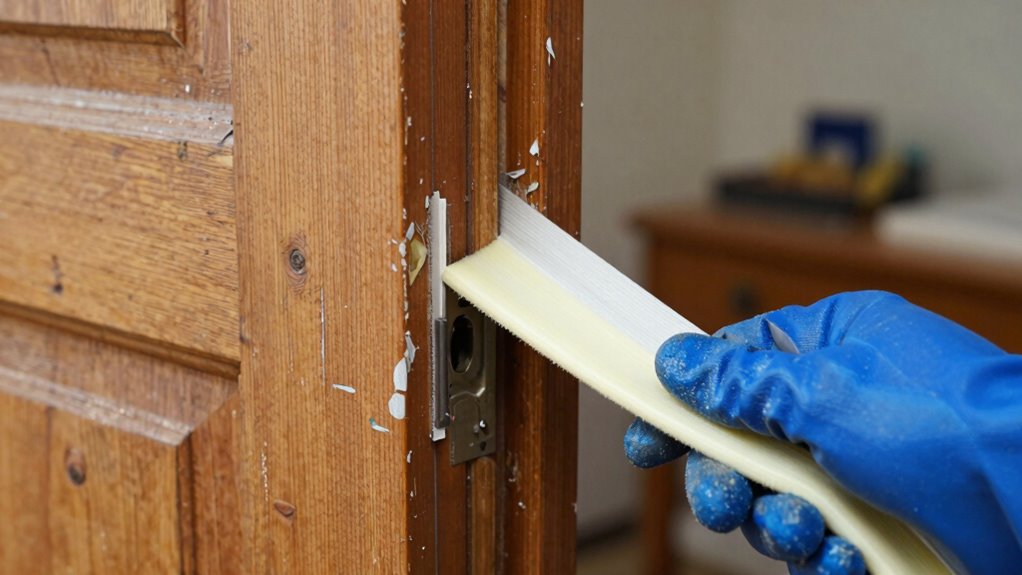
118” Wedge-Shape Foam Window Weather Stripping Door Seal Strip,Soundproofing Frame Winter Insulation Tape for Exterior Front Door,Noise Cancelling Window Inserts,Door Gap Filler Light Blocker,White
Upgraded Wedge Design: This window draft stopper features an upgraded wedge design, tapering from 5/32" to 11/32" (0.16"–0.35")…
As an affiliate, we earn on qualifying purchases.
As an affiliate, we earn on qualifying purchases.
Installing New Door Seals: A Step-by-Step Guide
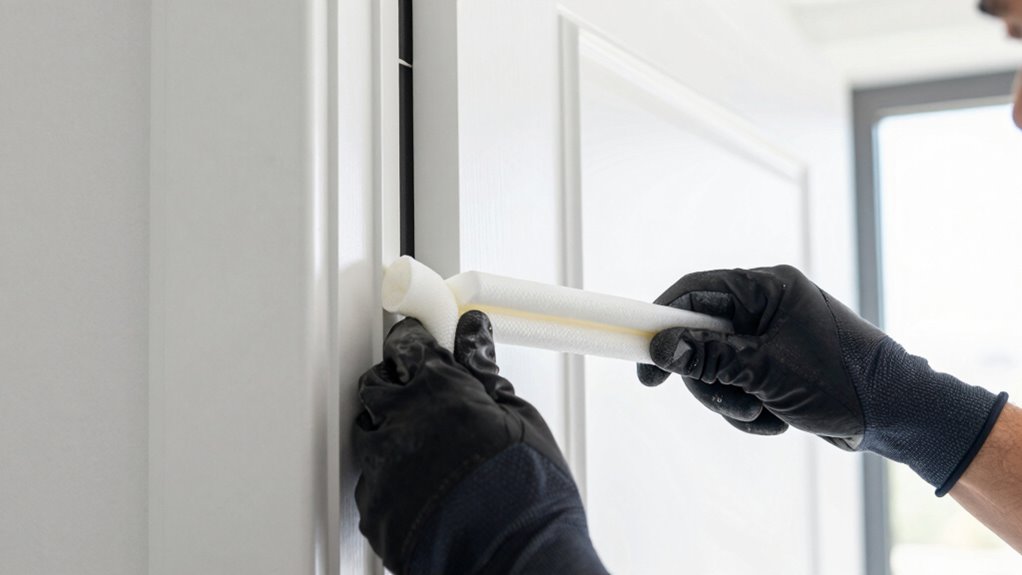
Before installing your new door seals, make sure the door surface is clean and dry. Carefully position the seal, pressing it firmly into place along the edges. Take your time to ensure the seal is applied evenly for ideal results. Incorporating visual cues can also help ensure proper alignment during installation. Ensuring the correct seal placement is essential for effective draft prevention and long-term performance. Proper installation techniques contribute significantly to the effectiveness of the door seals. Paying attention to material compatibility can further enhance the durability and sealing ability of your new door seals, leading to improved overall draft reduction and energy efficiency.
Prepare Door Surface
To guarantee a proper seal, you need a clean, smooth surface on the door where the new seal will attach. Start with door surface preparation by removing dirt, dust, and old adhesive using a brush or damp cloth. Ensure the area is completely dry before proceeding. A smooth surface enhances sealing material selection, ensuring the adhesive bonds firmly and prevents drafts. If there are any gaps, sand down rough spots or uneven areas to create an even surface. Inspect the door for cracks or peeling paint, and repair or sand these areas as needed. Proper preparation ensures your new seal adheres properly, providing maximum insulation. Taking the time to prepare your door surface properly can significantly improve sealing performance. Effective sealing depends on proper surface preparation, which is also essential for maintaining a pet-safe environment by reducing drafts and temperature fluctuations. Additionally, using the correct sealing materials tailored to your door type can further enhance insulation effectiveness. Proper surface cleaning and repair also helps prevent future issues with seal deterioration. Being aware of the door material can guide you in selecting the most suitable sealing method and materials.
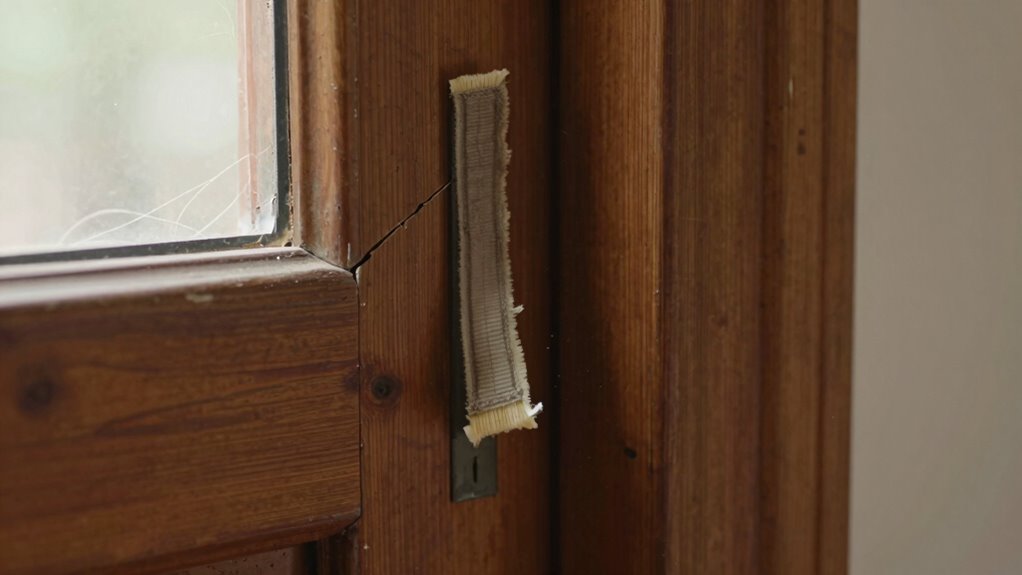
Apply New Seal Properly
Once you’re ready to apply the new seal, carefully align it with the prepared door surface. Choose the correct door seal types and sealing material to match your door’s needs. To guarantee a proper fit, follow these steps:
- Press the seal firmly along the entire length, avoiding gaps.
- Use a roller or your hands to push the sealing material into any crevices.
- Check for overlaps or wrinkles, trimming excess if needed.
- Test the seal by closing the door gently to confirm a snug fit without resistance.
Sealing Gaps and Cracks Around Your Door Frames
Start by inspecting your door frames for any gaps or cracks that could let air in. Once you find them, make sure to apply weatherstripping correctly to seal those areas effectively. Proper sealing not only improves energy efficiency but also keeps out drafts and noise. Additionally, consider using weatherproofing materials that are environmentally friendly to further enhance your home’s sustainability. Using solar system safety practices when installing or upgrading your home can also contribute to overall safety and efficiency.
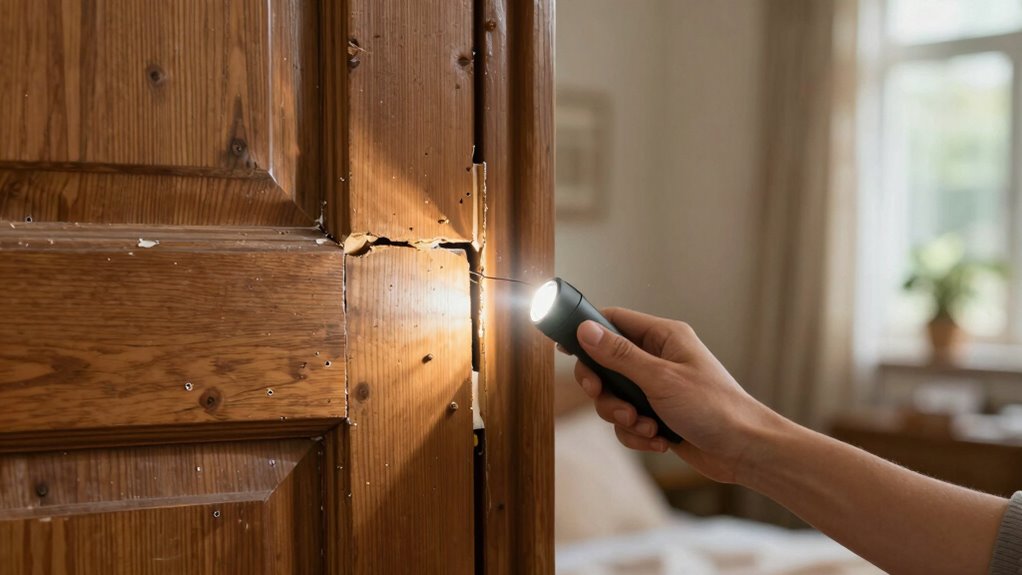
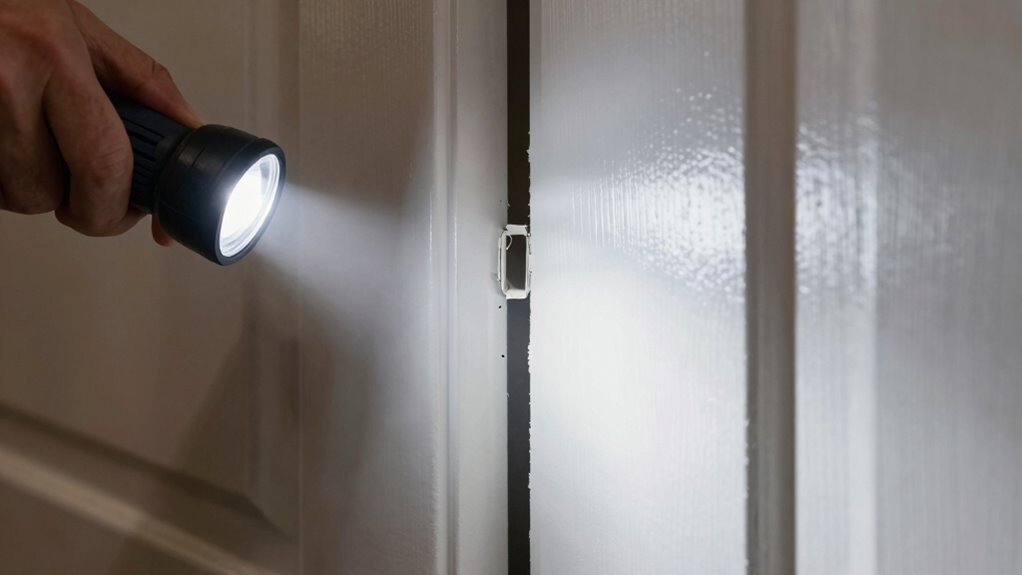
Inspect for Gaps
Have you ever noticed drafts or cold spots near your door? It’s time to inspect for gaps. First, check the door’s alignment; a misaligned door can create uneven gaps. Next, examine the hinges—loose or damaged hinges can cause shifting, increasing gaps. Then, look closely at the entire frame for cracks or spaces around the edges. Finally, use a flashlight or a paper test: hold it against the frame and see if it slips or if light shows through. By focusing on these areas, you identify where drafts sneak in. Proper door alignment and hinge maintenance are vital for sealing gaps effectively. Addressing these issues ensures your door closes snugly, reducing drafts and improving energy efficiency.
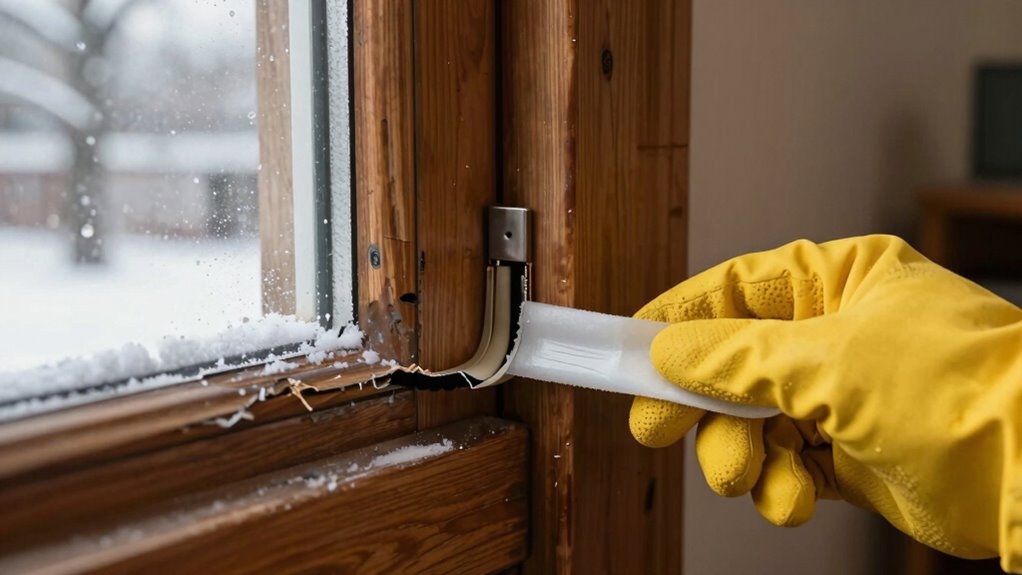
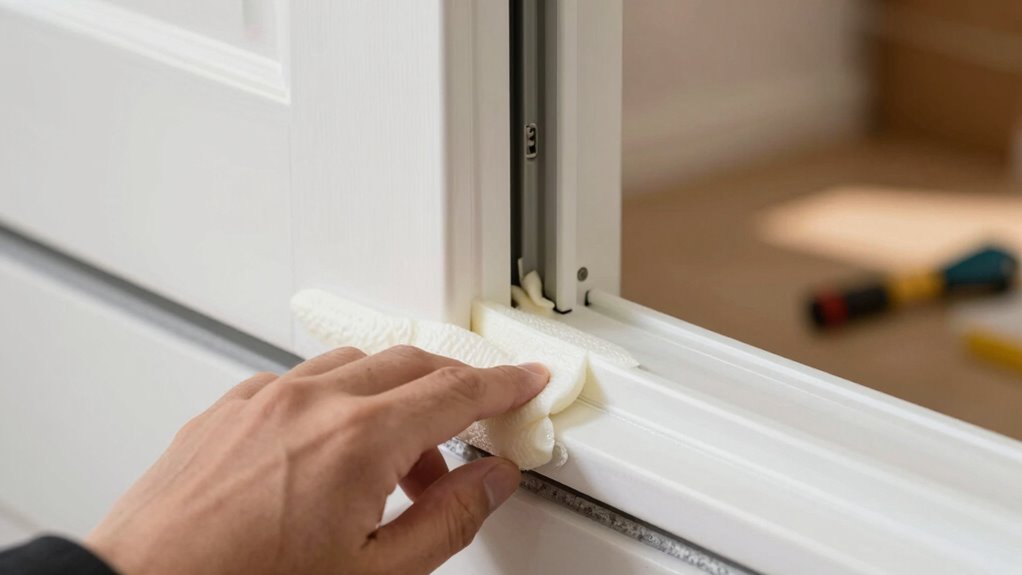
Apply Weatherstripping Properly
Applying weatherstripping correctly is key to sealing gaps and cracks around your door frame. First, identify the best types of weatherstripping for your door, such as foam tape, V-strip, or door sweeps. Use tools for sealing like scissors, a utility knife, or a caulking gun to guarantee precise application. Clean the surface thoroughly before installing to promote adhesion. Measure the length needed and cut the weatherstripping accordingly. Apply the weatherstripping firmly along the edges, making sure it fits snugly without gaps. For door sweeps, attach the strip at the bottom of the door, ensuring it brushes the threshold for an airtight seal. Proper installation prevents drafts, improves energy efficiency, and keeps your home more comfortable.
How to Test Your Door Seals for Effectiveness
To determine if your door seals are working effectively, you can perform a simple yet reliable test. This door seal testing helps you assess the effectiveness evaluation of your seals. Start by closing the door and holding a light or candle near the edges. Watch for flickering or movement of the flame, which indicates drafts. For a more thorough check, consider these steps:
- Check for visible gaps or tears in the weatherstripping.
- Use a dollar bill or tissue to see if it slips easily when placed in the seal.
- Feel along the door edges for cold air or drafts.
- Observe any moisture buildup or condensation around the seal.
Performing these steps will give you a clear idea of your door seal’s performance and whether it needs replacement or adjustment.
Maintaining and Replacing Door Seals Over Time
Regular maintenance of your door seals guarantees they continue to keep drafts out and improve energy efficiency. Inspect your seals regularly for wear, tears, or gaps. If you notice damage, replacing them promptly ensures *ideal* insulation. While doing so, check your door lock and hinge lubrication; smooth operation prevents unnecessary stress on the seal and door components. Proper door lock maintenance also helps avoid misalignment that can cause drafts. When replacing seals, remove old adhesive and thoroughly clean the area to ensure a secure fit. Keep hinges lubricated to prevent sagging, which can compromise seal integrity. Maintaining these components prolongs the lifespan of your door seals and keeps drafts at bay, enhancing your home’s energy efficiency over time.
Common Mistakes to Avoid When Sealing Your Doors
Even when sealing your doors properly, common mistakes can undermine your efforts and reduce energy efficiency. To get the best results, avoid these errors:
Avoid common door sealing mistakes to boost energy efficiency and prevent drafts.
- Ignoring gaps around the door frame, which can let drafts in.
- Using the wrong seal adhesive, which may not adhere properly or last long.
- Overlooking proper surface preparation—failing to clean the door frame before applying sealant weakens the seal.
- Forgetting to test the seal after installation, leaving you unaware of any leaks.
Ensuring a clean, dry surface, choosing the right adhesive, and carefully inspecting your work can make a significant difference. Avoid these mistakes to maximize your door seal’s effectiveness and reduce drafts around your door frame.
Frequently Asked Questions
How Often Should Door Seals Be Replaced for Optimal Performance?
You should replace door seals every 3 to 5 years for peak performance, depending on seal maintenance and wear. Regularly check for cracks, tears, or gaps that let drafts in. If you notice drafts or difficulty closing the door, it’s time for a replacement. Maintaining seals properly extends their lifespan, but keeping an eye on their condition ensures you don’t miss the ideal replacement interval, improving energy efficiency.
Can Weatherstripping Be Applied to Existing Damaged Door Frames?
Yes, you can apply weatherstripping to existing damaged door frames. First, perform door frame repair to fix any structural issues. Once the frame is solid, use sealant application around the edges to guarantee a tight seal. Then, add weatherstripping along the door’s perimeter. This combination helps reduce drafts, improves insulation, and prolongs the life of your door seal, making your home more energy-efficient.
Are There Eco-Friendly Options for Door Sealing Materials?
You’re in luck—there are eco-friendly options for door sealing materials. You can choose sustainable options like recycled rubber, cellulose-based weatherstripping, or natural latex foam. These materials are better for the environment and still provide effective sealing. Think of it as giving your home a green hug, reducing drafts while caring for the planet. Switching to eco-friendly materials helps you stay warm and eco-conscious at the same time.
How Do Different Climate Conditions Affect Door Seal Durability?
Different climate conditions substantially impact door seal durability and seal longevity. In humid environments, seals may deteriorate faster due to mold or rot, while extreme cold can cause materials to become brittle and crack. Hot, dry climates might lead to faster wear from UV exposure. To maintain effectiveness, you need to select seals suited to your climate, regularly inspect for damage, and replace them as needed, ensuring your door seals stay reliable and energy-efficient.
Is Professional Installation Necessary for Effective Door Sealing?
You don’t necessarily need professional installation for effective door sealing, but it can make a big difference. A professional guarantees proper application of sealant and correct fitting of seals, which improves sealant effectiveness. If you’re handy, you might do it yourself, but for the best results and long-lasting drafts reduction, investing in expert installation is worthwhile. Proper installation prevents gaps, enhances durability, and maximizes energy savings.
Conclusion
By paying close attention to your door seals, you gently invite comfort into your home, allowing warmth to stay in and drafts to quietly fade away. With patience and a little effort, you can transform your space into a cozy retreat, even when the breeze outside tries to sneak in. Remember, small adjustments often open the door to greater comfort—so don’t hesitate to nurture your home’s quiet harmony over time.