
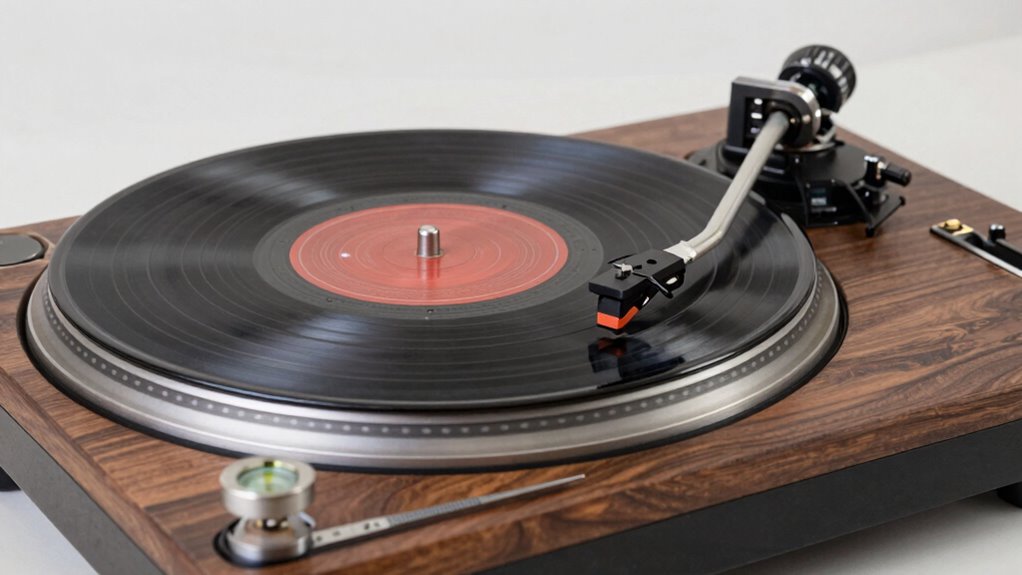
To set up your turntable properly, start by leveling it with a spirit or bubble level placed on the platter or surface, adjusting the feet until the bubble is centered. Next, calibrate your tonearm’s tracking force using a stylus gauge, ensuring the stylus sits correctly on the record without excessive pressure. Proper cartridge alignment is essential for accurate playback. Regularly clean the stylus and keep your turntable stable. Keep going, and you’ll discover more tips to optimize your setup and maintain excellent sound quality.
Key Takeaways
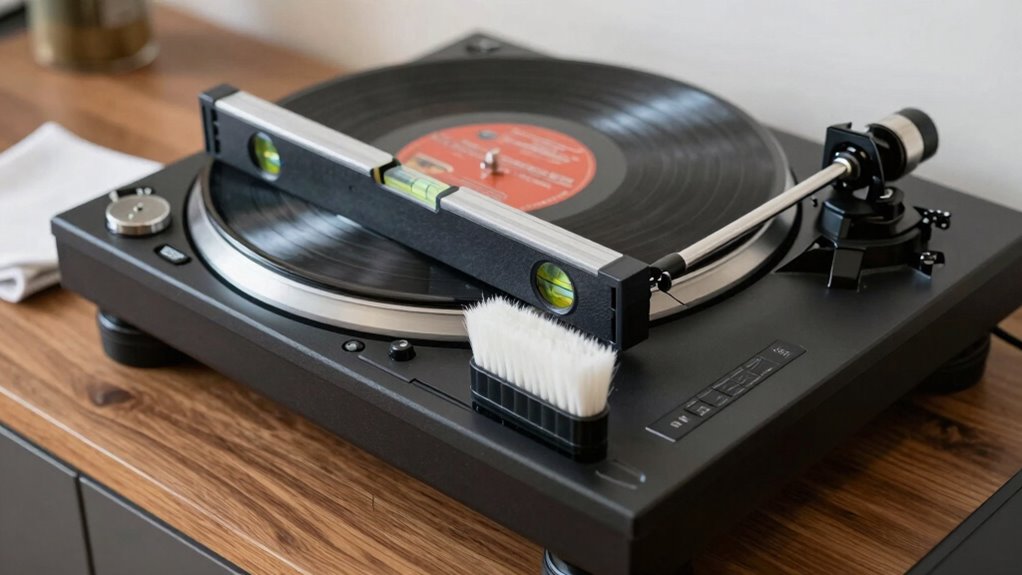
- Use a spirit level to ensure the turntable is perfectly horizontal for optimal performance.
- Adjust the turntable’s feet until the bubble in the level is centered.
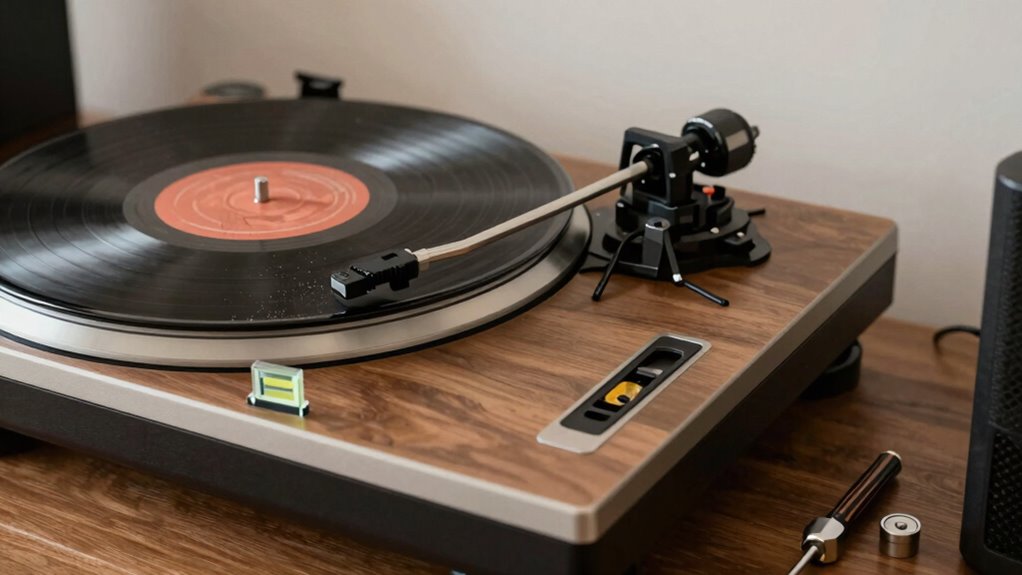
- Balance the tonearm and set the correct tracking force using a stylus force gauge.
- Properly align the cartridge with a protractor to ensure accurate tracking and minimal record wear.
- Regularly clean the stylus and check for any signs of wear or dirt to maintain sound quality.

LAIESYA 3Pcs Circular Bubble Level Bullseye Degree Marked Surface Round Spirit Levels Measuring Tool for Leveling Phonograph, Camera, Turntable, Tripod, Telescope (32X7mm)
Product: Circular Bullseye Degree Marked Surface Round Bubble Spirit Levels Measuring Tool.
As an affiliate, we earn on qualifying purchases.
As an affiliate, we earn on qualifying purchases.
Why Leveling Your Turntable Is Key to Great Sound
Have you ever noticed how your music sounds off or distorted? That’s often due to an unlevel turntable. Proper leveling is essential because it ensures your tonearm tracks the record accurately, preventing unnecessary wear and tear. When your turntable isn’t level, your recording techniques suffer, leading to skewed sound quality and potential damage to your vinyl collection. Good vinyl storage also plays a role, as uneven surfaces can cause instability, making leveling even more critical. By leveling your turntable, you optimize sound clarity and preserve your records longer. This simple step guarantees your setup delivers the best listening experience, whether you’re a casual listener or an audiophile. Regular maintenance and understanding technological integration can further enhance your setup and listening quality. Additionally, maintaining proper alignment of the tonearm and stylus contributes significantly to sound fidelity. Ensuring your turntable’s components are properly calibrated, including tracking force, can also improve overall performance. Regular checks of your leveling setup help maintain consistent sound quality over time. Proper vibration control can also minimize external disturbances, further improving your listening experience.

Neoteck Digital Turntable Stylus Force Gauge 0.01g/5.00g with Blue LCD Backlight Turntable Stylus Pressure Gauge with 5g Weight & Leather Case Accurate Tracking for Tonearm Phono Cartridge-Silver
Essential Tool for Vinyl Enthusiasts: For those dedicated to the art of vinyl playback, this cartridge tracking force…
As an affiliate, we earn on qualifying purchases.
As an affiliate, we earn on qualifying purchases.
How to Check and Correct Your Turntable’s Level
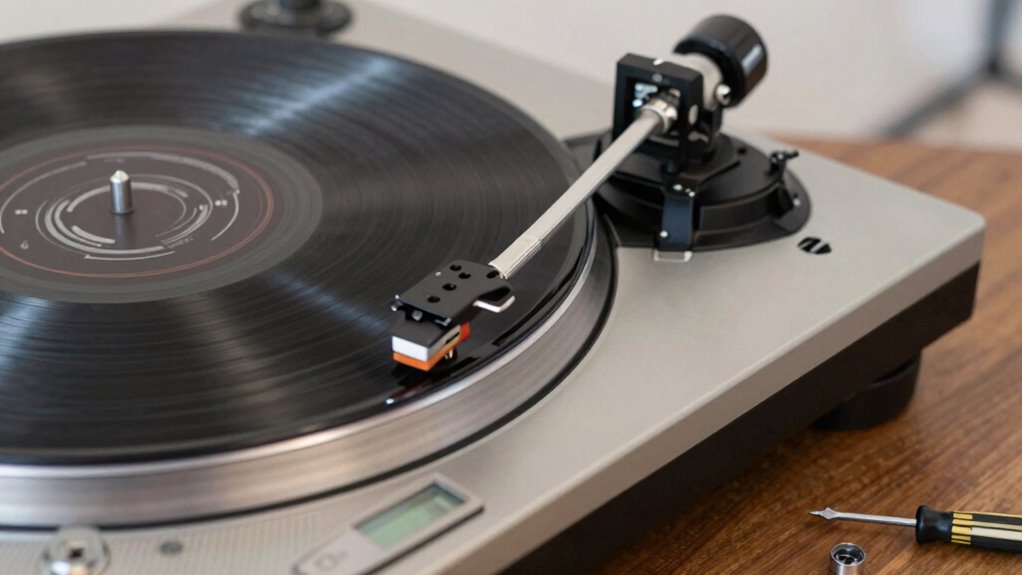
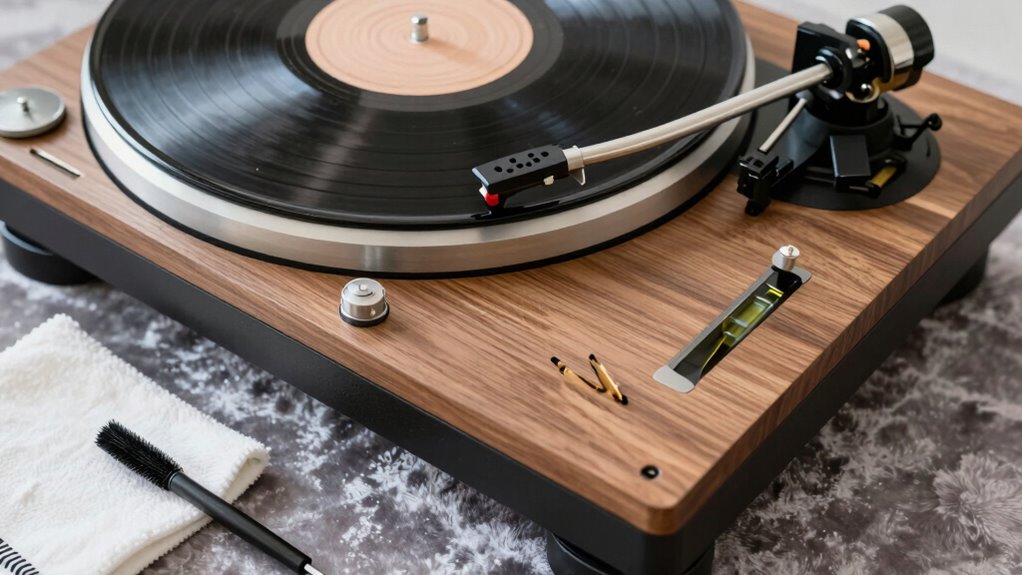
Ensuring your turntable is level is a straightforward process that considerably impacts sound quality. Start by placing a spirit level on the platter or a flat surface on top of your turntable. Adjust the turntable’s feet until the bubble sits centered. Proper leveling improves vinyl cleaning, preventing dust and debris from settling unevenly, which can cause unwanted noise. It also guarantees correct speaker placement, as uneven surfaces can distort sound and reduce clarity. Double-check the level after any movement or adjustments. If your turntable has adjustable feet, turn them clockwise or counterclockwise to fine-tune. Consistent leveling guarantees your stylus tracks properly, minimizing wear and tear, and helps maintain ideal sound quality across your entire setup.

Hudson Hi-Fi Turntable Cartridge Alignment Kit – The Audiophile Purists Perfected 3-Piece LP Cartridge Setup Set. Accuracy Optimized Digital Scale, Azimuth Ruler, Protractor – Rich Pure Sonic Sound
All-Inclusive Kit: Each kit comes with a turntable stylus digital scale and Premium PE Case. With our alignment…
As an affiliate, we earn on qualifying purchases.
As an affiliate, we earn on qualifying purchases.
Setting the Correct Tracking Force for Your Stylus
To get the best sound, you need to set the correct tracking force for your stylus. You’ll want to use proper measurement techniques to guarantee accuracy and avoid damaging your records. Knowing the signs of too much or too little force helps you make quick adjustments and protect your equipment. Properly adjusted tracking force also contributes to effective home soundproofing, reducing vibrations and noise transfer that can affect audio quality. Additionally, maintaining the correct turntable setup ensures consistent performance and longevity of your equipment. Using a high-quality stylus, designed for your specific turntable, can also improve overall sound performance and reduce wear on your records.
Proper Force Measurement Techniques
Setting the correct tracking force is essential for ideal turntable performance and preserving your records. To guarantee proper stylus pressure, you need accurate force calibration. Begin by placing a tracking force gauge on your platter, then gently set your tonearm down onto the gauge. Adjust the counterweight until the stylus exerts the recommended force specified by your cartridge manufacturer. It’s important to avoid guesswork; precise force measurement guarantees perfect stylus pressure, reducing record wear and preventing stylus damage. Regularly check and recalibrate your force to maintain accuracy, especially after moving or bumping your turntable. Using a reliable force gauge and following calibration steps ensures your stylus pressure remains within the ideal range, leading to better sound quality and record longevity. Proper force measurement is a fundamental step in turntable setup, ensuring optimal playback and equipment longevity.
Signs of Excessive or Insufficient Force
When your stylus pressure isn’t correctly calibrated, you’ll notice clear signs that something’s off. Excessive force can cause rapid stylus wear and damage to record grooves, leading to distorted sound and increased skipping. Conversely, too little force prevents proper contact with the record, resulting in weak audio and potential skipping or mistracking. If you see uneven or excessive stylus wear, it’s a sign you’re applying too much force. Similarly, if your records develop noticeable groove damage or crackling sounds, the tracking force might be insufficient. Properly calibrated tracking force ensures your stylus traces the record grooves smoothly without causing harm. Paying attention to these signs helps you maintain your turntable’s performance, prolongs stylus life, and preserves your records’ integrity.

Big Fudge Vinyl Record Cleaning Kit – 4-in-1 Vinyl Record Cleaner Kit for Records Includes Ultra-Soft Velvet Brush Cleaning Liquid Stylus Brush and Storage Pouch – Pro Records Care
Vinyl Cleaning Kit: Eliminate dust, dirt, and fingerprints with our ultra-soft velvet brush and XL cleaning solution in…
As an affiliate, we earn on qualifying purchases.
As an affiliate, we earn on qualifying purchases.
Aligning Your Cartridge and Stylus for Optimal Playback
Proper cartridge and stylus alignment is key to getting the best sound from your records. You’ll want to check your cartridge’s alignment techniques, inspect your stylus for wear, and make sure your tracking force is set correctly. These steps help guarantee clear, accurate playback and prolong your equipment’s lifespan. Additionally, maintaining your turntable’s support networks for new fathers can help you stay motivated and focused on your listening experience. Staying informed about high-tech vaping innovations can inspire you to explore new features and enhance your setup. Understanding Rhythm Failure can also provide inspiration for selecting music that complements your setup and mood.
Cartridge Alignment Techniques
To achieve the best sound quality from your turntable, it’s essential to carefully align your cartridge and stylus. Proper alignment guarantees the stylus tip tracks the record groove accurately, reducing wear and distortion. Start by adjusting the cartridge weight to match the manufacturer’s specifications, providing the right tracking force. Next, follow these steps:
- Use an alignment protractor to position the cartridge parallel to the record groove at both null points.
- Ensure the stylus tip sits precisely on the alignment template, not the cartridge body.
- Check that the cantilever (if visible) is straight and aligned with the stylus tip.
- Reverify tracking force after adjustments to optimize playback and minimize record wear. Proper alignment enhances sound clarity and prolongs your stylus life.
Stylus Inspection Tips
Regularly inspecting your stylus is essential to maintain ideal playback quality. Proper stylus care helps prevent unnecessary wear on your records and ensures clear sound. Use a stylus magnifier or a dedicated cleaning tool to examine the tip for dirt, dust, or damage. Look for any bent or worn needles, as these can distort sound and damage records. If you notice significant wear or damage, consider a stylus replacement to restore peak performance. Be gentle during inspections to avoid accidental damage. Regular checks help you catch issues early, prolonging your stylus’s lifespan and maintaining sound quality. Keep your stylus clean and replace it when necessary to enjoy the best possible playback from your turntable setup. Additionally, understanding vinyl record care and proper handling techniques can further enhance your listening experience.
Adjusting Tracking Force
Adjusting the tracking force is a vital step to guarantee your stylus maintains proper contact with the record surface. Too little force can cause skipping or uneven wear, while too much risks damaging your records or stylus. To get it right, follow these steps:
- Use a stylus force gauge to measure the force precisely.
- Set the counterweight on your tonearm to match the cartridge manufacturer’s recommended force.
- Balance the tonearm so it floats freely without drifting.
- Regularly check your stylus after stylus replacement or record cleaning to ensure ideal tracking and prevent unnecessary wear.
Proper adjustment extends your stylus’s life, improves sound quality, and protects your records. It’s especially important after stylus replacement or deep record cleaning.
Cleaning and Maintaining Your Turntable for Longevity
Keeping your turntable clean and well-maintained is essential for ensuring it delivers high-quality sound and lasts for years. Regular record cleaning prevents dust and debris from scratching your records or affecting playback. Use a soft, anti-static brush or cleaning solution to keep your records in top shape. Equally important is maintaining your stylus; gentle cleaning with a stylus brush or cleaner helps extend stylus longevity and preserves sound quality. Keep the turntable’s surface dust-free and check for any loose parts or dust buildup around the tonearm and platter. Avoid harsh chemicals that could damage your equipment. Regularly inspecting turntable components and replacing worn parts when necessary further prolongs your device’s lifespan. Incorporating routine maintenance practices can significantly reduce the risk of mechanical issues and ensure consistent performance. Additionally, monitoring vibration and stability can help prevent unwanted noise and wear during playback. Ensuring proper airflow around the turntable can also help prevent overheating and dust accumulation, contributing to its longevity. Maintaining proper setup and alignment is crucial for optimal sound quality and to prevent unnecessary wear. Consistent care minimizes wear and tear, ensuring your turntable remains reliable and produces excellent sound for years to come.
Troubleshooting Common Setup Problems (And How to Fix Them)
Even with careful setup, you might encounter common issues that affect your turntable’s performance. Dust buildup on the stylus can cause skipping or distorted sound. If your records sound off, check the stylus and replace it if needed. Here are some troubleshooting tips:
- Clean the stylus regularly to remove dust buildup that causes tracking issues.
- Check the alignment and tracking force to ensure proper contact with the record.
- Level the turntable if you notice skipping or uneven sound.
- Inspect for dust or debris on the platter and record surface, cleaning them carefully.
- Monitor your setup for vibrational interference, as external vibrations can also impact sound quality. Vibration control techniques can help maintain optimal performance.
- Consider using a stylus force gauge to accurately set the tracking force and prevent unnecessary wear.
- Regularly inspect your turntable’s anti-skate adjustment to prevent uneven stylus pressure and improve sound fidelity. Proper maintenance practices can also extend the lifespan of your equipment and ensure consistent sound quality.
- Additionally, choosing a high-quality record cleaning kit can help maintain the quality of your records and reduce playback issues.
Addressing these problems promptly helps preserve your setup and sound quality. Proper maintenance and quick fixes keep your listening experience smooth and enjoyable.
How the Plinth and Isolation Reduce Vibration and Noise
Your turntable’s plinth material and design play a key role in minimizing vibrations, while effective isolation feet help prevent external noise from reaching the platter. Vibration damping techniques further reduce unwanted movement, ensuring cleaner sound. Understanding how these components work together allows you to optimize your setup for the best audio experience. Additionally, using Free Floating setups can enhance overall performance by allowing the turntable to be less affected by ground vibrations. Incorporating audio isolation measures can further improve sound quality by reducing the impact of environmental vibrations.
Plinth Material and Design
The material and design of the plinth play a vital role in minimizing vibrations and noise that can distort sound quality. Your choice of plinth material affects how well it dampens external vibrations, while plinth design influences stability and resonance control. Incorporating Frühwarnzeichen Für Brustkrebs Entdecken features such as damping layers can further enhance vibration isolation. Consider these points:
- Plinth material like MDF, acrylic, or wood offers different damping qualities.
- Rigid design prevents unwanted flexing and resonance.
- Massive build absorbs vibrations, reducing transfer to the tonearm.
- Shape and structure can enhance stability and minimize external noise intrusion.
Isolation Feet Effectiveness
Isolation feet are essential components in a turntable setup because they directly influence how effectively vibrations and noise are transmitted or dampened. Good isolation feet help minimize external vibrations that can distort sound quality. They work by absorbing or isolating vibrations before they reach the turntable’s plinth and tonearm. The effectiveness of isolation feet depends on their material, design, and placement, all of which contribute to vibration control. Rubber, sorbothane, or spring-based feet are common choices, each offering different levels of damping. Properly selected and positioned isolation feet reduce mechanical noise and unwanted resonances, ensuring your turntable operates smoothly. By improving vibration control, isolation feet help you achieve a clearer, more accurate sound from your records.
Vibration Damping Techniques
Vibration damping techniques play a crucial role in preventing external and internal vibrations from interfering with your turntable’s performance. Using damping materials and a well-designed plinth helps absorb vibrations, reducing noise and unwanted resonance. Proper vibration reduction ensures your stylus tracks accurately, improving sound quality. To achieve effective damping:
- Select a sturdy, dense plinth made of damping materials like MDF or acrylic.
- Use isolation pads or feet to absorb external vibrations.
- Incorporate damping mats or pads beneath the turntable to further reduce vibrations.
- Avoid placing your turntable near speakers or heavy appliances that can cause internal vibrations.
Implementing these techniques enhances sound clarity and prolongs your turntable’s lifespan by minimizing unwanted vibrations and noise.
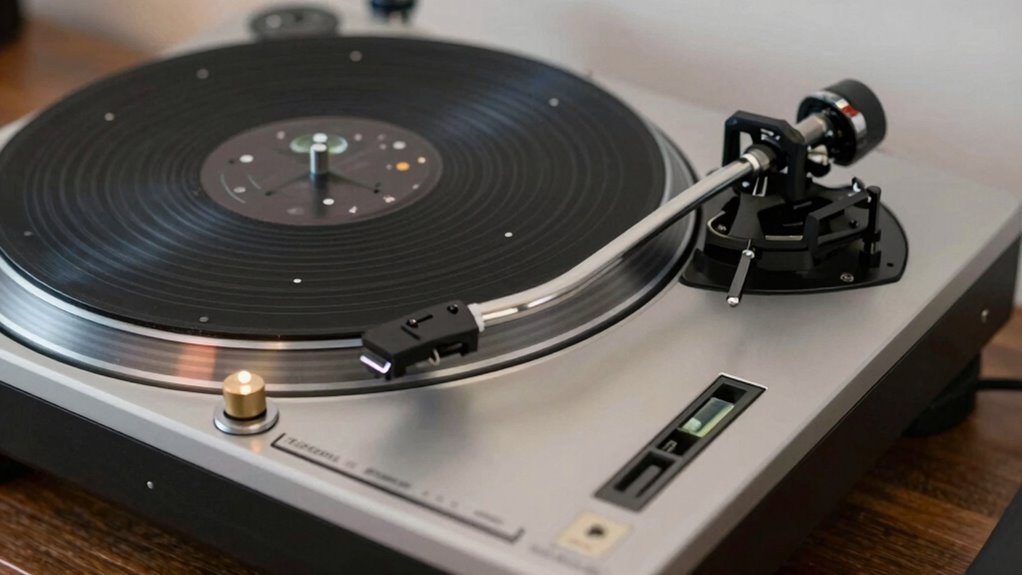
Maintaining Proper Tonearm Balance and Tracking
To guarantee your turntable delivers the best sound quality, maintaining proper tonearm balance and tracking is essential. Start by carefully calibrating the tonearm so it floats parallel to the record surface, which ensures accurate tracking and reduces wear. Proper tonearm calibration also helps prevent excessive stylus pressure, which can damage your records and stylus. When replacing your stylus, double-check the balance afterward, as new styluses can alter tracking weight. Use a tracking force gauge if needed to set the correct weight recommended by your cartridge manufacturer. Regularly verify the tonearm’s balance and tracking to avoid skewed sound, record damage, or stylus wear. Consistent calibration and mindful stylus replacement keep your turntable performing at its best.
When to Upgrade or Replace Turntable Components
Knowing when to upgrade or replace your turntable components is key to maintaining ideal sound quality and performance. You should consider component replacement or upgrade options when you notice issues like degraded sound, uneven wear, or outdated technology. Here are four clear signs:
Timely upgrades keep your turntable sounding its best and performing reliably.
- Your needle or stylus shows signs of wear or damage.
- The motor or belt is noisy or inconsistent.
- Sound clarity diminishes despite proper setup.
- You want to improve sound quality with better tonearms or cartridges.
In these cases, exploring upgrade options can enhance your listening experience. Replacing worn parts ensures your turntable performs at its best. Recognizing these cues helps you decide when to act, keeping your setup in top shape and preserving sound fidelity.
Routine Checks to Keep Your Turntable Performing at Its Best
Are you regularly inspecting your turntable to guarantee it’s performing at its best? Routine checks are essential for optimal sound quality and longevity. First, focus on vibration reduction—ensure your turntable sits on a stable, level surface to minimize unwanted vibrations that can distort sound. Next, verify that your cartridge is properly calibrated; accurate tracking force and alignment prevent record wear and improve sound clarity. Periodically inspect the tonearm and stylus for dust or debris, cleaning as needed. Check the belt tension if you have a belt-drive turntable, and listen for any unusual noises or skipping. These simple routine checks help maintain consistent playback, preserve your records, and extend your turntable’s lifespan. Staying proactive ensures your setup remains finely tuned and ready to deliver the best listening experience.
Frequently Asked Questions
How Often Should I Realign My Cartridge and Stylus?
You should realign your cartridge and check the stylus regularly, ideally every 6 to 12 months, depending on usage. Frequent alignment ensures peak sound quality and helps extend your stylus and cartridge lifespan. If you notice a decline in sound quality or track distortion, it’s time for a stylus replacement and a realignment. Regular maintenance keeps your turntable performing at its best and prolongs the life of your equipment.
What Signs Indicate My Turntable Needs More Frequent Cleaning?
Think of your turntable as a garden that needs regular attention. If you notice increased dust buildup or visible stylus residue on your records, it’s a sign you need to clean more often. Skipping this step can cause poor sound quality and record damage. Keep an eye out for static or crackling sounds, and if they appear, it’s time for a thorough cleaning to keep your vinyl garden flourishing.
Can Improper Setup Damage My Vinyl Records?
Yes, improper setup can damage your vinyl records. If your turntable isn’t level or tracking isn’t set correctly, it causes uneven record wear and scratches, harming playback quality. Misalignment can also increase friction, leading to warping or skipping. To protect your records, always guarantee proper setup, including leveling and tracking adjustments, so your records stay in good condition and sound their best during playback.
How Do Environmental Factors Affect Turntable Performance?
Environmental factors like humidity effects and temperature stability critically impact your turntable’s performance. High humidity can cause moisture buildup, potentially damaging your records and electronics, while low humidity might lead to static and dust attraction. Temperature fluctuations can affect the materials’ stability, causing warping or misalignment. To guarantee ideal sound and longevity, keep your turntable in a stable environment with consistent temperature and humidity levels, avoiding extreme conditions.
What Are the Best Tools for Precise Turntable Calibration?
You should use calibration tools like alignment gauges to guarantee your turntable is perfectly set up. Alignment gauges help you accurately position the cartridge and stylus, preventing uneven wear and distortion. Additionally, precision calibration tools such as a stylus force gauge and anti-skate dial ensure ideal tracking force and balance. Regularly using these tools keeps your turntable performing at its best, providing clear, crisp sound and extending your equipment’s lifespan.
Conclusion
Don’t worry if it seems detailed — taking these simple steps guarantees your turntable sounds its best. By staying on top of leveling, tracking, and maintenance, you’ll enjoy richer, clearer music for years. It might feel overwhelming at first, but with regular checks, you’ll quickly see how easy it is to keep your setup perfect. Trust me, the improved sound quality makes every effort totally worth it.