
Creating clear floor maps and marking no-go zones are essential for safety, efficiency, and space management in your facility. These zones prevent accidents by keeping hazardous areas, pathways, and obstacles well-identified and separate from high-traffic zones. Proper markings, visual cues, and regular updates help everyone understand boundaries and avoid risks. Mastering these basics ensures a safer workplace, and exploring further will give you the tools to implement and maintain effective no-go zones confidently.
Key Takeaways
- No-go zones help prevent entry into hazardous areas, reducing accidents and enhancing overall safety within facilities.
- Clearly marked zones improve hazard communication and guide personnel to avoid dangerous spaces.
- Properly defined no-go zones facilitate smooth traffic flow and minimize conflicts between pedestrians and machinery.
- Regular updates to no-go zones ensure safety measures stay effective amid layout or operational changes.
- Visual indicators and consistent signage make no-go zones easily identifiable from different angles and lighting conditions.

SWRT 2 Inch x 110FT Black & Yellow Hazard Tape Warning Safety Stripe Tape for Floor Marking, Strong Adhesive Wear Resistance Warterproof Caution Tape Roll Ideal for Walls, Floors, Pipes and Equipment
【Strong Adhesion】Our Caution tape has a strong adhesive that ensures a strong bond with a variety of surfaces….
As an affiliate, we earn on qualifying purchases.
As an affiliate, we earn on qualifying purchases.
What Are Floor Maps and Why Do They Matter?

Have you ever wondered how large buildings or complex spaces stay organized and easy to navigate? That’s where floor maps come in. They are detailed visual layouts that show the structure, pathways, and designated zones within a space. Floor maps are indispensable for implementing safety protocols, guiding both employees and visitors. They help ensure everyone knows where to go and what areas to avoid. Proper employee training includes familiarizing staff with these maps, so they can respond quickly during emergencies or daily operations. Clear, accurate floor maps reduce confusion, prevent accidents, and improve overall safety. In addition, understanding the importance of accurate mapping techniques can significantly enhance the effectiveness of safety procedures. Properly designed floor maps can also incorporate space utilization for more efficient layout planning. Employing latest mapping technologies can further improve accuracy and adaptability of these layouts. Utilizing digital mapping tools can streamline updates and ensure the most current layouts are accessible to all users. Additionally, integrating regional flavor insights into map design can enhance user engagement and contextual understanding. In short, they are vital tools that support efficient space management and enhance safety protocols for all who enter the premises.

SmartSign (Pack of 2) 7 x 10 inch “No Spray Zone – Residential Area, Children & Pets, Organic Garden” Sign, 55 mil HDPE Plastic, Black and Yellow, Made in USA
DURABLE PLASTIC: 'No Spray Zone' signs use 55 mil thick HDPE (high density polyethylene) and can last up…
As an affiliate, we earn on qualifying purchases.
As an affiliate, we earn on qualifying purchases.
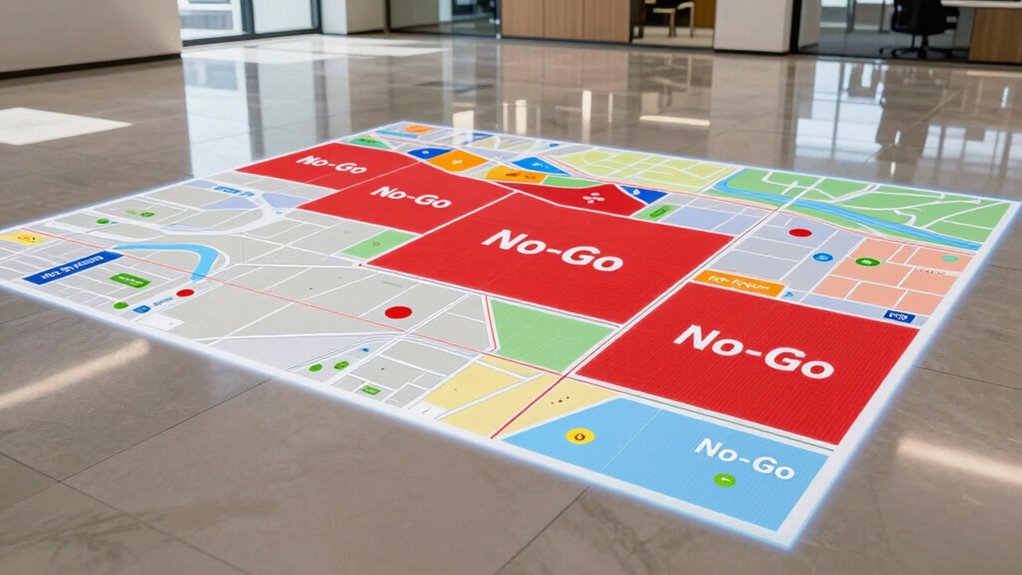
What Are No-Go Zones and How Are They Marked?
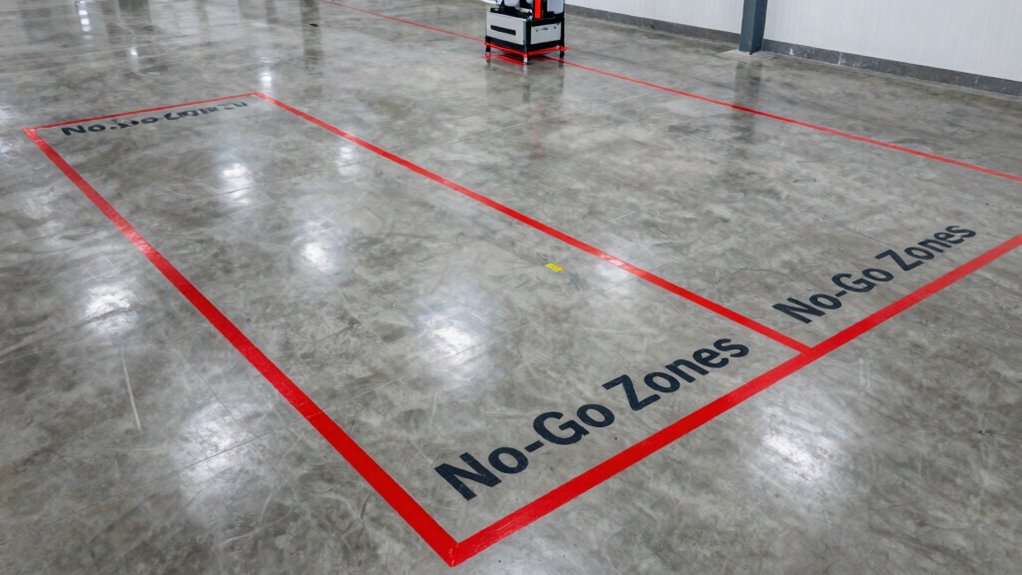
No-go zones are marked clearly on floor maps to keep you safe and organized. Visual indicators like icons or barriers, along with color coding systems, help you recognize these restricted areas quickly. Understanding these markings ensures you follow safety protocols and avoid accidental entry. Properly marked zones can also facilitate the use of floor mapping to plan and navigate spaces more effectively. Recognizing and respecting these safety symbols is essential for maintaining a secure environment. Additionally, awareness of No-Go Zones can help in managing emergency situations more efficiently. Incorporating consistent signage and visual cues enhances overall safety communication. Clear markings also assist in emergency response by guiding personnel efficiently during critical situations.
Visual Indicators Used
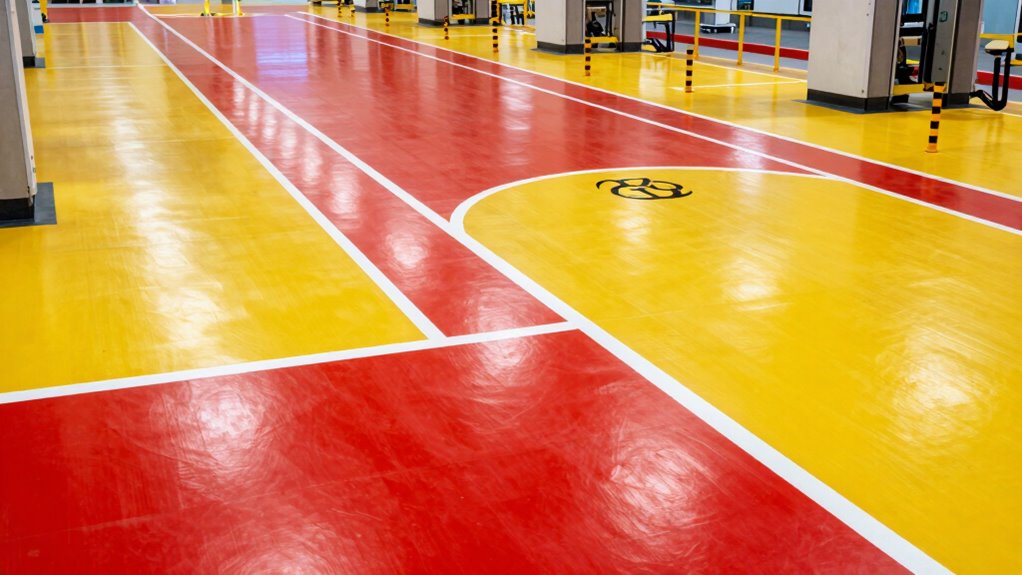
Visual indicators are essential for clearly marking no-go zones in a space, guaranteeing robots and humans alike can easily identify areas to avoid. You typically rely on the floor plan to determine where these zones are located, but visual cues make it unmistakable. Safety signage is a common method—signs, tape, or barriers—placed at strategic points to alert everyone. Floor markings, such as painted lines or symbols, also serve as effective indicators, providing a visual boundary that’s easy to recognize. These indicators help prevent accidents and ensure smooth navigation for robotic systems. By combining floor plan data with clear, visible signage, you create a safer environment where no-go zones are unmistakably marked and respected. Incorporating vetted and standardized safety items ensures consistency and enhances overall safety protocols. Additionally, using Floor markings that are compliant with safety standards can further improve recognition and adherence. Employing visual cues that are universally understood minimizes confusion and supports quick identification of restricted areas. Properly implementing visual indicators according to established safety guidelines is crucial for maintaining operational efficiency and safety. Incorporating standardized color codes can also aid in immediate recognition and compliance.
Color Coding Systems
How do you guarantee that no-go zones are immediately recognizable and easily distinguishable? The key is using effective color coding and visual indicators. These systems assign specific colors to different areas, making it quick to identify restricted zones at a glance. Imagine seeing:
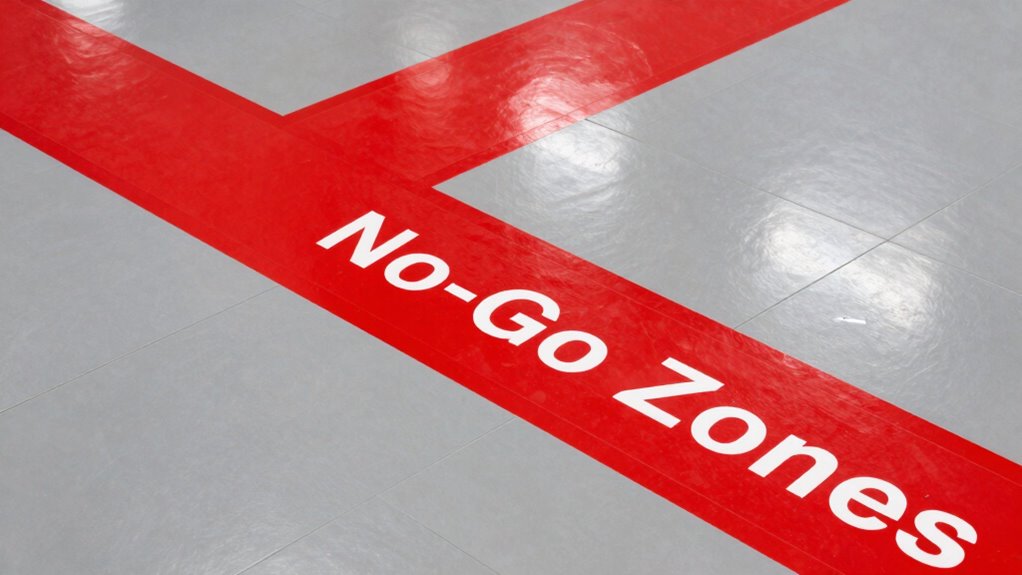
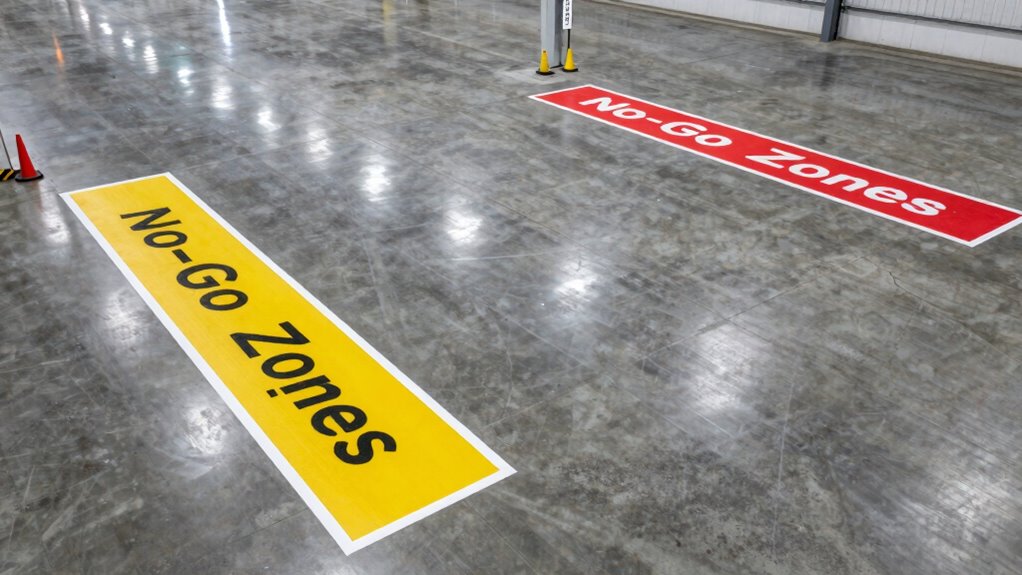
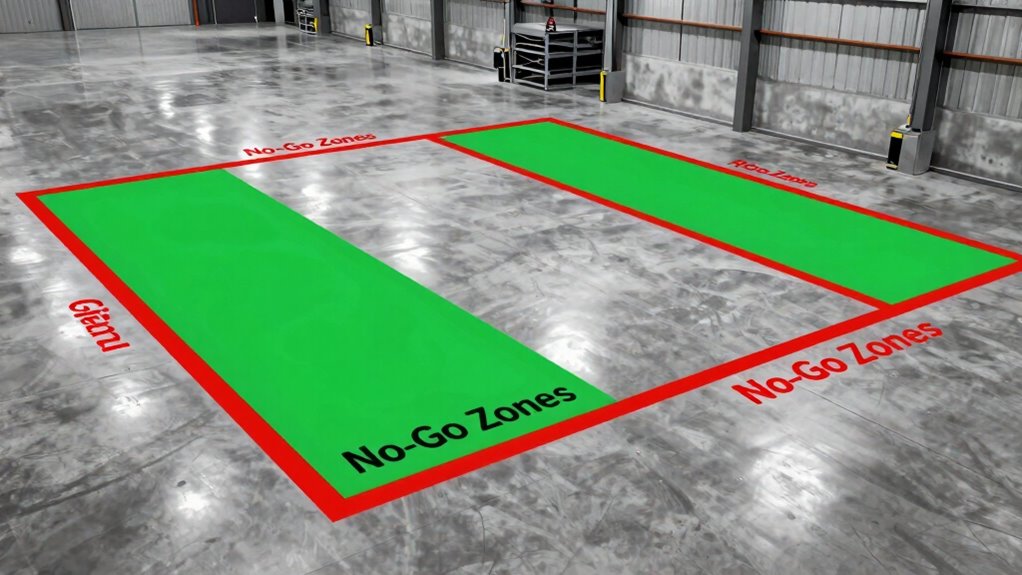
- Bright red markings outlining hazardous zones
- Yellow signs indicating caution or temporary restrictions
- Green patches showing safe pathways
- Blue overlays marking informational areas
This color coding creates clear visual indicators, reducing confusion and enhancing safety. By consistently applying these colors, you ensure everyone understands which zones to avoid, even from a distance. Proper use of color coding transforms complex floor plans into intuitive guides, keeping personnel aware and safe without second-guessing. Incorporating visual communication strategies improves overall clarity and effectiveness of the no-go zone markings. Additionally, using standardized color schemes helps maintain consistency across different areas and facilities. Employing consistent visual cues also aids in quick recognition during emergencies or routine inspections. Applying universal color standards further ensures that personnel from diverse backgrounds can interpret the markings accurately. Utilizing color contrast principles enhances visibility in various lighting conditions, making the markings even more effective.

Blast Gate Position Indicator, Visual Open/Closed Indicator
Visual Status Indicator: Green LED for fully open and red LED for fully closed blast gates.
As an affiliate, we earn on qualifying purchases.
As an affiliate, we earn on qualifying purchases.
How No-Go Zones Improve Safety in Warehouses
No-go zones help keep pathways clear, so you can move around safely without accidents. When zones are designated, it reduces conflicts between pedestrians and machinery. This organized approach makes your warehouse safer and more efficient. Implementing well-marked safety zones also helps in quick emergency responses and prevents congestion during peak hours. Properly defining traffic flow can further minimize the risk of collisions and improve overall safety. Additionally, clear zone demarcation enhances overall operational clarity, leading to better compliance and fewer hazards. Clear visual cues contribute to better understanding of designated areas, supporting safety initiatives and reducing confusion among staff. Incorporating hazard identification into zone planning further strengthens safety measures by proactively addressing potential risks.
Clear Pathways Reduce Accidents
Maintaining clear pathways in a warehouse is essential for preventing accidents and ensuring smooth operations. When pathways are unobstructed, you can quickly identify hazards and respond effectively during emergencies. No-go zones help keep aisles free of clutter, reducing trip hazards and enabling swift evacuation if needed. Imagine:
- Wide, unobstructed routes for forklifts and pedestrians
- Clearly marked emergency exits along main pathways
- Minimal obstacles that block hazard identification
- Easy access to safety equipment and escape routes
These organized pathways not only lower the risk of collisions but also streamline emergency planning. When everyone knows where to go and move safely, accidents decrease, and your warehouse becomes a safer environment for all workers. Clear pathways are a simple yet crucial part of safety management. Proper appliance maintenance plans can also contribute to a safer environment by preventing equipment failures that could cause accidents.
Designated Zones Minimize Conflicts
Implementing designated zones, or no-go areas, considerably reduces conflicts between forklifts and pedestrians in your warehouse. Clear wayfinding signage guides everyone to stay within their designated paths, minimizing confusion and unexpected encounters. These zones help you create safe spaces where pedestrians can move freely without the risk of forklift collisions. Proper obstacle identification within these zones ensures that hazards are marked and avoided, preventing accidents before they happen. When everyone understands the boundaries and visual cues, conflicts decrease markedly. By clearly marking no-go areas, you establish a safer environment, streamline traffic flow, and promote awareness. This proactive approach minimizes disruptions and enhances overall warehouse safety, making sure that both personnel and equipment operate smoothly within their roles.

JOREST Contour Gauge with Lock (10 Inch), Gift Ideas for Men Dad Carpenter Handyman, Profile Tool with Measuring Scale for Tile Flooring, Carpet laying, Woodworking, Measuring Angle/Shape/Outline/Edge
【Multi Purposes】Being used with other tools such as pallet buster, crowbar, bradawl, carpentry tools, marking tools, leveler tool,…
As an affiliate, we earn on qualifying purchases.
As an affiliate, we earn on qualifying purchases.
How Floor Mapping Boosts Workflow Efficiency
Floor mapping considerably enhances workflow efficiency by providing clear, accurate layouts that streamline navigation and task planning. With precise maps, you can design spaces that promote ergonomic design, reducing worker fatigue and increasing productivity. It also facilitates storage optimization, ensuring tools and materials are placed logically for quick access. Visualize a workspace with:
Floor mapping boosts productivity through clear layouts, ergonomic design, and optimized storage for streamlined workflows.
- Clearly marked pathways that prevent congestion
- Optimized storage zones for easy retrieval
- Workstations arranged for minimal movement
- No-go zones clearly defined to avoid conflicts
These elements help you identify bottlenecks and adjust layouts accordingly. As a result, your team works more smoothly, saving time and reducing errors. Floor mapping isn’t just about layout; it’s about creating an efficient environment that supports productivity and safety.
Common Types of No-Go Zones in Facilities
No-go zones are critical areas in facilities that require clear boundaries to guarantee safety and smooth operations. Common types include equipment storage areas, chemical handling zones, and high-traffic pathways. These zones often pose hazards that demand careful hazard identification to prevent accidents. Proper staff training ensures everyone understands these boundaries and the reasons behind them. For example, restricted areas around machinery or chemical storage must be clearly marked to avoid accidental entry. No-go zones also include emergency exit routes that must remain unobstructed. By recognizing these key zones, you help minimize risks, protect personnel, and maintain compliance. Effective floor mapping that highlights no-go zones is essential for clear communication and safety awareness across your facility.
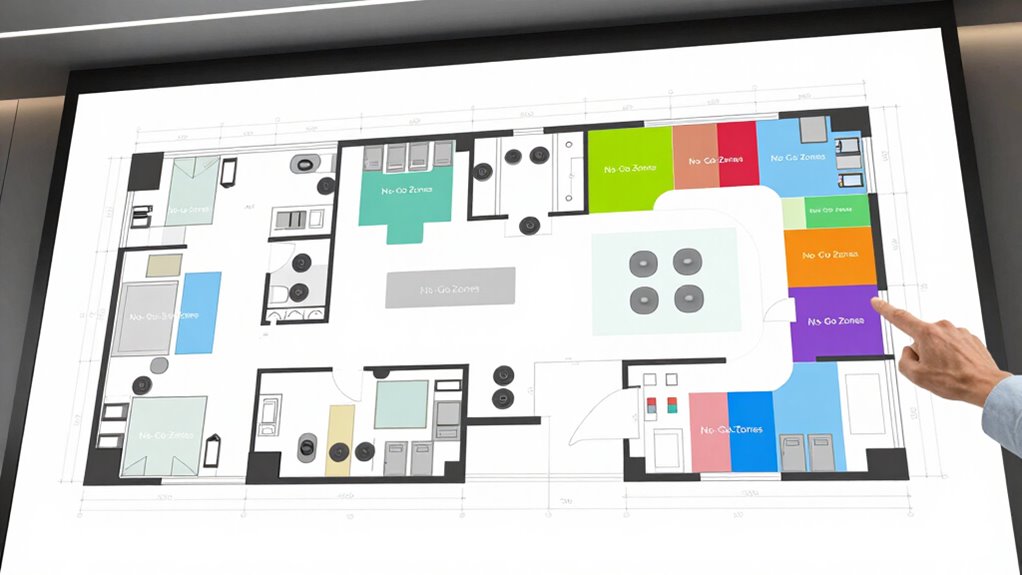
How to Design Floor Maps That Clearly Mark No-Go Zones

To make no-go zones stand out on your floor maps, use clear color coding that instantly signals restricted areas. Keep symbols consistent across the map so users can recognize and comprehend them quickly. Place these markings strategically where they’re most visible to ensure everyone notices and respects the no-go zones.
Clear Color Coding
Have you ever struggled to quickly identify restricted areas on a map? Clear color coding helps you avoid confusion by creating strong visual cues. Use high contrast colors—like red or bright yellow—to make no-go zones stand out sharply against the surrounding environment. Consistent color schemes across your map strengthen visual clarity, reducing misinterpretation. Imagine:
- Bright red areas immediately signaling restricted zones
- Green for safe, accessible zones
- Blue for informational or neutral zones
- Black or gray for boundaries and pathways
These choices help your team quickly recognize dangerous or off-limits areas at a glance. When color contrast is high, your map becomes an intuitive tool, guiding movement safely and efficiently without second-guessing. Proper color coding minimizes errors and enhances overall safety.
Consistent Symbol Use
Using consistent symbols across your floor maps is essential for clear communication, especially when marking no-go zones. When you maintain symbol consistency, it becomes easier for everyone to recognize restricted areas quickly, reducing confusion and potential safety issues. Clear signage clarity depends on standardized symbols that are intuitive and easily distinguishable. To help you design effective maps, here’s a simple guide:
| Symbol Type | Meaning |
|---|---|
| Red circle with slash | No entry or restricted zone |
| Yellow triangle | Caution or hazard |
| Solid black line | Boundary or limit |
| Crossed hand | Do not enter |
Consistent use of these symbols ensures your floor maps communicate restrictions effectively, minimizing misunderstandings.
Strategic Placement
Where you place no-go zone symbols on your floor map can make all the difference in guaranteeing safety and clarity. Strategic placement helps with hazard identification and maintains safety compliance. Position symbols prominently in high-risk areas, such as near machinery, electrical panels, or slippery surfaces. Avoid cluttered zones where symbols might be overlooked. Use clear visual cues like bright colors or bold borders to draw attention. Consider the flow of movement; place no-go zones where they prevent accidental entry into hazardous spaces. This ensures employees instinctively recognize restrictions. Think about visibility from different angles and lighting conditions. Well-placed symbols serve as immediate visual cues, reducing accidents and fostering a safer environment. Proper placement reinforces hazard identification, making safety compliance intuitive and straightforward.
How to Mark and Communicate No-Go Zones Effectively

Marking and communicating no-go zones clearly is essential to guarantee safety and prevent accidents during floor mapping. Start by ensuring hazard identification is thorough, so all potential dangers are recognized before marking. Use signage standards that are universally understood, such as bold colors, clear symbols, and concise text. Place signs at eye level and in prominent locations to catch attention immediately. Consistency is key: use the same signage style for all no-go zones to avoid confusion. Incorporate physical barriers where necessary, like cones or tape, to reinforce the message. Regularly review and update signage as conditions change, ensuring everyone remains informed. Effective marking and communication minimize risks and create a safer environment during the mapping process.
Tools for Accurate Floor Mapping and Zone Management

To achieve precise floor mapping and effective zone management, leveraging the right tools is essential. Modern mapping software helps you create accurate floor plan designs that align with zoning regulations. These tools enable you to visualize space, identify no-go zones, and plan routes efficiently. Picture yourself using:
- Digital CAD programs that detail every wall and obstacle
- Laser distance meters for quick, accurate measurements
- 3D scanning devices to capture complex layouts
- Software integrations for real-time updates and zone adjustments
These tools streamline your process, reduce errors, and guarantee your zone management complies with regulations. By investing in the right technology, you’ll have a clear, reliable foundation to develop safe and effective no-go zones, ultimately improving operational safety.
Best Practices for Enforcing No-Go Zones
Effective enforcement of no-go zones requires clear communication and consistent application of rules. You should implement access control measures to restrict unauthorized entry, such as locking doors or using keycards, ensuring only authorized personnel can access sensitive areas. Proper zone signage is essential; place visible, easy-to-understand signs at strategic points to alert everyone about restricted zones. Train staff regularly on the importance of respecting no-go zones and the procedures for enforcement. Consistency is key: apply rules fairly and promptly when violations occur. Regularly monitor these zones to identify potential breaches early. By combining effective access control, clear signage, and ongoing staff training, you create a safer environment and minimize accidental or intentional zone violations.
Tips for Updating and Reviewing Your Floor Map Regularly
Regularly updating and reviewing your floor map guarantees it accurately reflects your current space and safety protocols. To keep your floor plan up-to-date, schedule routine inspections to identify changes like new obstacles or layout modifications. Incorporate clear zone review procedures that verify no-go zones remain effective and properly marked. When updating, visualize your space with:
Regularly review and update your floor plan to ensure safety zones stay accurate and effective.
- Moving furniture or equipment that alters traffic flow
- Adding new safety features or hazards
- Changes in storage or work areas
- Adjustments due to renovations or expansions
These updates ensure your floor plan remains reliable, helping prevent accidents and maintain safety standards. Consistently reviewing your zones also helps catch outdated or overlooked no-go areas, keeping your safety protocols sharp and effective. Stay proactive with regular floor plan updates and zone review procedures to maintain a secure environment.
Frequently Asked Questions
How Do No-Go Zones Differ Between Industrial and Commercial Facilities?
In industrial facilities, no-go zones often focus on hazard identification, such as high-risk machinery or chemical areas, requiring strict safety protocols. Commercial spaces, however, designate no-go zones mainly for customer safety and sensitive areas, like storage or maintenance rooms. You need to recognize these differences to make certain safety protocols are tailored correctly, preventing accidents and maintaining smooth operations across both environments.
What Technology Is Best for Real-Time Floor Map Updates?
Think of real-time floor map updates like a GPS guiding your warehouse. You’ll want sensors with high accuracy and advanced mapping software that adapt quickly to changes. LIDAR sensors excel here, providing precise data even in complex environments. Coupled with robust mapping software, they guarantee your no-go zones are always current, helping you avoid hazards and optimize operations efficiently. This tech keeps your facility’s map as dynamic as your workflow.
How Often Should Floor Maps and No-Go Zones Be Reviewed?
You should review your floor maps and no-go zones regularly, ideally aligning with your maintenance schedules and safety protocols. Quarterly reviews work well to ensure accuracy and address any changes in layout or hazards. Regular updates help prevent accidents, improve efficiency, and keep safety standards high. Stay proactive by scheduling these reviews consistently, and involve your team to catch potential issues early and maintain a safe, well-mapped workspace.
Can No-Go Zones Be Dynamically Adjusted Based on Operational Changes?
Yes, no-go zones can be dynamically modified to enhance operational flexibility. You should regularly evaluate your environment, monitor workflow changes, and update these zones accordingly. By doing so, you guarantee safety, optimize navigation, and respond swiftly to new hazards or obstacles. Dynamic adjustments allow your operations to stay efficient and adaptable, minimizing downtime and maximizing productivity. Keep your no-go zones current to maintain a safe and flexible workspace at all times.
What Are Common Mistakes to Avoid When Marking No-Go Zones?
When marking no-go zones, you should avoid poor hazard identification and unclear signage. Make certain your hazard identification is accurate, highlighting potential dangers clearly. Use signage that’s easy to understand and visible from a distance to prevent confusion. Never assume everyone will interpret the zones the same way; consistent, clear signage ensures safety. Regularly review and update zones to reflect operational changes, preventing outdated or unsafe markings.
Conclusion
Think of your floor map as the compass guiding your facility’s safety and efficiency. No-go zones are like silent guardians, protecting your crew from unseen hazards. When you mark and respect these areas, you’re steering your operation toward smoother sailing. Keep your map updated, communicate clearly, and trust these invisible anchors to keep everyone safe and your workflow steady—because in this vast warehouse, clarity and caution are your true north.