Install and configure smart home security cameras to monitor selected areas, record footage, and send alerts to your phone. This guide is for homeowners and renters setting up consumer Wi-Fi cameras for the first time. Allow 1–3 hours, depending on the number of cameras and whether you need to mount them.

Get the latest gadgets delivered free with Prime
- Fast, free delivery on millions of items
- Prime Video, Amazon Music and more included
- Member-only deals all year

Blink Outdoor 4 Security Camera and Battery Doorbell 2K+ Bundle, 5 Cameras, Sync Module Core, Black
- ✔ Included devices: 5 Outdoor 4 cameras, 1 Battery Doorbell 2K+, Sync Module Core
- ✔ Video resolution: 1080p HD cameras; 2K doorbell
- ✔ Camera field of view: 143° diagonal
Blink Outdoor 4 Security Camera and Battery Doorbell 2K+ System, 3 Cameras, Sync Module Core, Black
- ✔ Included devices: 3 Outdoor 4 cameras, 1 Battery Doorbell 2K+, 1 Sync Module Core
- ✔ Video resolution: 1080p HD cameras; 2K (1920 x 1920) doorbell
- ✔ Field of view: 143° diagonal camera view; 140° horizontal and vertical doorbell view

2K Solar Wireless Security Camera System, 4-Pack
- ✔ Camera count: 4
- ✔ Video resolution: 2K
- ✔ Power: Solar panel with backup battery
Difficulty: Beginner | Time: 1–3 hours
What You’ll Need
Tools & Materials:
- Smart security cameras and any included power adapters or mounting hardware
- Phone or tablet with the camera maker’s app installed
- Home Wi-Fi name and password
- Screwdriver and drill with suitable bits for fixed mounts
- Ladder, if mounting above ground level
Knowledge:
- Basic use of a smartphone app
- Ability to connect a device to your home Wi-Fi
- For fixed installation, basic drilling and wall-anchor use
Check each camera’s power requirements, Wi-Fi band support, weather rating, and recording options before installation. Ask the property owner before drilling in a rental. Choose a recording plan or storage method that fits your needs; cloud storage may require a subscription, while local storage may require a memory card or hub.
Blink Outdoor 4 Security Camera and Battery Doorbell 2K+ Bundle, 5 Cameras, Sync Module Core, Black
This bundle makes the strongest case for households that want to put cameras at several separate locations. Five 1080p Outdoor 4 cameras can cover more doors, paths, and outbuildings than the three-camera Blink option, and the included 2K Battery Doorbell adds a higher-resolution view at the front entrance. That combination gives us a coherent fixed-camera system with app access, night vision, two-way audio, and Alexa compatibility.Its advantage is breadth, not camera movement or the highest resolution across every view. The Outdoor 4 cameras have a wide 143-degree diagonal field of view, but they do not offer the solar system’s 360-degree pan-and-tilt coverage or 2K camera video. We should choose the solar four-pack if a single camera needs to scan a broader area and solar charging is practical. Blink’s replaceable, non-rechargeable lithium batteries keep installation wire-free, while also making eventual battery replacement part of ownership. Person and vehicle detection and cloud clip storage also depend on a separately sold Blink plan, so this is a better fit for buyers who value a larger layout over included advanced detection.
Pros:
- Five Outdoor 4 cameras provide more separate camera positions than the three-camera Blink bundle.
- Includes a 2K Battery Doorbell and Sync Module Core.
- Wire-free installation with night vision, two-way audio, and Alexa support.
- Outdoor cameras are rated for operation from -4°F to 113°F.
Cons:
- Cameras and doorbell use non-rechargeable lithium batteries.
- Person and vehicle detection and cloud clip storage require a separately sold plan.
- Needs 2.4 GHz Wi-Fi; the outdoor cameras record in 1080p rather than 2K.
Best for: Households that want to monitor several distinct outdoor locations and add a 2K video doorbell in one battery-powered system.
Not ideal for: Buyers who need solar charging, movable camera views, or person and vehicle detection without a separate Blink plan.
Bottom line: We recommend this bundle when covering several separate outdoor locations matters more than camera movement or solar power.
“We recommend this bundle when covering several separate outdoor locations matters more than camera movement or solar power.”
Blink Outdoor 4 Security Camera and Battery Doorbell 2K+ System, 3 Cameras, Sync Module Core, Black
We see this as the more focused way into the Blink setup: three fixed outdoor cameras, one 2K video doorbell, and a Sync Module Core. It retains the core smart-home features of the five-camera bundle, including app alerts, live view, night vision, two-way audio, and Alexa voice control. For a home with a few priority entry points, that may be enough coverage without planning positions for five cameras.The difference from the top-ranked bundle is straightforward: the devices and main capabilities are similar, but this version supplies two fewer Outdoor 4 cameras. That makes it less suited to monitoring multiple detached areas or a long perimeter. Compared with the solar four-pack, it also gives up 2K video on the outdoor cameras and pan-tilt control in exchange for a doorbell-first package and a familiar fixed-camera layout. As with the larger Blink set, batteries are non-rechargeable, the system uses 2.4 GHz Wi-Fi, and advanced person or vehicle detection plus cloud clip storage require a separate plan. Choose it when three camera positions cover your real needs; skip it if you would soon need to add broader coverage.
Pros:
- Includes three cameras, a 2K doorbell, and Sync Module Core.
- Provides live view, app alerts, night vision, and two-way audio.
- Weather-resistant cameras operate across a broad temperature range.
- Works with Alexa-enabled devices.
Cons:
- Three cameras may leave larger properties or multiple outbuildings uncovered.
- Uses non-rechargeable lithium batteries.
- Person or vehicle detection and cloud clip storage require a separate Blink plan.
Best for: First-time buyers with a small home or a few clear camera locations who want a video doorbell in the same system.
Not ideal for: Households needing five or more fixed viewpoints, camera pan-and-tilt, solar power, or plan-free person detection.
Bottom line: We would choose this set over the five-camera bundle when three camera positions are sufficient and a doorbell-led system is the priority.
“We would choose this set over the five-camera bundle when three camera positions are sufficient and a doorbell-led system is the priority.”
2K Solar Wireless Security Camera System, 4-Pack
This four-camera system earns its place for buyers who want 2K video across the cameras and the ability to adjust views from an app. Its pan, tilt, and zoom controls provide 360-degree coverage, which can help monitor a wider area from a suitable mounting position. Solar panels with backup batteries also reduce dependence on routine battery replacement, while color night vision with a motion-activated spotlight and AI human detection support outdoor monitoring.Those strengths set it apart from both Blink bundles. Blink gives us a dedicated 2K doorbell and separate fixed camera placements; this system instead emphasizes movable views, solar charging, and human detection. The tradeoff is that solar performance depends on sun exposure, so shaded mounting points may weaken the power advantage. Optional MicroSD storage gives buyers a local route, but the card is not included, and cloud storage is another option rather than a specified included service. Its dual-band 2.4 GHz and 5 GHz Wi-Fi support is broader than Blink’s 2.4 GHz requirement, but buyers should still check network coverage where each camera will go. We would choose it when movement and solar power solve a real placement problem, not simply because the resolution number is higher.
Pros:
- 2K video with app-controlled pan, tilt, and zoom for adjustable coverage.
- Solar panels and backup batteries support wire-free operation.
- Color night vision with spotlight, starlight mode, and AI human detection.
- Supports optional MicroSD or cloud storage and Alexa commands.
Cons:
- Solar charging depends on adequate sunlight at the installation location.
- MicroSD card is not included, and cloud storage is optional.
- No doorbell is listed in the bundle, unlike both Blink systems.
Best for: Buyers who want app-adjustable camera views, 2K video, AI human detection, and solar charging at sunny outdoor mounting points.
Not ideal for: Homes with shaded camera locations, buyers who want an included video doorbell, or anyone who prefers separate fixed views over pan-tilt control.
Bottom line: We recommend this system when solar power and adjustable views matter more than a bundled doorbell or separate fixed camera positions.
“We recommend this system when solar power and adjustable views matter more than a bundled doorbell or separate fixed camera positions.”
As an Amazon Associate we earn from qualifying purchases.
Before You Start
Decide which areas you need to monitor and check the camera maker’s privacy and recording guidance. Aim cameras at your own entryways and property. Avoid pointing them into neighbors’ windows or other private spaces, and check local rules about recording audio and shared areas. Do not place cameras where they could expose sensitive activity, such as inside bathrooms.
Use a strong, unique password for the camera account and enable two-factor authentication if the app offers it. Keep the camera and app firmware current. If a camera supports only 2.4 GHz Wi-Fi, have that network ready; some models cannot join a 5 GHz-only network.
Step-by-Step Instructions
Step 1: Choose camera locations
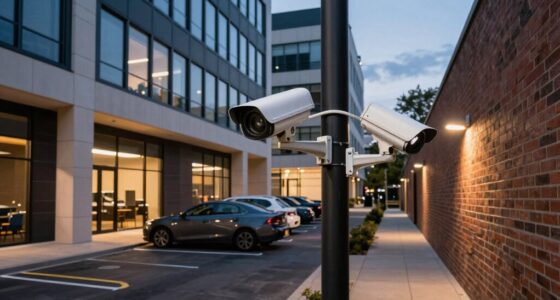
Walk around the areas you want to monitor and select a position for each camera. Prioritize doors, accessible windows, driveways, and other points of entry. Place cameras high enough to be difficult to reach, but low enough to capture useful detail such as faces. Check the view in daylight and at night, and keep the lens clear of walls, branches, and reflective surfaces.
Tip:For outdoor cameras, check that the chosen spot is within Wi-Fi range and has access to power if the model needs a cable. Weather resistance does not mean a camera can be installed in every exposed location; follow its mounting instructions.
Check: Each planned camera has a clear view of the intended area, a suitable power source, and a usable network signal.
Step 2: Create or secure your camera account
Open the camera maker’s app and create an account or sign in. Set a unique password that you do not use on other services. Turn on two-factor authentication when available, and review who can access the account or shared cameras. Grant only the phone permissions needed for setup and alerts.
Tip:Do not share your account password with household members. Use the app’s household or device-sharing feature so access can be removed separately.
Check: You can sign in, see the account’s security settings, and identify how to add another authorized user.
Step 3: Power on and pair each camera
Plug in the camera or charge its battery as directed. Open the app, choose the option to add a device, and follow the pairing prompts. Connect it to the correct Wi-Fi network and enter the password carefully. If setup uses a QR code, hold the phone at the distance and angle shown in the app. Add cameras one at a time and give each a clear name, such as “Front Door” or “Garage.”
Tip:Keep the phone near the camera during pairing. If the app asks to join a temporary camera network, return to the app after connecting so setup can continue.
Check: The app lists each camera by its chosen name and displays a live view or connection status.
Step 4: Test the camera view before mounting
Hold or temporarily place each camera at its planned position. Open the live view and adjust the angle until the target area fills enough of the frame to identify activity. Check the image at different times of day, and test night vision after dark or in a dim room. If the image shows glare, move the camera away from glass or reflective surfaces.
Tip:Night-vision infrared lights can reflect off nearby walls, eaves, or window glass and wash out the image. A small change in position can reduce the glare.
Check: The live view shows the intended entry or area without major blind spots, glare, or obstructions.
Step 5: Mount the cameras securely
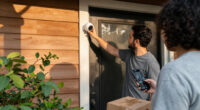
Mark the mounting points using the supplied template or bracket. Check for wires and pipes before drilling. Use suitable wall anchors for the surface, then fasten the bracket and attach the camera. Route cables so they cannot be pulled easily and so water cannot run along a cable into an indoor opening. Keep battery models accessible enough for charging or battery replacement.
Tip:Follow the supplied mounting instructions and use a stable ladder on level ground. Do not mount a camera above a location where it could fall onto people or property.
Check: Each camera is stable, aimed at the tested view, and has a safely routed power cable or an accessible battery.
Step 6: Set recording and storage options
In the app, choose how each camera records: continuous recording, motion-triggered clips, or another supported mode. Set the storage destination, such as a memory card, hub, or cloud plan. Review the recording schedule, clip length, retention period, and any limits tied to your subscription. If the camera has a privacy shutter or recording indicator, learn how to use it.
Tip:Motion recording can miss events if sensitivity is too low or the camera’s detection zones exclude the activity. Continuous recording uses more storage and may require a paid plan or local storage device.
Check: The app shows the selected recording mode and storage destination, and there is no setup warning about unavailable storage.
Step 7: Configure motion zones and alerts
Open motion or detection settings for each camera. Draw activity zones around the areas you want monitored and exclude roads, trees, or public walkways that create unwanted alerts when possible. Set detection sensitivity, person or package detection, and alert hours if supported. Enable phone notifications, then trigger a test by walking through the monitored area.
Tip:Start with moderate sensitivity and adjust after observing a day or two of alerts. Very high sensitivity can create frequent notifications from shadows, rain, or moving foliage.
Check: A test movement in the monitored zone creates the expected notification or event in the app.
Step 8: Review privacy and access settings
Check each camera’s privacy settings, microphone controls, and sharing list. Disable audio recording if you do not need it or cannot record audio under local rules. Confirm that shared users are people you trust, and remove old or unused access. Check whether the app provides privacy schedules or a way to pause recording while people are home.
Tip:Camera and app features vary. Review the maker’s guidance for account security, software updates, and data retention so you know how footage is stored and deleted.
Check: The cameras point only at intended areas, access is limited to approved users, and audio and privacy settings match your needs.
Step 9: Verify recording and alerts
Walk through each camera’s monitored zone, wait for the event to appear, and open the clip. Confirm that the timestamp is correct, the image is clear, and playback works. Test alerts with the phone locked, then confirm that the app can still reach the camera after you leave the home network. Check the battery or power status and review signal-strength warnings.
Tip:Some cameras take a short time to process or upload clips. Allow the delay shown by the app before deciding that recording failed.
Check: Each camera records a test event, plays it back, and sends alerts as configured.
Common Mistakes to Avoid
- Mounting a camera before checking its live view from the intended position. — Test the angle and night image while holding or temporarily placing the camera before drilling.
- Connecting a camera to a Wi-Fi band or network it does not support. — Check the camera’s specifications and select the required network during pairing.
- Setting motion sensitivity too high or monitoring a busy street. — Use activity zones and moderate sensitivity, then adjust after reviewing real alerts.
- Leaving shared access or audio recording enabled without reviewing it. — Check sharing and privacy settings during setup, and revisit them when household access changes.
Troubleshooting
Problem: The camera will not connect to Wi-Fi.
Solution: Confirm the password and network name, move the camera closer to the router, and check whether the camera requires 2.4 GHz Wi-Fi. Restart the camera and retry pairing using the app’s instructions.
Problem: The live view works, but no clips appear.
Solution: Check that recording is enabled, storage is available, and the selected mode includes the event. Review detection zones and sensitivity, then trigger a test inside the active area.
Problem: The camera sends too many alerts.
Solution: Reduce sensitivity, narrow the activity zone, or schedule alerts for the hours you need them. If available, enable person detection to reduce alerts from general movement.
Problem: Night footage is bright, hazy, or hard to identify.
Solution: Move the camera away from glass and nearby reflective surfaces, clear the lens, and adjust its angle so infrared light does not bounce off a wall or eave.
What Success Looks Like
Your setup is complete when every camera appears online in the app, shows the intended view, records and plays back a test event, and sends the expected alert. Confirm that storage is available, timestamps are correct, camera access is limited to approved users, and privacy settings reflect how you want the system to operate.
Next Steps
Review alerts for the first few days and adjust detection zones or sensitivity to reduce missed events and unwanted notifications. Check battery levels, storage capacity, and Wi-Fi status on a regular schedule. Install app and camera firmware updates through the maker’s official app, and repeat the recording test after changing network, storage, or notification settings.
Frequently Asked Questions
Do smart security cameras need Wi-Fi?
Most consumer smart cameras use Wi-Fi to send alerts and provide remote viewing. Some cameras record to a local hub or memory card, but remote access and app features may still depend on an internet connection. Check the model’s requirements before buying or installing it.
Can I install a camera without drilling?
Some cameras include adhesive mounts or use magnetic brackets, while others need screws for a secure installation. Use only a mounting method approved for your camera and surface, and avoid adhesive mounts where a fall could injure someone or damage property.
Should I choose cloud or local storage?
Cloud storage can make clips available away from home, but it may require a subscription and an internet connection. Local storage can work without a cloud plan, but the device or card may be lost or damaged with the camera. Compare access, retention, and backup options for your model.
Why do I get alerts but no video clips?
An alert may come from a detection event even when clip recording is disabled, storage is full, or the clip upload has not finished. Check the recording mode, storage status, and event history, then test again.
How often should I check my cameras?
Check the app periodically for offline devices, low batteries, full storage, and pending updates. Test playback after major changes to your Wi-Fi or recording settings, and inspect outdoor cameras after severe weather.